In a nutshell
- 🌱 Cardboard mulch blocks light to starve the weed seed bank, while remaining porous enough for air and water; worms pull fibres into the soil, improving structure and tilth.
- 🧰 Lay it right: remove tapes/labels, use 2–3 layers (or one heavy sheet), overlap 10–15 cm, soak, then top with 5–8 cm compost or chips; cut planting holes only where needed and water in well.
- 💧 Key benefits include moisture retention, temperature moderation, erosion control, and a surge in microbial life—often cutting weeding time by half in the first season and supporting no-dig methods.
- ♻️ Choose plain, brown, uncoated cardboard; avoid glossy/waxed and remove plastics; expect breakdown in 3–12 months and manage slugs by keeping edges tidy and avoiding overly wet chip near salads.
- 📏 Use paths and beds strategically: thicker chips over cardboard for durable paths, careful collar gaps around perennials, and re-cover beds after planting to maintain long-term weed suppression.
As any UK gardener with an allotment plot or a busy weekend diary knows, the real thief of time isn’t planting, it’s weeding. A sheet of cardboard mulch changes the equation. Laid flat and weighted with organic matter, it blocks light, starves the weed seed bank, and buys you back entire afternoons. It works with the soil rather than against it, keeping moisture in and traffic out. Think of it as a low-cost, biodegradable barrier that turns maintenance into management. The method is simple, the materials are free or cheap, and the results can feel almost unfair—fewer weeds, better soil, and calmer gardening sessions.
Why Cardboard Mulch Works
Cardboard is a porous, carbon-rich material that denies weeds the one resource they absolutely need: light. When you overlap sheets, you cut off photosynthesis, preventing annual weeds from germinating and pushing perennial weeds into depletion. Brown, uncoated cardboard holds up for long enough to suppress growth, then breaks down into humus, feeding microbes and improving structure. Worms adore the damp, dark interface, pulling fibres into the profile like mini ploughs—without the soil disruption that encourages new weeds.
By excluding light while allowing water and air to pass, cardboard acts as a smart filter rather than a suffocating lid. In a few months, roots explore a calmer, cooler zone beneath, where moisture persists even after a dry week. For no-dig gardeners, the effect is transformative: fewer soil disturbances, fewer weed-flushes, and a steady drift toward crumbly tilth. Lay it once, top it with organic mulch, and watch the hoe stay in the shed.
How To Lay Cardboard Mulch Correctly
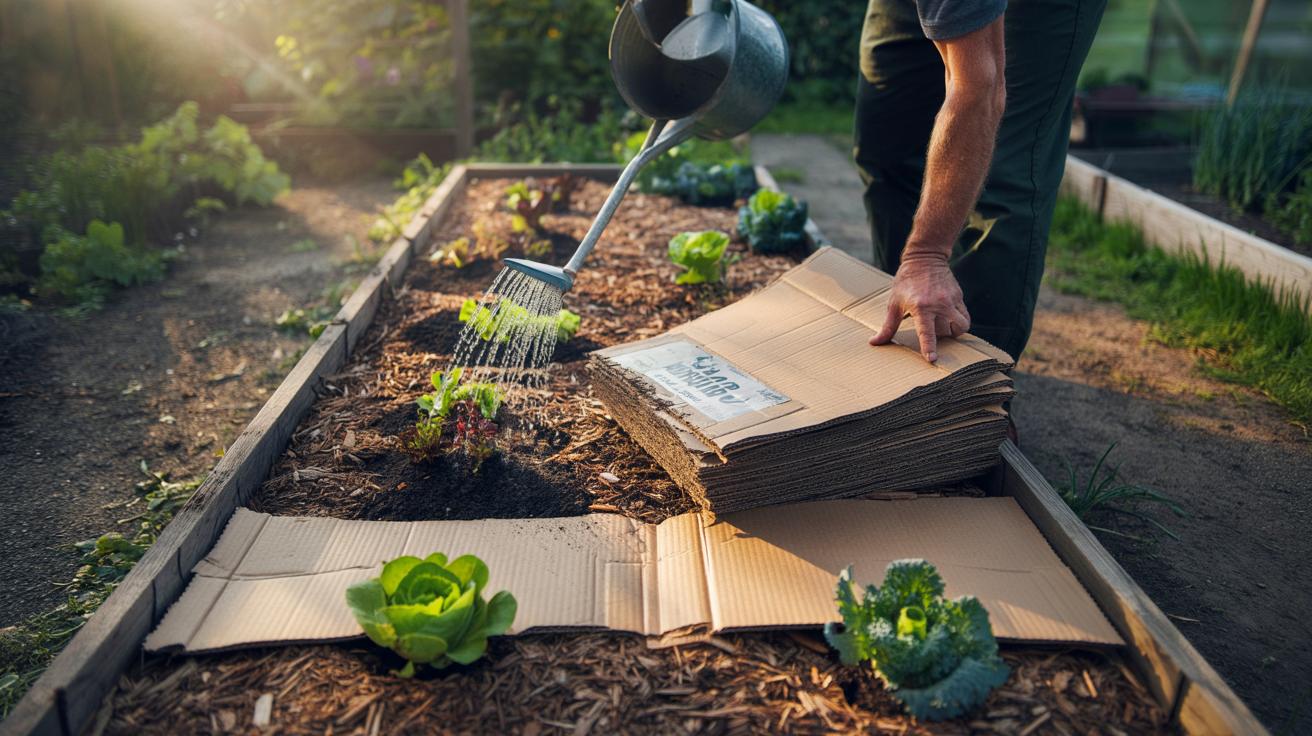
Start by stripping off tape, staples, and glossy labels. Aim for two to three layers of standard box cardboard or a single layer of thick corrugated, soaked until pliable. Overlap edges by 10–15 cm to prevent green “escape routes.” Wide overlaps are the difference between a tidy finish and a weeded edge every fortnight. Pin with bricks, stones, or a dusting of compost to keep sheets snug in wind. Then add 5–8 cm of organic mulch: compost, wood chips, leaf mould, or a mix. This top layer keeps light out, feeds soil life, and presents a neat finish.
Water thoroughly to bed everything in, and slice planting holes only where needed. For tough perennials like couch grass or bindweed, expect repeat applications or spot-lifting of strays; rhizomes hate the darkness but will test your joins. Around perennials and shrubs, cut slits and tuck cardboard close to stems, leaving an air gap to avoid collar rot. On paths, a heavier chip layer over cardboard gives a clean, long-lasting surface.
Benefits Beyond Weed Control
Cardboard mulch does more than stop weeds. It stabilises soil moisture, reducing watering, and blunts heat spikes that stress crops. In winter, it curbs erosion, keeping fines and nutrients where roots can find them. Microbial life booms under the cover, aided by the slow carbon release as fibres degrade. Expect a measurable reduction in weeding time—often by half in the first season and even more once the soil settles. That time dividend grows with each year you avoid digging and keep surfaces covered.
The surface mulch improves foot access during wet spells, while the barrier beneath breaks up pans and compaction gently. Slugs can shelter in mulch, so keep edges tidy, avoid over-wet chip near salad beds, and invite predators with small log piles or a pond edge. For annual beds, peel back mulch to warm soil in spring, then re-cover after planting. The result is a calmer, more resilient plot that forgives gaps in your routine.
Materials, Safety, And Sustainability
Choose plain, brown cardboard from delivery boxes or greengrocers. Avoid waxed cartons, heavy dyes, and plasticised packaging; they resist breakdown and can introduce contaminants. Remove all tapes and labels—many contain plastics. If you’re mulching a food bed, keep the system clean: compost or leaf mould on top, and refresh as the cardboard softens. Good materials make the difference between a tidy bio-barrier and a litter-strewn chore. Use what you have, but be selective. Finally, think of cardboard as a bridge to living cover: once weeds are tamed, ground-cover crops or regular mulches can take over.
| Topic | Recommendation | Notes |
|---|---|---|
| Cardboard Type | Plain brown, uncoated | Avoid glossy, waxed, or coloured |
| Layer Thickness | 2–3 sheets or 1 heavy corrugated | Overlap by 10–15 cm |
| Top Mulch | 5–8 cm compost or chips | Thicker on paths |
| Watering | Soak on laying | Re-wet if edges lift |
| Decomposition | 3–12 months | Faster in warm, damp soils |
Cardboard mulch turns a weed-strewn bed into a manageable canvas, cutting labour while feeding the soil beneath your boots. It sits comfortably with no-dig practice, and it’s thrifty: rescued boxes become barriers, soil food, and time-savers all at once. If you choose clean materials, overlap correctly, and finish with a nourishing mulch, the system is reliable through wind, drought, and downpours. The real win is consistency—cover bare soil, and weeds lose their foothold. What patch of your garden would benefit most from a simple, light-blocking layer this weekend, and how might you adapt the method for your own soil and schedule?
Did you like it?4.4/5 (30)