In a nutshell
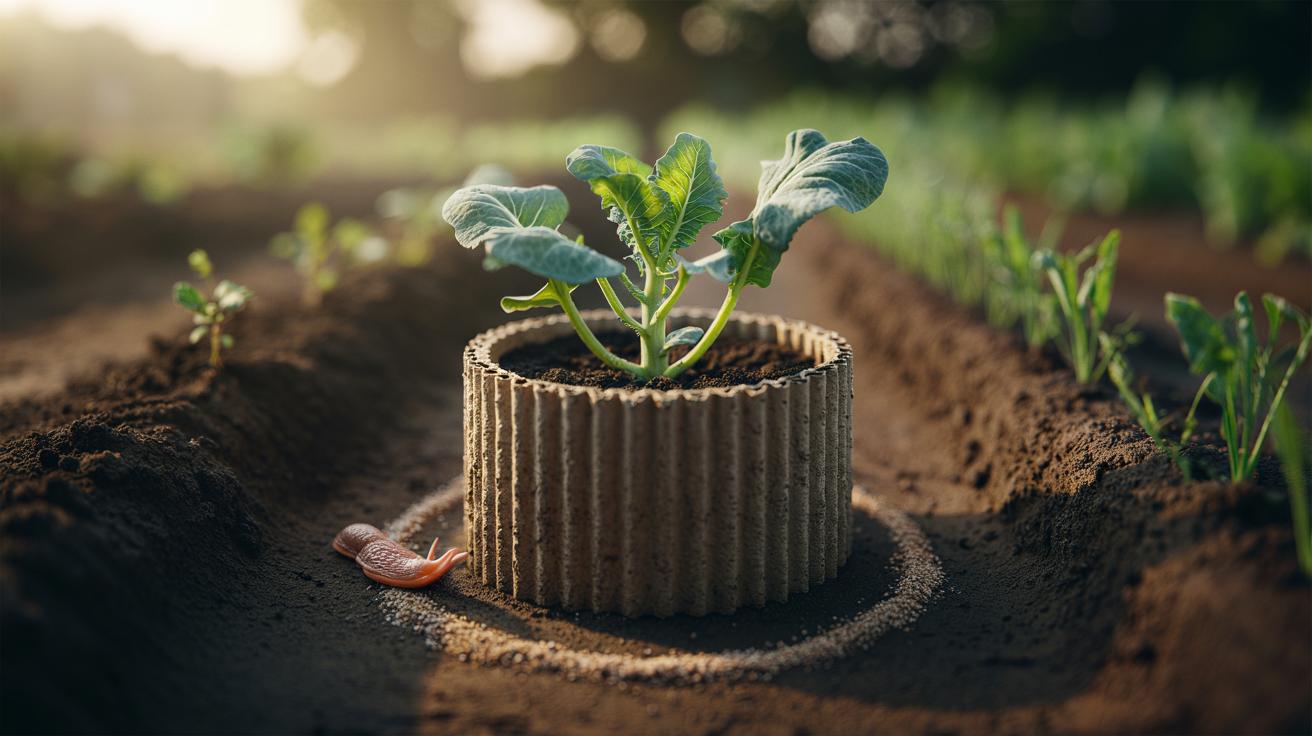
- 🌱 A simple cardboard collar acts as a low-cost, biodegradable barrier that protects seedlings by mechanical exclusion, stopping slugs and cutworms from reaching and chewing stems.
- 🛠️ Easy DIY: use plain corrugated cardboard, form 6–10 cm rings, press 2–3 cm into soil, and keep a 1 cm gap from the stem; secure overlaps with a peg or flour paste.
- 🐛 Targeted control: highly effective against slugs, cutworms, and reduces cabbage root fly egg-laying; limited for flea beetles and none for vine weevil—pair with mesh or nematodes as needed.
- 💧 Extra benefits: reduces soil splash and weed pressure, funnels water to roots, buffers wind, and gently warms the collar zone—supporting stronger early growth.
- 🔎 Smart use: adjust height for wet/dry spells, avoid waxed coatings, pin against wind, and remove or let decompose once stems harden—fold into wider integrated pest management.
There’s a humble trick making a comeback in British plots: slip a ring of cardboard around a young stem and watch the nibbling stop. This low-cost barrier turns flimsy seedlings into survivors without pellets or sprays. Cut from delivery boxes and pressed into the soil, the collar frustrates slugs, deters cutworms, and shields tender tissue from splash and wind. For many gardeners, a simple ring can halve early-season losses. Beyond pest control, the collar subtly warms the soil surface and focuses watering where it counts. It’s a small intervention with outsized impact—precisely the sort of quiet innovation that keeps veg patches productive and wildlife-friendly.
Why a Cardboard Collar Works
The genius lies in mechanical exclusion. Slugs and cutworms patrol at soil level, sensing stems by touch and scent. A firm collar presents a dry, rigid edge that breaks their pathfinding and forces a detour. Pressed 2–3 cm into the bed, it blocks cutworms from circling and severing stems, a classic night-time catastrophe for brassicas and lettuce. Physical barriers remain the most reliable, chemical-free defence in cool, slug-prone springs. The collar’s height—about 4–6 cm above ground—adds a stubby fence that many soft-bodied pests refuse to cross.
The ring also manages microclimate. It reduces soil splash that carries disease to leaves, limits weed competition around the crown, and slightly buffers gusts that kink tender stems. During watering, it funnels moisture straight to the root zone, a boon on free-draining beds. Because the material is biodegradable, it hosts beneficial microbes as it softens, then disappears into the soil web. The key caveat: keep cardboard clear of the stem to prevent damp abrasion; a 1 cm gap is enough.
How to Make and Fit the Ring
Raid the recycling: choose unwaxed, plain corrugated cardboard (ditch glossy coatings, staples, and heavy inks). Cut strips 4–6 cm wide and long enough to wrap around with a 2 cm overlap. Form a gentle circle 8–10 cm in diameter for brassicas, 6–8 cm for salads. A snug fit in the soil matters more than perfect measurements. Press the ring 2–3 cm down so it locks in place; if your bed is loose, pin with a short twig or biodegradable peg through the overlap. Keep at least 1 cm clearance from the stem to avoid rubbing and rot.
Water inside the ring to settle soil and remove air pockets. On windy sites, slightly bevel the outer edge inward so gusts don’t lift the collar. Mulch can abut the outside, but leave the inner zone bare for warmth and visibility. Expect the ring to hold shape for 6–8 weeks—long enough for stems to toughen. If snails are rampant, dust the outside rim with a light ring of horticultural grit. Avoid plastic tape; if you must join ends, use a dab of flour paste or a bamboo pin.
Which Pests Are Stopped—and Which Are Not
A cardboard collar excels against stem-chewing, ground-level pests, yet it isn’t a silver bullet. Think of it as one tool in integrated pest management: combine with tidy beds, evening patrols, and habitat for predators like frogs and ground beetles. Knowing what the ring can and cannot block helps you deploy it where it pays.
| Pest | Typical Damage | Collar Effect | Notes |
|---|---|---|---|
| Slugs/Snails | Ragged bites, missing seedlings | Reduces access | Best with dry rim; add grit outside edge |
| Cutworms | Stem cut at soil line | Blocks circling/chewing | Press 2–3 cm into soil to interrupt path |
| Cabbage Root Fly | Larvae eat brassica roots | Limits egg-laying near stem | Ensure flush contact with soil surface |
| Flea Beetles | Shot-holes in leaves | Minimal | Use mesh; collar only reduces splash |
| Vine Weevil Larvae | Root gnawing | None | Target larvae with nematodes |
| Birds | Pecked tops pulled out | Partial windbreak | Add cloches or twine lines if persistent |
Observe and adapt. If you spot slime tracks lead over the rim, raise the collar height or refresh the edge as it softens. If flea beetles persist, a fine mesh cover remains the best companion to your cardboard barrier.
Tips, Variations, and Common Pitfalls
For wet springs, trim collars slightly higher—6–7 cm—to keep rims drier. In drought, lower rims to 3–4 cm and water inside the ring to reduce evaporation. Never let the cardboard touch the stem: damp fibres can scuff tissue and invite rot. On no-dig beds, set collars after mulching by twisting them down to the soil surface; this keeps slugs from sheltering under the rim. A narrow inner moat of sharp sand or a dusting of wool pellets just outside the collar can harden the line without harming wildlife.
Skip waxed fruit boxes and plastic-coated cups—they resist breakdown and can shed fragments. If wind plucks rings free, peg them or add a short slit to flare the base. Remove remnants once stems are thumb-thick, or let them compost in place if tidy edges aren’t essential. For wide-sown carrots and beets, use elongated ovals rather than circles. And remember: a collar is a guard, not a cure; pair it with healthy spacing, clean tools, and patient observation.
In the UK’s slug-friendly climate, a cardboard collar is a quiet triumph: frugal, biodegradable, and strikingly effective against stem predators. It gives seedlings a crucial head start, protects soil life by reducing chemical inputs, and fits seamlessly into wildlife-first gardening. When a recycled ring saves a tray of lettuces, it pays for itself many times over. As spring gathers pace, why not trial a dozen collars across your most vulnerable crops, note the difference, and refine the method for your own soil and pests—what tweaks will your patch teach you this season?
Did you like it?4.5/5 (27)