In a nutshell
- 💨 Warm airflow accelerates solvent evaporation, taking classic lacquer from wet to touch-dry in about 30 seconds.
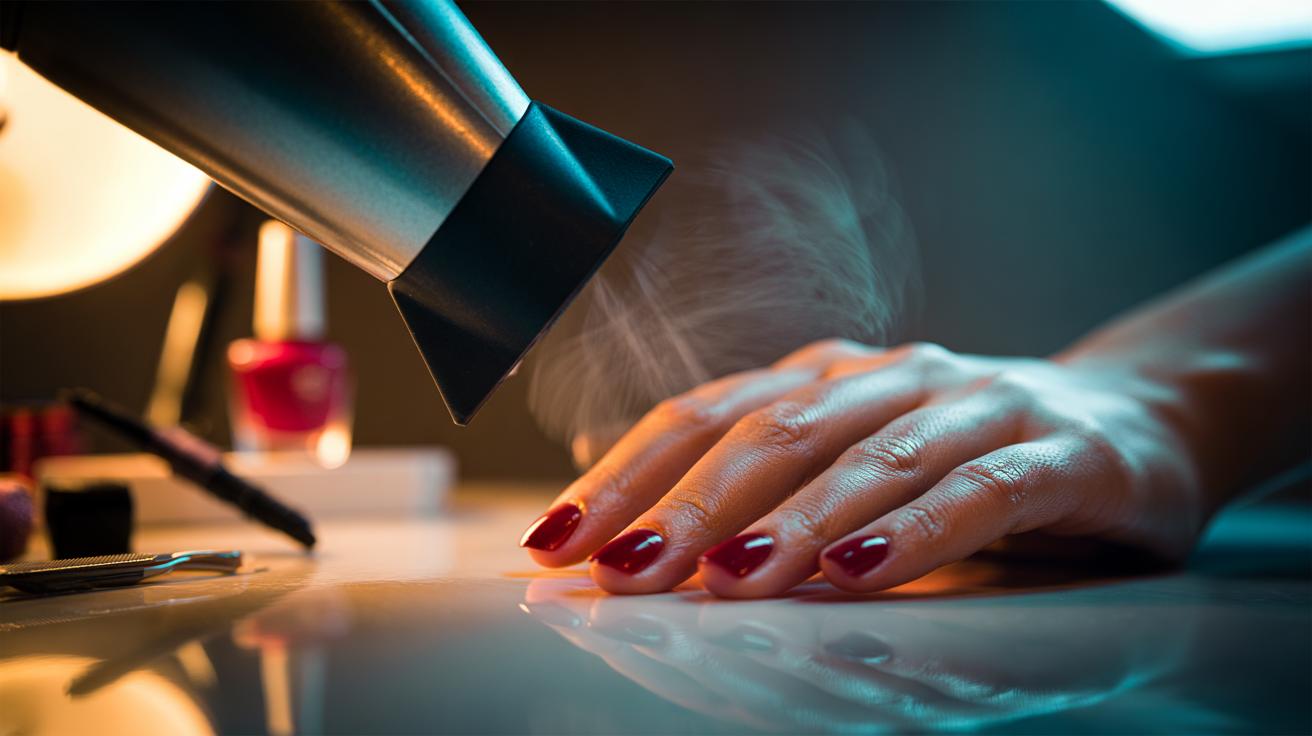
- 🧭 Follow the method: apply thin coats, set hairdryer to warm/low, keep it moving at 20–30 cm, then finish with a brief cool shot.
- ⚠️ Safety first: ensure good ventilation, avoid high heat and humidity, and remember polish solvents are flammable.
- 💅 Know your polish: gel needs UV/LED to cure; a hairdryer only helps with solvent flash-off in traditional lacquers.
- 🧪 Troubleshooting: pebbly or bubbled finishes mean you were too close or too hot; dents suggest coats were too thick.
The beauty hack doing the rounds on British TikTok actually has solid science behind it: use a hairdryer to set nail polish in an eye-blink. When applied correctly, warm, moving air can take a fresh coat from wet to touch-dry in around 30 seconds. The trick is not brute heat but controlled airflow that speeds solvent evaporation without blistering the colour. For commuters squeezing a manicure between meetings or anyone who smudges their thumbs on the zip of a winter coat, this method is a godsend. Here’s how warm air hardens colour quickly, why distance matters, and the precise settings that make the difference between glossy perfection and a rippled mess.
Why Warm Air Works on Nail Polish
Traditional nail lacquer contains volatile solvents that keep pigment and resins fluid. As those solvents escape, the film transitions from tacky to firm. Warm air accelerates that evaporation by energising solvent molecules and sweeping away the saturated air hugging the nail surface. Think of it as clearing the mist off a windscreen: the moment you replace solvent-laden air with drier, slightly warmer air, the finish tightens. The boundary layer above the nail is thinner, evaporation is faster, and you reach the elusive “touch-dry” stage with striking speed.
Heat alone is not the hero. Too hot, and you soften the polymer film, trap bubbles, or dull the shine. The goal is moderate warmth plus airflow at a safe distance, so the polish levels and sets without cooking. And a crucial caveat: gel polish requires UV/LED to cure and will not harden properly under a hairdryer. You can help flash off solvents between gel layers, but the true cure demands light. For classic lacquers, though, the hairdryer method is both rapid and reliable.
The 30-Second Hairdryer Method, Step by Step
Start with thin coats. Load the brush lightly, cap the free edge, and avoid flooding the cuticles. Wait 30–45 seconds after painting a hand so the solvent “lift-off” begins naturally. Now take the hairdryer: set it to warm/low, not hot. Hold it about 20–30 cm from your nails and keep it moving in gentle arcs. Never park the nozzle over one spot; movement prevents ripples and hot spots. Sweep for 20 seconds, rotate your wrist, then give another 10 seconds to the thumbs—these tend to carry more product.
To finish each coat, use a cool-shot burst for 5–10 seconds. That locks the surface and boosts gloss by letting the film contract evenly. Repeat for the next layer, then the top coat. Done cleanly, you can achieve “touch-dry” status for each layer in around 30 seconds of warm airflow. If you’re heavy-handed with colour, extend by 10–15 seconds. Avoid high heat, which can create micro-bubbles and drag marks, and resist the urge to test with a thumb print—use the back of a knuckle if you must.
Best Settings, Safety, and Common Pitfalls
Getting the settings right turns a hack into a habit. Use warm air to speed evaporation, low fan to maintain control, and distance to protect the sheen. Keep the space ventilated; polish solvents are flammable, and a hairdryer is still a heat source. Work away from open flames and avoid enclosed, steamy bathrooms where humidity slows drying. If the finish looks pebbly, you were too close or too hot; if it dents easily, your coats were too thick. Pair the method with a fast-dry top coat or drying drops for even faster results.
| Setting/Factor | Recommendation | Why It Works |
|---|---|---|
| Heat | Warm, not hot | Speeds evaporation without softening the film |
| Fan Speed | Low to medium | Airflow clears solvent-rich air; prevents ripples |
| Distance | 20–30 cm | Protects shine and avoids bubbling |
| Time per coat | 20–30 sec warm + 5–10 sec cool | Reaches touch-dry quickly with surface set |
| Polish Type | Lacquer yes; Gel needs UV/LED | Hairdryers do not cure gels |
Two more guardrails: keep the dryer moving, and don’t chase speed by loading thick coats. If in doubt, add five seconds of airflow rather than heat. A drop of cuticle oil after the final cool shot also reduces surface drag, making accidental brushes less likely to leave a mark.
Used with a light hand and a bit of patience, the hairdryer technique transforms home manicures, trimming drying time while preserving that salon-level gloss. It’s simple, cheap, and adaptable: thin coats, warm air, steady movement, and a short cool shot to seal the deal. Once you’ve mastered the distance and tempo, smudges become the exception, not the rule. Will you try the 30-second method on your next colour, or do you have a rival trick—like drying drops or a quick-dry top coat—that you swear by for getting out the door faster?
Did you like it?4.4/5 (28)