In a nutshell
- 🌧️ Covering with cardboard sheets absorbs raindrop impact, slows runoff, increases surface roughness, and boosts infiltration while feeding microbes that strengthen soil structure.
- 📦 Choose plain kraft or corrugated, avoid wax/plastic inks, remove tape; use double‑wall for exposed slopes and pre‑soak to drape over uneven ground.
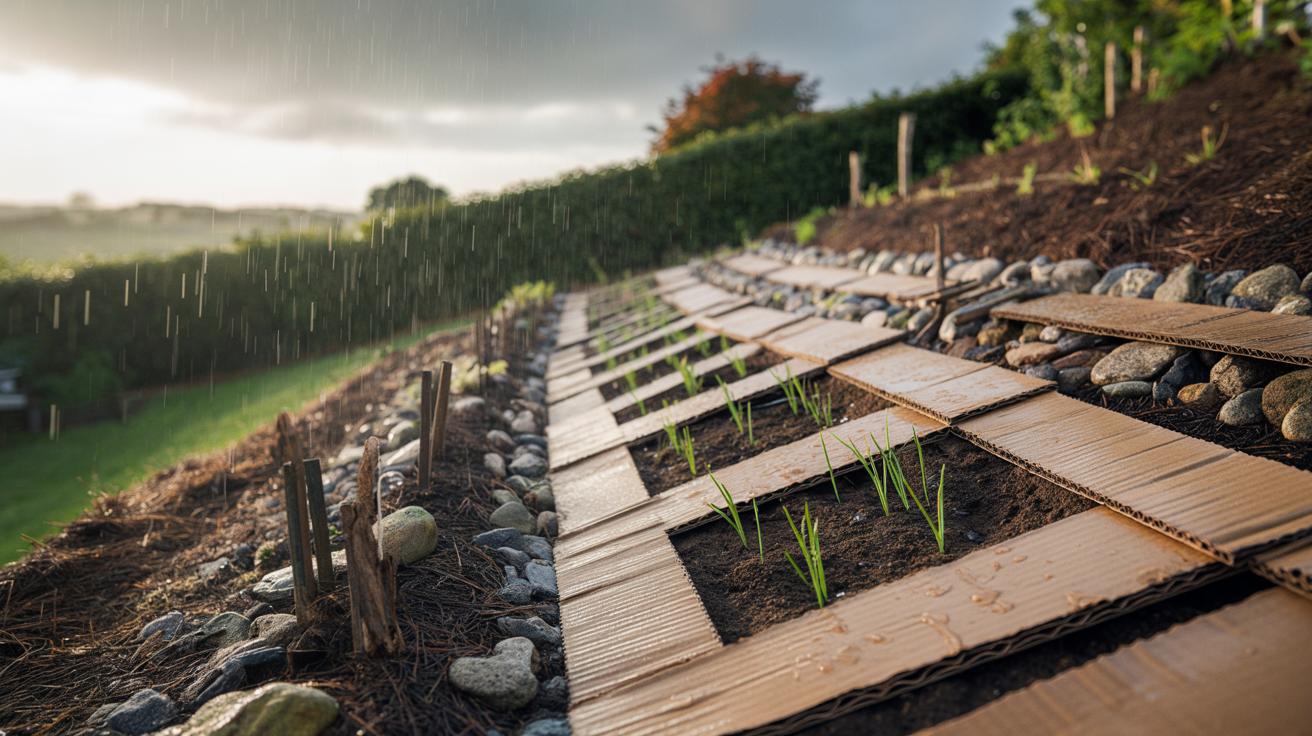
- 🧭 Install on the contour with 10–20 cm overlap, uphill shingling, frequent anchoring (every 50–75 cm), mulch edges, and T‑slits around plants; add small check dams on longer runs.
- 🔧 Maintain covers for 3–12 months: inspect after heavy rain, re‑pin lifted corners, top up with wood chips, manage slugs, and keep sheets away from drains and walls.
- 🌿 For longevity, pair cardboard with living groundcovers or coir matting; it’s low‑cost, biodegradable, and improves soil health while protecting beds, paths, and slopes.
When rain hammers bare ground, every drop behaves like a tiny hammer, blasting particles loose and sweeping them downhill. A simple, low‑cost fix is to lay down cardboard sheets, creating a protective skin that softens impact, slows runoff, and buys time for roots to knit the surface. Gardeners and land managers across the UK increasingly use cardboard because it’s readily available, biodegradable, and light to move. Cover the soil and you transform a slick slope into a rough, absorbent surface that resists being stripped by storms. Here’s how cardboard curbs erosion, which types to choose, and the right way to install and maintain it so your soil stays put.
The Science: Why Covering Soil Stops Erosion
Unprotected soil suffers from raindrop impact, which dislodges fine particles that then clog pores and form a crust. That crust sheds water, amplifying runoff that shears soil from slopes. Cardboard acts as a mulch barrier, absorbing and diffusing the kinetic energy of rainfall before it can strike the surface. By shielding the ground from direct impact, you prevent the initial splash that starts the whole erosion chain.
Beyond impact protection, cardboard increases surface roughness, which slows water, lengthening the time it takes to move downslope. Slower water loses the power to carry sediment, and more of it infiltrates. Corrugated layers create tiny air gaps that promote infiltration rather than overland flow, while the fibres wick moisture into the soil instead of shedding it sideways. On clays that seal quickly, a cover keeps pores open underneath, sustaining biological activity that further stabilises aggregates.
As it softens, cardboard feeds microbes and worms, binding particles with organic glues and worm casts. That living glue enhances soil structure, so the ground resists future storms even after the cardboard breaks down. A covered soil grows stronger as it rests.
Choosing and Preparing Cardboard Sheets
Look for plain brown kraft or corrugated cardboard without plastic film, staples, or glossy inks. Remove tape and labels; contaminants create weak points and can leach into beds. Double‑wall corrugated is ideal on exposed slopes because its thicker profile resists tearing and offers better cushioning. Flatten boxes, slice along folds, and pre‑soak if you need the sheets to drape neatly over uneven ground. Always avoid waxed or heavily printed boards near food crops.
| Cardboard Type | Thickness | Best Use | Pros | Cons |
|---|---|---|---|---|
| Single‑ply kraft | Thin | Flat beds, light rain | Easy to cut, conforms well | Tears sooner, shorter life |
| Single‑wall corrugated | Medium | General garden slopes | Good impact damping | Needs tight anchoring |
| Double‑wall corrugated | Thick | Exposed banks, paths | Durable, slows runoff best | Heavier, harder to shape |
Cut sheets to fit, then stack or overlap the edges generously to block gaps where water can enter and lift the cover. Keep a stash of U‑pins, landscape staples, or stones for anchoring. If aesthetics matter, plan a top layer of wood chips or compost to hide the cardboard and add extra mass.
Installation on Slopes and Around Plants
Prepare the site by raking out ruts and smoothing steep micro‑pockets that accelerate flow. Lay sheets on the contour—across the slope, not down it—so each panel slows water like a miniature terrace. Shingle the sheets with a 10–20 cm overlap, placing the uphill piece on top to prevent water sneaking beneath. Think like rain: if a drop can find a seam, it will.
Anchor every 50–75 cm using biodegradable pegs or metal staples, then weight edges with mulch to stop wind lift and seal seams. Around trees and perennials, cut T‑shaped slits and slide sheets around stems, leaving a 5–8 cm breathing gap to avoid collar rot. On longer runs, build small check dams of sticks or stones every 2–3 metres to slow water further, and break the slope with gentle curves rather than straight channels. For paths, add a thicker top mulch so foot traffic doesn’t wear through.
Maintenance, Decomposition, and Environmental Cautions
Cardboard typically lasts 3–12 months depending on rainfall, thickness, and microbial activity. Expect worm tunnelling and softening after the first wet spell; this is good news for infiltration but may expose seams. Inspect after heavy rain, re‑pin lifted corners, and top up with wood chips or compost where wear appears. Small fixes after storms prevent big failures later.
Choose plastic‑free boards and avoid heavily dyed or waxed boxes, particularly near edible beds. Keep sheets away from drains, grates, and damp house walls. In dry spells, uncovered cardboard can be a minor fire risk; keep it mulched and hydrated. Watch for slugs under persistent covers and deploy traps if seedlings are nearby. If you need a longer‑term solution, combine cardboard with living groundcovers such as clover, or follow up with coir matting on steep banks. Once decomposition advances, fork in the residues to enrich organic matter and re‑cover bare patches swiftly.
Cardboard excels because it interrupts the first violent seconds of a storm, when most damage begins, and encourages every drop to soak in rather than scour away soil. It’s inexpensive, widely available, and doubles as a feedstock for the life that stabilises your ground from within. As you plan your next bed or bank, consider how a few well‑anchored sheets could protect seedlings, pathways, and slopes through a wet winter. With careful choice, tidy overlaps, and routine checks, you can turn brown boxes into a quiet, effective erosion shield. Where on your plot could a strategic layer of cardboard make the biggest difference this season?
Did you like it?4.5/5 (21)