In a nutshell
- 🌑 The method relies on light exclusion: overlapping, opaque cardboard blocks sunlight, starving weed seeds of energy while creating a cooler, moister microclimate that reduces competition for water and nutrients.
- 📦 Use plain corrugated cardboard (no plastic tapes or glossy coatings) and top with 75–100 mm wood chips; opacity is crucial to prevent leaks of light at seams and edges.
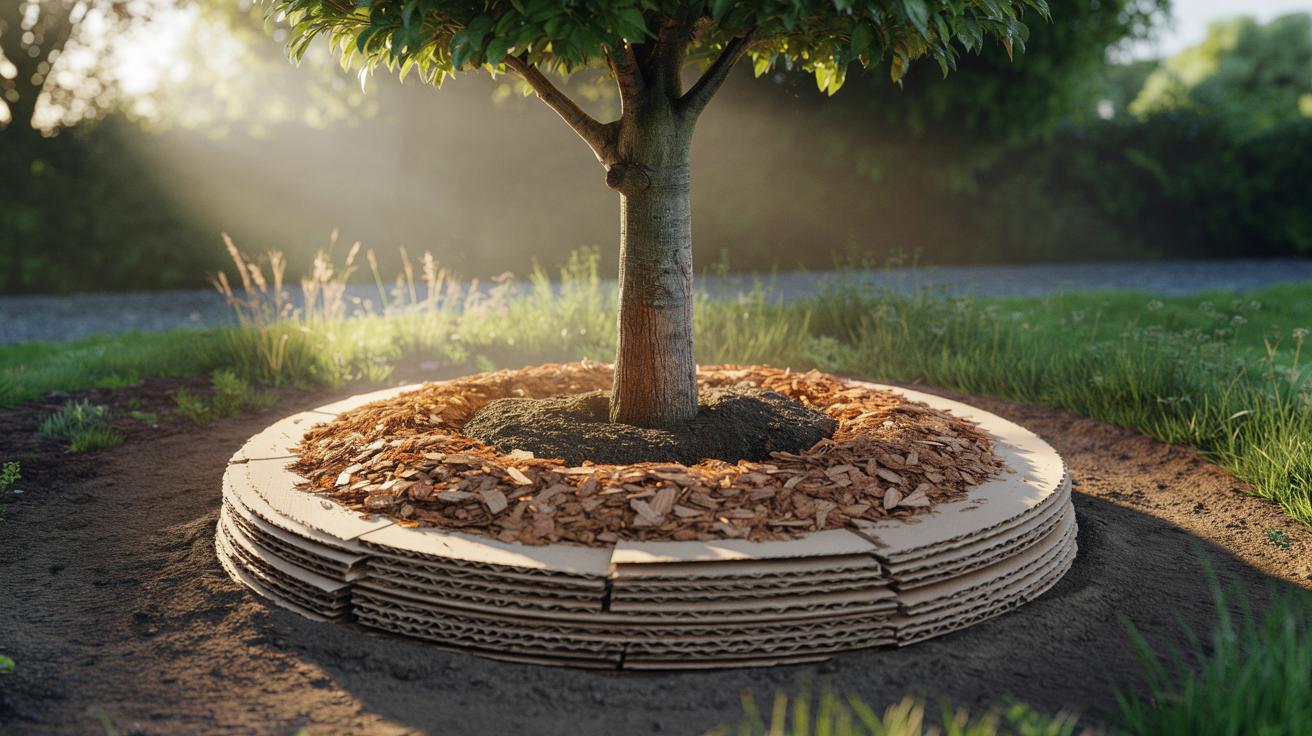
- 🛠️ Key steps: clear a 1 m+ circle, pre-soak sheets, leave a 75–100 mm gap around the trunk, overlap seams 100–150 mm, add a compost skim if desired, then water in to settle and seal.
- 🧭 Maintenance and wildlife: avoid volcano mulching, inspect after storms, widen and refresh annually as cardboard degrades (9–18 months), add extra layers against rhizomatous weeds, and monitor for slugs or rodents.
- 🌿 Benefits: boosts soil life and structure, enhances moisture retention, cuts herbicide use, and suits UK weather swings—delivering chemical-free, low-cost weed control and reduced watering around young trees.
Gardeners across the UK are rediscovering a simple, low-cost tactic for tidier tree circles: a layered cardboard barrier that denies weeds the sunlight they need to grow. By building a light-proof skin beneath a mulch, you can stop germination, starve the existing seed bank and spare young trees from competition for moisture and nutrients. Blocking light is the quiet engine of this method, and it works without digging or herbicides. The result is cleaner soil, fewer watering demands and healthier, faster-establishing trees. Here’s how the technique functions, why material choice matters and the key steps to do it well in British conditions.
How Cardboard Suppresses Weeds by Blocking Light
Weeds are opportunists, primed to sprout when their seeds sense warmth, moisture and light. The cardboard barrier interrupts that third cue. By stacking overlapping sheets, you create a continuous, opaque layer that stops photosynthetically active radiation reaching the soil surface. Seeds that do germinate under the barrier quickly exhaust their reserves. Without light, they cannot replenish energy via photosynthesis, and growth stalls. No light means no fuel, and no fuel means no weed canopy. This is especially helpful around newly planted trees that struggle against grasses and vigorous perennials scavenging water at the same depth as young feeder roots.
Cardboard also slows the rebound of rhizomatous weeds. While persistent species like couch grass may try to snake into seams, multiple layers plus a thick organic mulch on top create an extended darkness zone. The tree benefits twice: reduced competition and a cooler, moister soil. As the barrier softens, soil life works it into humus, improving structure and water-holding capacity.
There’s a microclimate advantage too. The barrier reduces surface evaporation and buffers temperature swings, protecting fine roots common in the upper 150 mm of soil. In UK summers, this can mean fewer stress events, while in winter the mulch above the cardboard insulates against harsh frosts. The technique is essentially light exclusion backed by moisture management—a one-two punch that keeps the weed bank dormant and the tree growing.
Choosing and Preparing Materials
Not all cardboard is equal. Look for plain, brown corrugated sheets with minimal printing. Avoid glossy coatings, plastic tapes and heavy-ink packaging that may include unwanted additives. Thicker, double-wall cardboard creates better opacity, but several layers of standard boxes work well. Peel off tape, flatten the sheets and pre-soak them with a hose so they conform closely to the ground. Opacity is everything: if light gets through, weeds will too. A durable top layer of wood chips, bark, or coarse composted mulch (75–100 mm) protects the cardboard and extends its life while feeding soil biology as it breaks down.
| Material | Typical Thickness | Role in Barrier |
|---|---|---|
| Brown corrugated cardboard | 2–6 mm (single to double wall) | Light-blocking layer; smothers weeds and seeds |
| Newspaper (uncoated) | 6–10 sheets | Fills gaps; adds opacity at seams |
| Wood chip or bark mulch | 75–100 mm | Protects cardboard; retains moisture; feeds soil |
| Compost (optional) | 10–20 mm under mulch | Nutrient primer; improves microbial activity |
Source materials locally: council green-waste mulch or arborist chips are plentiful after storm work, and most shops will give away cardboard. If you must store sheets before use, keep them dry to avoid mould. When laying, prioritise overlapping edges and double up around known weed hotspots.
Step-by-Step Layering Around Trees
Begin by weeding tall growth and watering the root zone. Create a clean circle around the tree at least 1 metre in diameter for young specimens, expanding to the canopy drip line as the tree matures. Never pile materials against the trunk or cover the root flare. Leave a 75–100 mm gap around the base to prevent rot and discourage pests. Lay the first layer of cardboard, overlapping seams by 100–150 mm. Where a trunk or roots interrupt the sheet, cut a slit and slide it neatly around, maintaining the gap at the base.
Stagger a second layer so seams don’t align. Pre-soaking helps sheets mould to the soil and removes air pockets that could admit light. Add a thin skim of compost if desired, then top with 75–100 mm of wood chips. Mulch depth matters: too thin invites breakthrough; too thick can exclude oxygen. Rake the edge down to ground level to avoid a water-shedding lip, and water the area well to settle everything.
Inspect after heavy rain or wind. Tuck in any lifted edges and replenish mulch as it settles. In most UK settings, the cardboard will last 9–18 months, by which time it will have degraded into the soil. To keep weeds at bay, refresh with new sheets and mulch annually until the tree canopy naturally shades the soil.
Common Pitfalls, Wildlife, and Maintenance
Avoid “volcano mulching” at all costs. Mulch piled high against bark invites decay and girdling. Another mistake is leaving gaps or thin spots that leak light; these become weed corridors. In areas with rhizome bullies—bindweed, couch, creeping buttercup—use an extra layer of cardboard and double-check seams. Watch for slugs and rodents, which may shelter under warm, dry mulch. If this becomes an issue, coarser chips and a slightly thinner mulch can help, as can encouraging predators like hedgehogs and birds.
Cardboard must be free of plastic tapes and labels; microplastics linger far longer than the fibre. Choose uncoated, recyclable sources and remove staples. In compacted soils, consider a light fork to improve aeration before laying the barrier, but avoid root damage. Plan a seasonal check each spring: top up mulch to the original depth, widen the circle as branches spread and keep that trunk gap clear. During drought, the system retains moisture, yet you should still water deeply and less often to train roots downwards.
As the barrier decomposes, it fuels fungi and invertebrates that build soil structure. This living engine is why the technique fits so cleanly with low-input, chemical-free gardening. Done well, it’s a tidy cycle: exclude light, conserve water, feed the soil, protect the tree. If you inherit an overgrown patch, the same method can reclaim space without digging, which protects roots and soil carbon.
Used thoughtfully, the cardboard barrier gives trees a crucial head start while quietly transforming compacted ground into friable, living soil. It is inexpensive, widely available and compatible with wildlife-friendly practice when you keep bark clear and seams snug. The principle remains disarmingly simple: starve weeds of light and they cannot win. As UK summers swing between wet spells and heat spikes, this layered armour stabilises conditions and reduces maintenance. Will you trial a tree circle this season—and if so, where will you start, and which materials will you choose for your first light-proof layer?
Did you like it?4.6/5 (25)