In a nutshell
- 🌑 Light exclusion starves weeds: blocking photosynthesis forces roots to burn stored sugars, weakening rhizomes and stolons; many seeds are photoblastic and won’t germinate in darkness.
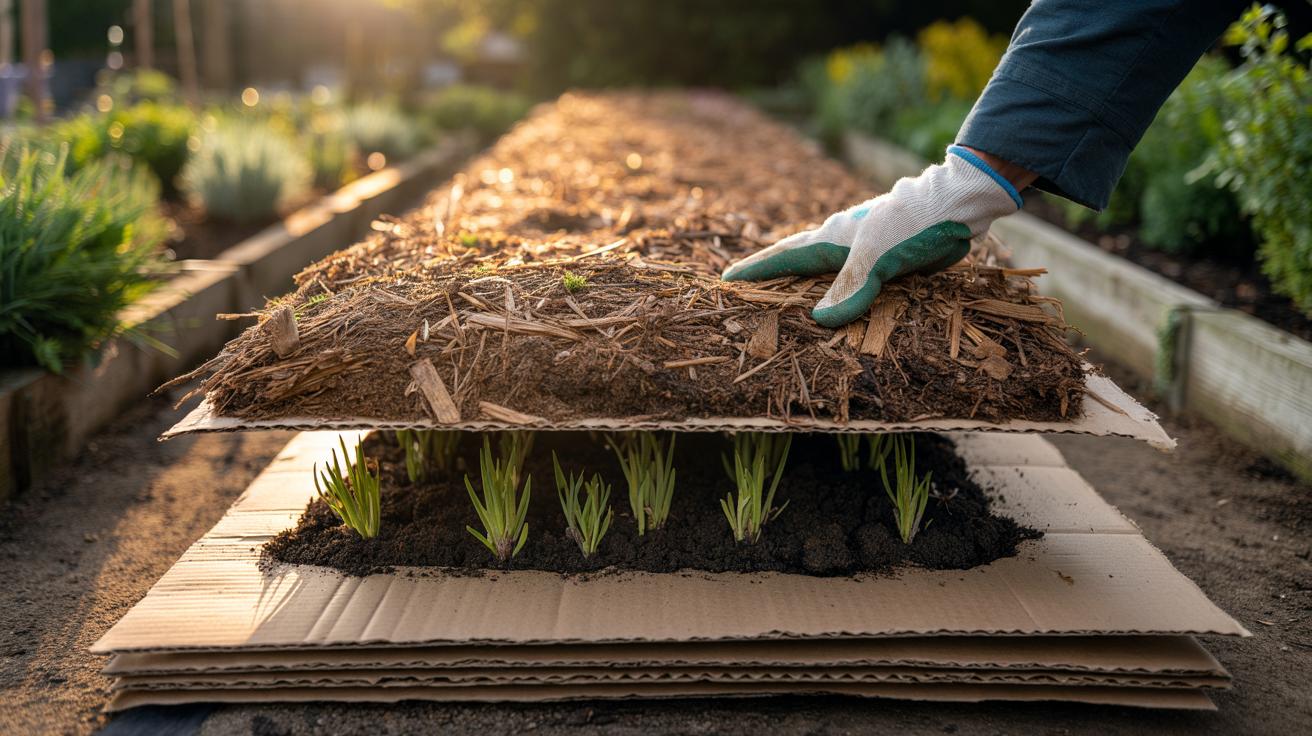
- 📦 Choose and layer right: plain brown corrugated cardboard (no tape or gloss), soaked and overlapped 10–20 cm; apply 2–3 layers and cap with 5–10 cm mulch for sustained opacity and contact.
- 🛠️ Practical setup: strim low, wet soil and sheets, lay snugly, cut X-slits to plant through; use woodchip on paths, compost for veg beds; creates a low-dig, cleaner surface.
- 🧭 Edges and pitfalls: double overlap at boundaries, refresh mulch mid-season, remove contaminants, manage slugs, and avoid herbicide-tainted inputs for reliable long-term suppression.
- 🌱 Soil gains: decomposing cardboard feeds soil biology, moderates moisture and temperature, and builds humus—delivering months of fewer weeds without chemicals.
Gardeners across the UK are rediscovering the quiet power of cardboard. Laid in sheets and capped with organic matter, it forms a breathable barrier that interrupts the basic life-support systems of unwanted plants. The principle is simple yet robust: light deprivation cuts off a weed’s ability to photosynthesise, while steady moisture and soil life work the buried material into humus. Starved of energy, roots burn through stored carbohydrates until they fail. This article explores how the method works, the right materials and thickness to choose, and the practical steps that keep weeds down for months without digging or chemicals. Used well, it produces cleaner beds, richer soil, and fewer re-sprouts just when your borders should be at their best.
Why Cardboard Smothers Weeds: The Science of Light Deprivation
Weeds survive on a balance sheet of energy. Leaves capture light to make sugars via photosynthesis, while roots spend those sugars through respiration to maintain cells and push new growth. When you cover the soil with opaque cardboard, the light income stops but the outgoings continue. Without sunlight, shoots etiolate, carbohydrate reserves drain, and the plant’s underground organs run a deficit they cannot repay. Rhizomes and stolons are hit especially hard, because their sprawling networks require constant energy to stay alive. Seeds also lose a key trigger: many are photoblastic and need light cues to germinate, so they stay dormant under the dark cap.
The effect compounds over weeks. The cardboard suppresses leaf regrowth, mulch above keeps the zone moist and cool, and soil organisms shred the paper into fragments that invite earthworms. Light exclusion doesn’t suffocate the soil; it moderates extremes and stabilises microbial communities. As roots search in vain for energy, they weaken, allowing you to replant the surface with fewer interruptions from resurgent weeds.
Materials and Thickness: Choosing, Layering, and Overlap
Use plain, brown corrugated cardboard with all tape, staples and glossy inks removed. Thicker sheets last longer, but multiple thin layers also work if you overlap them generously. Soak the cardboard so it conforms to the soil and reduces gaps. Gaps are invitations for light leaks and opportunistic shoots. Aim for two to three layers of average moving-box board, then cap with 5–10 cm of compost, leaf mould or woodchip depending on whether you’re planting through immediately or holding ground for later.
Edges matter. Overlap sheets by at least 10–20 cm, extend beyond bed lines, and weigh the perimeter with stones, pins, or a lip of mulch. Choose peat-free mulches to protect bogs and favour local woodchip or well-finished green-waste compost. If you anticipate tough perennials, increase coverage time and top up the mulch mid-season. The combination of opacity, continuous contact, and mulch mass is what delivers months of reliable suppression.
| Aspect | Recommendation | Why It Matters |
|---|---|---|
| Cardboard Type | Plain brown, no tape or gloss | Clean decomposition; no contaminants |
| Overlap | 10–20 cm between sheets | Prevents light leaks and shoots |
| Layer Thickness | 2–3 layers or 8–12 mm | Maintains opacity for months |
| Mulch Depth | 5–10 cm above cardboard | Weights sheets; aids suppression |
| Expected Suppression | 3–6 months (annuals), 6–12 months (perennials) | Sets realistic timelines |
Step-by-Step Method for Beds, Borders, and Paths
Start by knocking back bulk growth: strim or mow low so the cardboard sits flat. Remove woody stems and rake away sharp debris that might puncture the barrier. Water the area if the soil is dry, then lay sheets so they hug the contours. Wetting the cardboard before and after laying dramatically improves contact and longevity. For mixed borders, place sheets around desired shrubs, cut neat X-slits to plant through, and backfill with compost so new roots establish above the barrier while the old weed layer starves below.
On paths, choose a thicker cap of woodchip for durability; in beds intended for vegetables, prefer peat-free compost and top up mid-season. Anchor edges where footfall or wind could lift corners. In the UK, autumn is ideal: rains keep the system hydrated and microbial action continues through mild winters. Spring applications also excel if you pre-soak thoroughly. The result is a low-dig, cleaner surface that is ready for planting with minimal disturbance.
Dealing With Tough Perennials and Common Pitfalls
Persistent spreaders like couch grass, bindweed and ground elder need longer darkness and vigilant edge control. Extend the coverage to 12 months, refresh mulch at six months, and inspect margins where light can sneak in. The perimeter is the weakest link; double the overlap at boundaries and around posts or paving. If shoots appear through planting slits, pinch them out promptly to maintain the energy deficit. For invasive species under legal control such as Japanese knotweed, this method is not sufficient—seek specialist guidance.
Avoid pitfalls that compromise the barrier. Don’t use coloured or waxed packaging; adhesives and coatings slow breakdown and can contaminate soil. Remove all plastic tape. Manage slugs by creating dry refuges, encouraging predators, and spacing plantings; cardboard increases habitat, so vigilance pays. Where manure or compost is added, ensure it is free from persistent herbicide residues. Used correctly, the system harmonises with soil biology, trading spade-work and herbicides for time, patience, and steady light exclusion.
The cardboard layer method is a patient gardener’s ally: quiet, effective, and kinder to soil structure than repeated digging. It turns waste into a tool, feeds the micro-life that feeds your plants, and resets weedy ground without harsh inputs. By removing light and holding the line at edges, you force roots to spend until they have nothing left. With careful overlap, smart mulching, and timely checks, beds stay cleaner for months and the soil improves beneath your feet. How might you adapt this approach to your trickiest patch—an overgrown border, a new path, or a veg bed waiting for spring?
Did you like it?4.5/5 (30)