In a nutshell
- 🌱 One well-laid cardboard mulch layer blocks light, keeps beds weed‑free for most of the season, conserves moisture, and feeds soil biology as it decomposes.
- 🧰 How-to: clear and water soil, lay a single layer of plain brown corrugated card with 7–10 cm overlaps, wet it, then add 5–8 cm of compost or chips; plant through small X slits.
- 📦 Materials: use uncoated cardboard, remove tape, avoid glossy/waxed boxes; typical lifespan 6–12 months under a mulch cap.
- 🚫 Pitfalls: skimped overlaps, dry soil, thin mulch, and oversized cuts invite weeds or slugs—fix by re-laying overlaps, watering first, topping up mulch, and trimming cuts small.
- ✅ Payoff: lower maintenance, less watering, no herbicides, protection from weather extremes, and compatibility with no‑dig and ornamental beds.
In a season when time is scarce and weeds are relentless, one thrifty tactic is winning over British growers: a single layer of cardboard mulch. Laid smartly in spring, it smothers annual weeds, conserves moisture, and feeds the soil as it breaks down. One well-fitted layer can keep beds virtually weed-free until autumn, turning weekend firefights into light touch-ups. The idea is wonderfully simple—cut off sunlight to germinating seeds while letting rain and air through. For kitchen gardens, ornamentals, and no-dig conversions alike, cardboard offers a low-cost bridge between tidy beds and thriving biology, especially where drought and hosepipe bans demand restraint. Here’s how it works, how to do it, and how to sidestep the pitfalls.
Why Cardboard Mulch Works
Cardboard is a porous barrier that blocks light, so weed seeds struggle to germinate and established annuals starve. The fibres wick and hold moisture, easing summer stress on seedlings. As the sheet softens, soil organisms—especially earthworms—pull fragments down, improving tilth. This is not a plastic membrane; it breathes, it feeds, and it disappears. Because you are depriving weeds of photosynthesis rather than poisoning them, beds remain safe for edible crops and friendly to beneficial insects. In no-dig systems, a single layer respects soil structure, keeping fungal networks intact and reducing compaction.
There is also a thermoregulation benefit. Cardboard shields bare ground from harsh sun, smoothing extremes that can cook roots or dry out seedlings. In heavy rain, it slows the splash that spreads disease spores. When topped with 5–8 cm of organic mulch—compost, leaf mould, or wood chips—the sheet becomes a stable, dark understorey that nurtures microbes. The result: fewer weeds to pull, fewer waterings, and a steadier pace of growth.
How to Lay a Single Layer
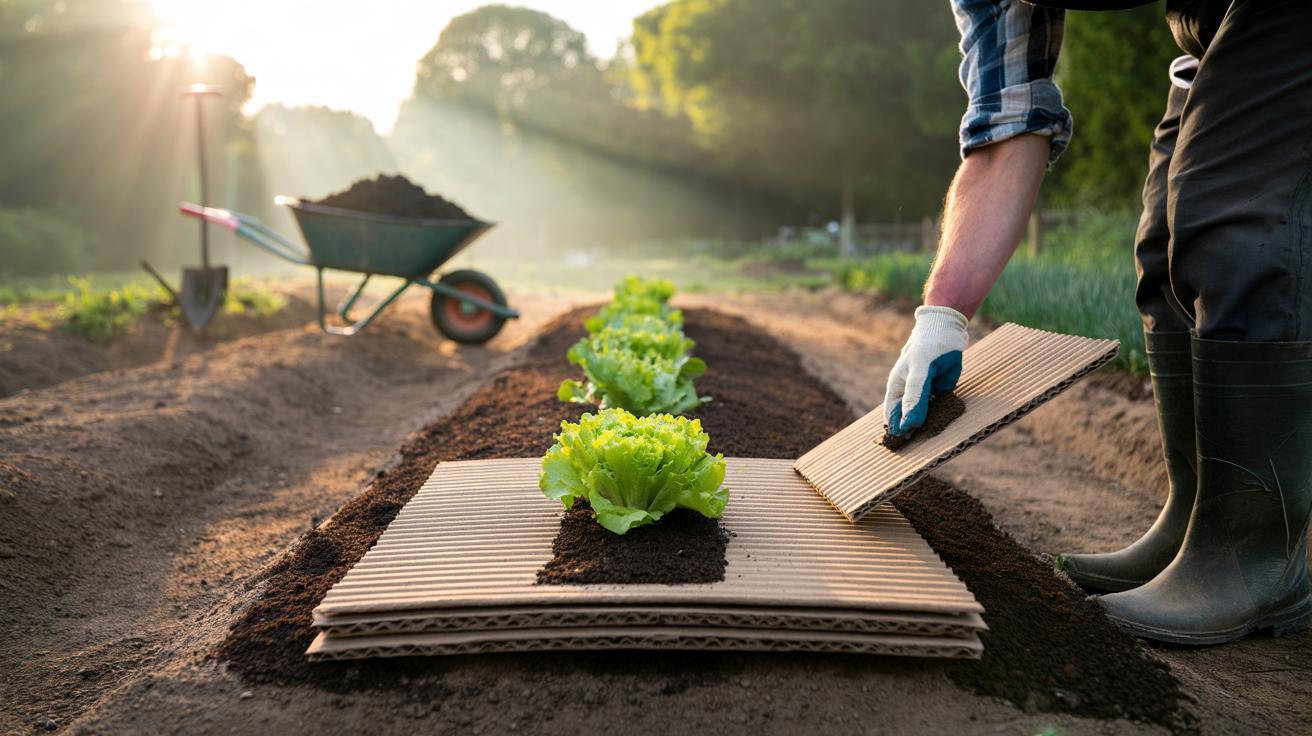
Start by clearing tall growth and levelling rough clods. If converting lawn, scalp it close. Water the area thoroughly—moist soil activates decomposition. Place a single layer of plain brown corrugated cardboard, removing plastic tape and staples. Overlap edges by at least 7–10 cm to shut out light. Gaps are where weeds win. Dampen the cardboard so it flexes into contours and resists wind lift. Immediately add a surface mulch: 5–8 cm of compost for beds, or wood chips for paths. This top layer locks the sheet in place and hides it neatly.
To plant, cut an X slit and peel back flaps just enough for the rootball. Set the plant, fold the flaps back, and top up mulch, keeping stems clear to avoid rot. Peg edges or weigh them with stones if your site is breezy. For rows, pre-mark spacing before mulching to avoid overcutting. Water-in slowly so moisture wicks through. With one careful afternoon of work, you have set up a season of low-maintenance growing.
What to Use: Sources, Thickness, and Safety
Choose uncoated, non-glossy cardboard—moving boxes, bike cartons, and appliance packaging are ideal. Avoid waxed food boxes and heavy inks. Most UK shipping inks are now soy-based, but check: if it rubs off easily and is not glossy, it’s usually fine. One layer of robust corrugated board (3–5 mm) is enough beneath a decent mulch cap. Thicker stacks can starve soil of air and slow rooting. Remove every strip of plastic tape; it lingers long after the card has vanished. Expect the barrier to last 6–12 months depending on rainfall, soil life, and mulch depth.
If you are suppressing perennial brutes—couch grass, bindweed, ground elder—the method still helps, but persistence matters. Check edges monthly and hand-rogue any shoots that find daylight. For slug-prone plots, use a compost top layer rather than wet wood chips around salad crops, and encourage predators with log piles and shallow water dishes.
| Material | Best Use | Notes |
|---|---|---|
| Brown corrugated cardboard | Bed and path weed suppression | Single layer; remove tape; wet before mulching |
| Compost (5–8 cm) | Top layer for veg beds | Feeds soil; reduces slugs versus wood chips |
| Wood chips (5–8 cm) | Paths and around trees | Slow breakdown; avoid mixing into seed beds |
| Leaf mould (5–8 cm) | Mulch for perennials | Light, airy; good moisture retention |
Common Mistakes and How to Fix Them
Skimping on overlaps invites a green seam within weeks. Re-lift and add a 7–10 cm overlap, then weigh edges with mulch or pegs. Using glossy or waxed packaging slows decay and can repel water; swap it for plain board. Laying cardboard on bone-dry soil creates a thirsty barrier—always water first. Do not stack multiple layers unless tackling invasive perennials, and even then monitor soil breathability. If your mulch cap is too thin, sunlight sneaks in at cuts and edges; top up to at least 5 cm.
Planting issues often come from oversized cuts. Make small X slits and fold back, rather than removing rectangles. If slugs surge, lift chips away from salad stems and switch to compost, add copper collars on precious crops, and tidy daytime refuges. In windy spots, staple the card to the soil with biodegradable pins or use bricks until the first rain beds it down. Consistent checking in the first month saves hours later.
Cardboard mulch is not a silver bullet, but it’s remarkably close for busy gardeners who want tidy, productive beds without herbicides. With one well-laid layer and a decent mulch cap, you harness soil biology to do the weeding and watering for you. It’s cheap, quick, and kinder to your back—and it leaves the soil better than it found it. As the season warms, are you ready to try a single layer and see how far it carries your garden—what bed will you transform first, and what tweaks will you test in your own conditions?
Did you like it?4.5/5 (27)