In a nutshell
- 🧽 Science-backed prevention: Soap scum forms when minerals bind surfactants; remove the water film fast—use a squeegee within 60 seconds of showering to stop deposits.
- 🧼 Pro routine in 30 seconds: Cool rinse, smooth vertical strokes with slight overlap, wipe the blade each pass, finish edges with a microfibre cloth.
- 🧴 Add-ons that help: Weekly vinegar or 1:1 isopropyl alcohol spray, optional hydrophobic coating, and steady ventilation to curb condensation.
- 🪠 Right tool, right fit: Choose flexible silicone or rubber blades, suitable width, angled handle, and store on a hook; replace at first nicks.
- 💡 Big payoff: Daily squeegeeing prevents buildup, cuts chemical use and scrubbing time, and keeps shower glass clear and streak-free.
Ask any British cleaning crew and they’ll tell you the same thing: a humble squeegee, used correctly, can halt soap scum for good. The trick isn’t a mystery product but a tiny shift in routine that defeats residue before it dries into cloudy film. The method takes under a minute after each shower and, when paired with a few low-cost tweaks, it can cut weekend scrubbing to near zero. Do it right and you’ll stop scum at the source, not chase it afterwards. Here’s the pro playbook—why it works, the exact strokes to use, and simple extras that keep glass pristine and sparkling without harsh chemicals.
Why Soap Scum Sticks and How a Squeegee Stops It
That stubborn haze is a marriage of body oils and soap surfactants with hard-water minerals. Once the water evaporates, calcium and magnesium bond with fatty acids, forming a tough, insoluble film. Over time, limescale roughens the glass surface, anchoring fresh grime faster. The key is beating evaporation. A squeegee wipes away the water layer—and the dissolved surfactants—before they crystallise. Remove the water, remove the problem. It’s physics and chemistry working together: lower contact time, lower residue, less scrubbing.
Cleaning crews emphasise timing. Glass stays warm after a shower, which speeds drying and mineral deposit formation. Swipe within 60 seconds of turning off the water to disrupt the film while it’s mobile. The blade’s edge shears water cleanly, reducing microscopic droplets where deposits form. Done daily, this simple act denies scum its foothold, preventing the cloudy buildup that makes enclosures look older than they are.
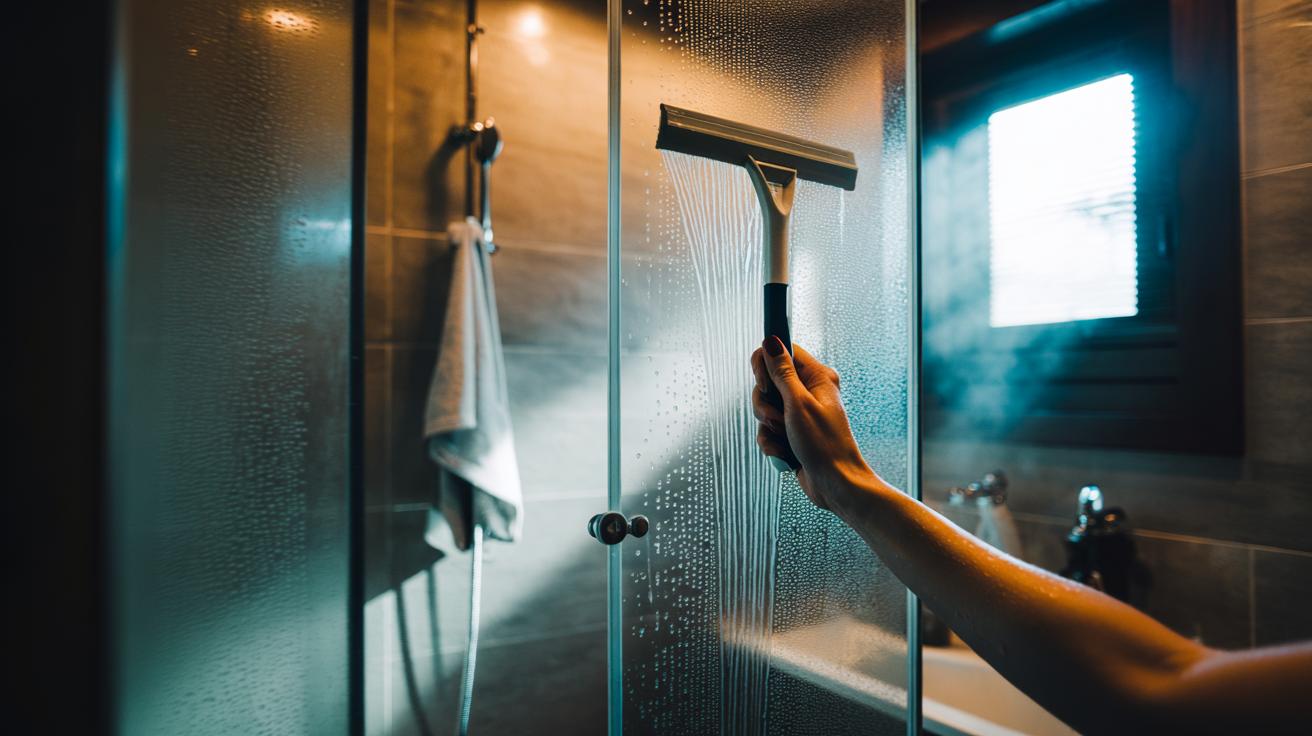
The Step-by-Step Squeegee Routine Cleaning Crews Swear By
Start with preparation. At the end of your shower, briefly rinse the glass with cool water to drop the temperature and reduce steam. If you’re in a hard-water area, a quick spritz once a week of a 1:1 white vinegar and water mix helps dissolve light deposits—leave for a minute, then rinse. Daily squeegeeing is still the backbone. No pressure, just steady contact lets the blade glide without chatter.
Technique matters. Place the squeegee at the top corner and draw one smooth vertical stroke to the sill. Overlap each subsequent pass by 1–2 cm to avoid tramlines. After every stroke, flick or wipe the blade edge on a cloth to keep it clean. Finish with a horizontal pass along the bottom edge to catch pooled water. Use a dry microfibre cloth to detail the handle area, hinges and seals where a squeegee can’t reach. Hang the tool so the blade doesn’t distort; a simple suction hook on the glass or tile keeps it handy. The whole routine takes about 30 seconds and slashes weekly cleaning time.
Add-Ons: DIY Solutions, Coatings, and Smart Storage
Professionals layer simple tactics for a belt-and-braces defence. For regular maintenance, a DIY spray of 1 part isopropyl alcohol to 1 part water with a drop of mild washing-up liquid cuts residue without streaks. Apply after squeegeeing, then buff with microfibre. For longer intervals between cleans, consider a hydrophobic barrier designed for shower glass. These coatings reduce surface energy so water sheets away, giving the squeegee less to pick up. Follow the label for curing times and ventilation. A good coating won’t replace your routine, but it will make every pass easier.
Storage and air flow are underrated. Keep a silicone-blade squeegee in the enclosure so the habit sticks; silicone resists nicks and won’t scratch glass. Improve ventilation by running the extractor fan during and for 20 minutes after showering, or cracking a window, to reduce condensation. In very hard-water regions, a compact inline softener or a no-rinse chelating shower spray used twice weekly can limit mineral spots. Small, consistent steps beat sporadic deep cleans every time.
Choosing the Right Squeegee for Your Bathroom
Selecting the correct tool increases success and speeds the job. Look for a flexible silicone or high-grade rubber blade that won’t chatter; stiffer blades struggle on curved doors. Blade width matters: narrow blades are nimble in tight enclosures, while wider models clear large panels quickly. Handles with a slight angle help maintain even contact, and replaceable blades extend lifespan. Stainless or powder-coated bodies resist rust in humid rooms. If it squeaks, you’re pressing too hard or the blade edge is worn.
| Blade Material | Ideal Width | Best For | Pros |
|---|---|---|---|
| Silicone | 25–30 cm | Most glass enclosures | Soft edge, quiet glide, gentle on seals |
| Natural Rubber | 20–25 cm | Compact doors, curved panels | Crisp wipe, good flexibility, affordable |
| Dual-Edge Replaceable | 28–35 cm | Large walk-in screens | Longer life, flips when worn |
| Telescopic Handle | 25–30 cm | Tall panels and roof lights | Safer reach, fewer missed spots |
Whichever you choose, pair it with a non-scratch hook and a dedicated cloth. Replace the blade at the first sign of nicks to avoid streaks. A comfortable grip keeps pressure even, and a matte finish resists slip with wet hands. The right squeegee turns a chore into a quick habit that protects glass clarity day after day.
Used the way professional crews do, the squeegee trick is a neat fusion of timing, technique and tiny daily effort. Combine a quick swipe with occasional vinegar maintenance, decent ventilation and a suitable blade, and you’ll keep soap scum and limescale from ever taking hold. You’ll save money on bottled cleaners, reduce faff, and keep your bathroom looking newly installed. Prevention is easier than cure, and it starts the moment the water stops. Which part of this routine will you adopt first, and what tweak could make it stick in your household every single day?
Did you like it?4.6/5 (20)