In a nutshell
- ✨ Why it works: White, non-gel toothpaste has fine silica abrasives that safely lift film from chrome; test first and avoid charcoal or harsh tartar-control formulas—aim for polishing, not scouring.
- 🧰 Tools and prep: A soft microfibre cloth, a pea-sized dab of toothpaste, warm water, and a soft brush/cotton buds; pre-wipe to remove grit, protect porous surfaces, and keep lighting good—use minimal product.
- 🔄 Step-by-step: Apply with light, circular motions and gentle pressure, work small sections, don’t let paste dry, rinse thoroughly, and buff dry; use a 1:1 vinegar pre-soak for stubborn limescale.
- 🔧 Aftercare: Daily dry wipe, a whisper of baby oil or silicone-free polish for beading, weekly spot-clean, monthly refresh; use non-abrasive cleaners on PVD, brushed, or satin finishes.
- ❌ Common mistakes: Gritty or coloured gels, scouring pads, mixing with bleach/descalers, and allowing residue in crevices—follow the rule: small dab, soft cloth, gentle pressure, full rinse.
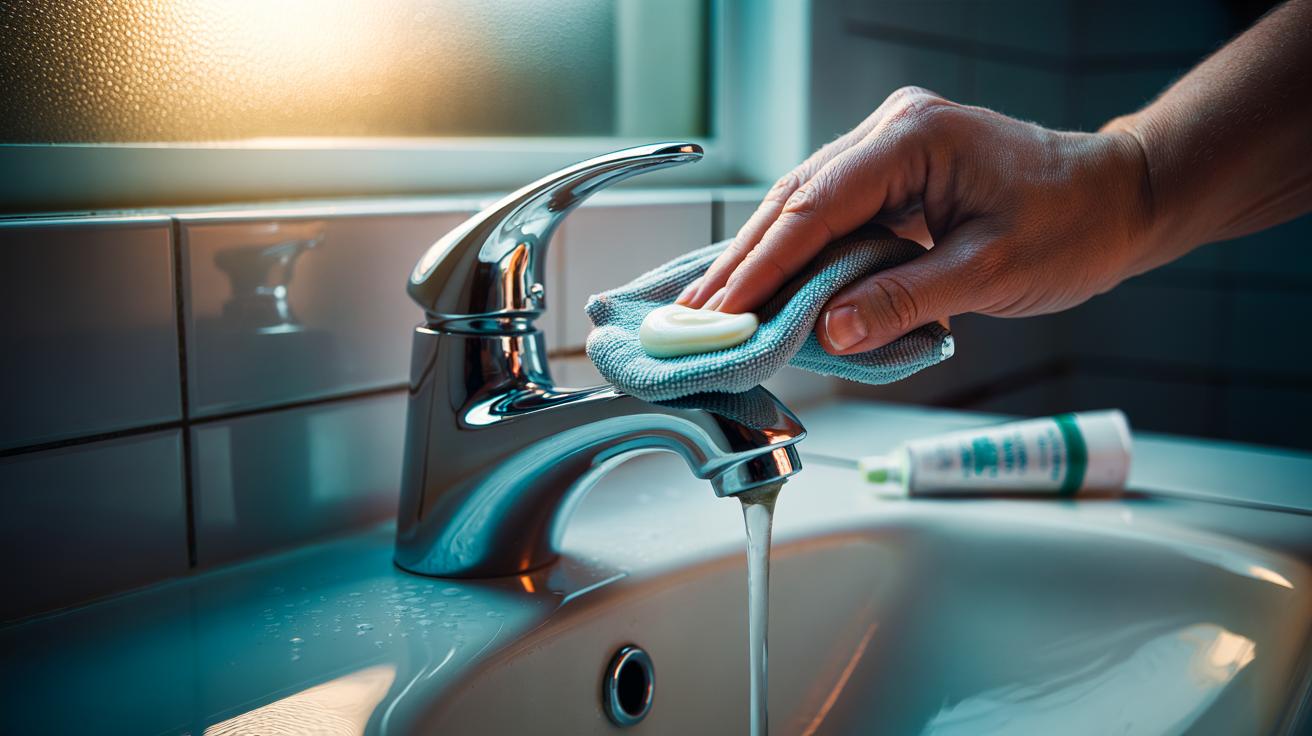
Chrome taps and shower fittings can lose their sparkle under a film of limescale and fingerprints, but you don’t need a cupboard of specialist products to revive them. A small household secret does the trick: a pea-sized smear of toothpaste. The paste’s mild polishing agents lift residue while leaving the plating intact, restoring that showroom gleam in minutes. With the right technique and a gentle touch, you can banish water spots, brighten handles, and freshen up your bathroom without fumes or faff. Used sparingly and wiped clean, toothpaste offers a quick, low-cost shine for polished chrome.
Why Toothpaste Works on Chrome
The science is elegantly simple. Standard white, non-gel toothpaste contains fine silica abrasives that gently buff away film without cutting into the thin layer of chrome. Surfactants lift oils and soap scum, while humectants keep the paste workable long enough to break down mineral deposits. That balance makes toothpaste effective on taps, spouts, and control knobs where grime sits on the surface. Always test on a discreet spot first to confirm compatibility with your specific finish, and avoid satin or brushed surfaces, where even mild abrasives can alter the texture.
Product choice matters. Pick a simple, white formula; avoid charcoal blends, heavy “tartar control” pastes, and bright gels that often lack useful abrasives or can stain sealant edges. Whitening toothpaste is acceptable, but choose one with a gentle rating and no coarse particles. Remember, the goal is controlled polishing, not scouring. If you can feel grit between finger and thumb, it’s too harsh for plated bathroom hardware. When in doubt, read the label and choose the mildest option.
Tools and Preparation
Set yourself up for a quick, clean result. You’ll need a soft microfibre cloth, a pea-sized dab of white, non-gel toothpaste, warm water, and a soft-bristled brush or cotton bud for tight creases. Wipe the fixture first with a damp cloth to remove loose dust that could scratch. If limescale is heavy, soften it with a brief warm-water soak before polishing. Mask adjoining porous materials, like unsealed stone, to prevent residue smears. Good prep prevents the tiny abrasives from dragging grit across the chrome and ensures an even, streak-free finish.
| Item | Why it helps | Notes |
|---|---|---|
| White, non-gel toothpaste | Mild polishing action | Avoid charcoal/heavy tartar-control formulas |
| Microfibre cloth | Lint-free application and buff | Use separate cloths for polish and final buff |
| Soft brush/cotton buds | Detail around seams | Gentle bristles only |
| Warm water | Rinse residue clean | Prevents streaking |
| Masking tape (optional) | Protects adjacent surfaces | Useful near stone or unsealed grout |
Keep a dry towel ready for the final buff. Ventilation isn’t critical here, but good lighting helps you spot lingering haze. Use only a pea-sized amount per tap—more paste creates mess without improving shine. With tools ready and surfaces prepped, you’re set for a swift, satisfying polish.
Step-by-Step Polishing Technique
Dampen a microfibre cloth and dot on a pea-sized amount of toothpaste. Working in small sections, massage the paste over the chrome using light, circular motions. Keep pressure gentle—let the fine abrasives do the work—and pass over water spots for 20–30 seconds. For creases around tap bases and screw collars, swap to a soft brush or cotton bud. Light pressure is essential; pressing hard risks marring thin plating. Allow a brief dwell of 30–60 seconds on stubborn marks, but don’t let the paste dry.
Rinse thoroughly with warm water, then wipe with a clean, damp cloth to lift any film. Finish by buffing dry with a fresh microfibre, moving in straight strokes to amplify the shine. Inspect under angled light; repeat on isolated spots if needed. If limescale persists, pre-soften with a 1:1 white vinegar and water dab, rinse, then re-apply toothpaste. Rinse until the surface squeaks under the cloth—residue causes streaks. The result should be a crisp, reflective lustre.
Aftercare and Common Mistakes
Once gleaming, protect the finish so you polish less often. After showers, a quick wipe with a dry microfibre cloth disrupts mineral build-up. A fingertip of baby oil or a silicone-free furniture polish, lightly buffed, adds a water-shedding sheen. Consider a weekly spot-clean with a damp cloth and a monthly toothpaste refresh if your area has hard water. Regular light maintenance beats occasional heavy scrubbing. If your fixtures are PVD-coated or labelled “brushed” or “satin”, stick to non-abrasive cleaners only.
Avoid common pitfalls. Don’t use coloured gels that can stain sealant lines, or gritty “natural” pastes that scratch. Skip scouring pads, wire wool, and powdered abrasives. Never mix toothpaste with bleach or harsh descalers; treat one product at a time. Don’t let paste dry on the metal or sit in crevices—residue dulls the finish and traps dirt. When in doubt, the safest rule is: small dab, soft cloth, gentle pressure, full rinse. That discipline preserves the plating and keeps the sparkle lasting longer between cleans.
A tiny dab of toothpaste offers a quick, thrifty route to mirror-bright chrome, especially on taps and shower fixtures that see daily use. The method is simple, the tools are basic, and the results are gratifying—provided you choose a mild paste, use light pressure, and rinse thoroughly. With a minute or two of careful polishing, water spots and fingerprints vanish, leaving a crisp reflection and a cleaner-looking bathroom. Shine thrives on small, regular habits rather than heroic effort. Which fixture will you revive first, and what personal tweaks—different cloths, a brief vinegar pre-soak, or an extra buff—will you add to perfect your finish?
Did you like it?4.5/5 (25)