In a nutshell
- 🧪 Understand the smudge problem: fingerprints are skin oils and salts that cling to the steel’s grain; identify hotspots like handles, dispensers, and control panels to break the cycle.
- 🧼 Clean correctly before protecting: use a microfibre cloth and wipe with the grain, wash with diluted washing-up liquid, rinse, then dry-buff; tackle grease with 70% isopropyl alcohol and avoid abrasives or bleach.
- 🧴 Seal the surface: apply a feather-light micro-film barrier—food-grade mineral oil, carnauba wax, or a polymer spray—to a cloth, then buff until dry for an invisible, smudge-resistant finish.
- ⏱️ Keep it simple: do a nightly 20-second dry buff, a midweek 50/50 water + IPA wipe on handles, and a weekend reseal; retire smearing cloths and maintain a “steel-only” set.
- 📊 Match method to location: use wax/polymer on high-touch handles, mineral oil near food areas, and lighter product on fingerprint-resistant finishes; aim for a lasting satin sheen that holds for 5–7 days.
Stainless steel dazzles under the kitchen lights. It also betrays every touch. One visit from jammy fingers or post-workout hands, and a gleaming fridge wears a map of the day. The fix isn’t endless wiping; it’s smarter preparation that stops the smudges from sticking in the first place. With the right clean, a near-invisible barrier, and a maintenance rhythm you can do in seconds, you can keep appliances looking showroom-fresh for days. The trick is subtle. Use light products, work with the grain, and eliminate the residue that attracts prints. The reward: fewer streaks, less effort, and a kitchen that looks quietly immaculate.
Understand What Causes Prints
Fingerprints are mostly skin oils, salts, and microscopic grime that latch onto metal. Stainless steel forms a thin chromium oxide layer which resists rust, but it is not immune to smudges. The brushed “grain” creates valleys where oils sit. Heat and steam from kettles or dishwashers soften residues on doors and handles, making them tackier and more receptive to new marks. Spritzed cooking oils drift farther than you think. They settle invisibly, then amplify every touch. The cleaner the surface, the fewer places prints can cling.
Not all finishes behave the same. Glossy steel highlights smears; matte or “fingerprint-resistant” coatings diffuse them. Household rhythm matters too. Busy mornings stack contact points at the handle edges, water dispensers, and control panels. Map your hotspots. If you can target those, you can break the cycle. The goal isn’t perfection; it’s a controlled surface that quietly repels new marks long enough to carry you through the week.
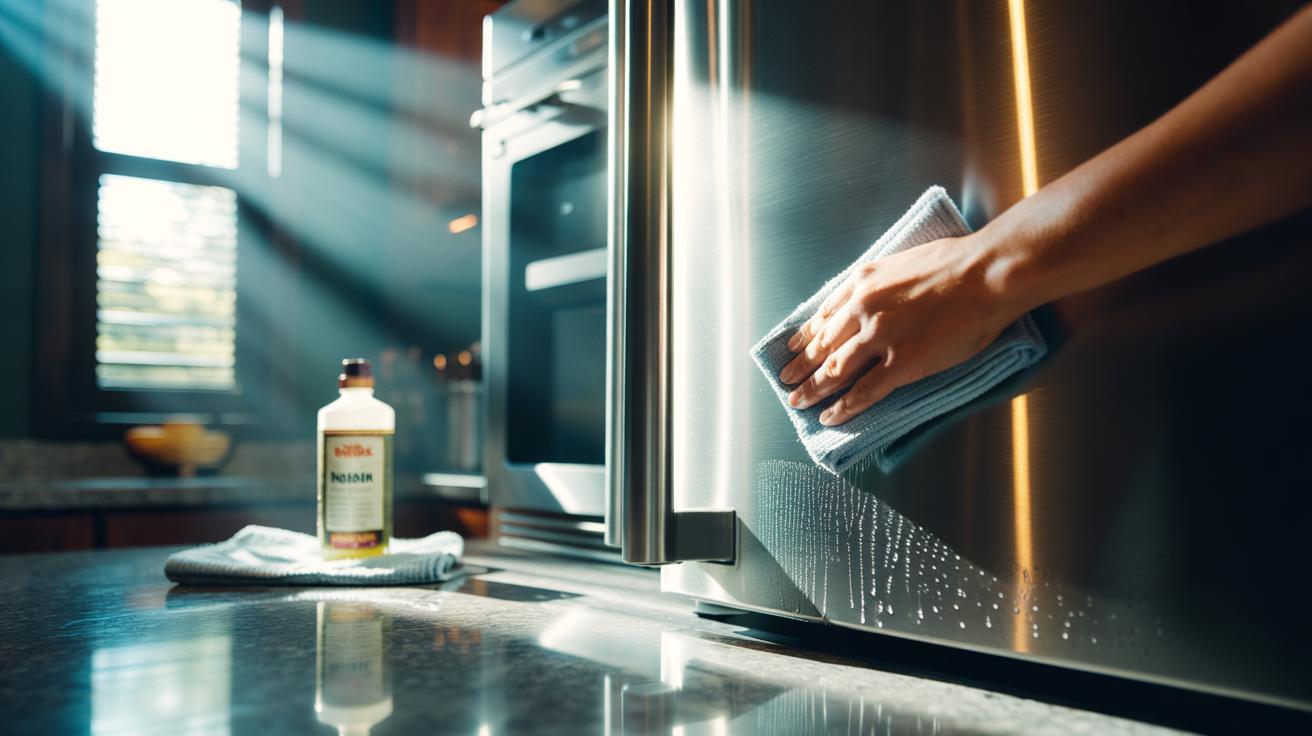
Clean Properly Before You Protect
Start dry. Sweep a clean microfibre cloth along the grain to lift dust and crumbs that would otherwise scratch. Then mix warm water with a drop of washing-up liquid, wring the cloth almost dry, and wipe in long, straight passes. Rinse the cloth, wipe again with plain water, and immediately buff with a second, dry microfibre. Streaks vanish when water doesn’t linger. For greasy zones, use 70% isopropyl alcohol on a cloth and chase it with that dry buff. Edges, handles, and touchscreens need a gentle touch and minimal moisture.
Avoid chlorine bleach, scouring powders, and abrasive pads that can dull the finish. Vinegar cuts mineral haze, but keep it mild and off rubber gaskets. Always work with the grain, never in circles. If your cloth drags, it’s still dirty; refresh to a clean side. This meticulous reset is crucial. You’re removing not just prints but the hidden film that invites new ones. Once the steel is squeaky-clean and dry, you’re ready to make it last.
Seal With a Micro-Film Barrier
Now lock the clean in. A feather-light micro-film barrier stops oils from anchoring. Use food-grade mineral oil for general doors, or a carnauba-based polish for tougher longevity on non-food-contact panels. Stainless-specific polymer sprays also work well. Apply a tiny dab to a soft cloth—less than a pea-sized amount per door—and stroke with the grain. Wait a minute, then buff briskly with a fresh microfibre until the surface feels dry, not slick. Do not pour directly on the metal. Over-application attracts dust and smears.
| Method | Lasts Up To | Food-Safe Nearby | Finish | Notes |
|---|---|---|---|---|
| Food-grade mineral oil | 3–5 days | Yes | Satin, natural | Use sparingly; rebuff midweek. |
| Carnauba wax polish | 5–7 days | Not on food-contact | High sheen | Great for doors; avoid hobs. |
| Polymer stainless spray | 4–6 days | Check label | Even, low-gloss | Quick, consistent results. |
| Alcohol wipe, then buff | 1–2 days | Yes | Neutral | Good reset; not a seal. |
One pass too many leaves haze; two perfect passes leave resilience. Handles benefit most from a wax or polymer because of constant contact. For hobs and fridges near food prep, stick to mineral oil or stainless sprays marked food-safe. Invisible is the aim, not glossy. When your cloth glides and the steel looks quietly crisp, you’ve nailed the barrier.
Establish a Maintenance Routine That Lasts
Keep it frictionless. Hang a clean microfibre on a hook by the fridge. Each evening, give hotspots a 20-second dry buff. Midweek, spritz a cloth with a 50/50 mix of water and isopropyl alcohol, wipe the handles, then rebuff. On the weekend, refresh the protective layer—minute work, maximum payoff. Consistency beats intensity. You’re topping up a film, not starting from scratch.
Watch for cues. If water no longer beads on the surface, reseal. If a cloth begins to smear, retire it; detergents and fabric softeners can leave residues that undo your efforts. Keep a “steel-only” cloth set. Homes with little hands may need a Wednesday top-up; a two-adult household can cruise to Saturday. If your appliance has a fingerprint-resistant finish, reduce product and rely on the dry buff; heavy coatings can look patchy. The aim is simple: swift, repeatable steps that preserve that steady, just-cleaned look for days.
With the right reset, a whisper-thin shield, and a habit you barely notice, stainless steel stops shouting about every touch and starts doing what it does best—reflecting light and calm. The nicest surprise is the time you win back. No frantic polishing before guests. No streak-chasing under spotlights. Just a subtle, sustained sheen. Ready to build your own three-step rhythm—clean, seal, quick buff—and see how long you can stretch that pristine finish in your kitchen this week?
Did you like it?4.6/5 (22)