In a nutshell
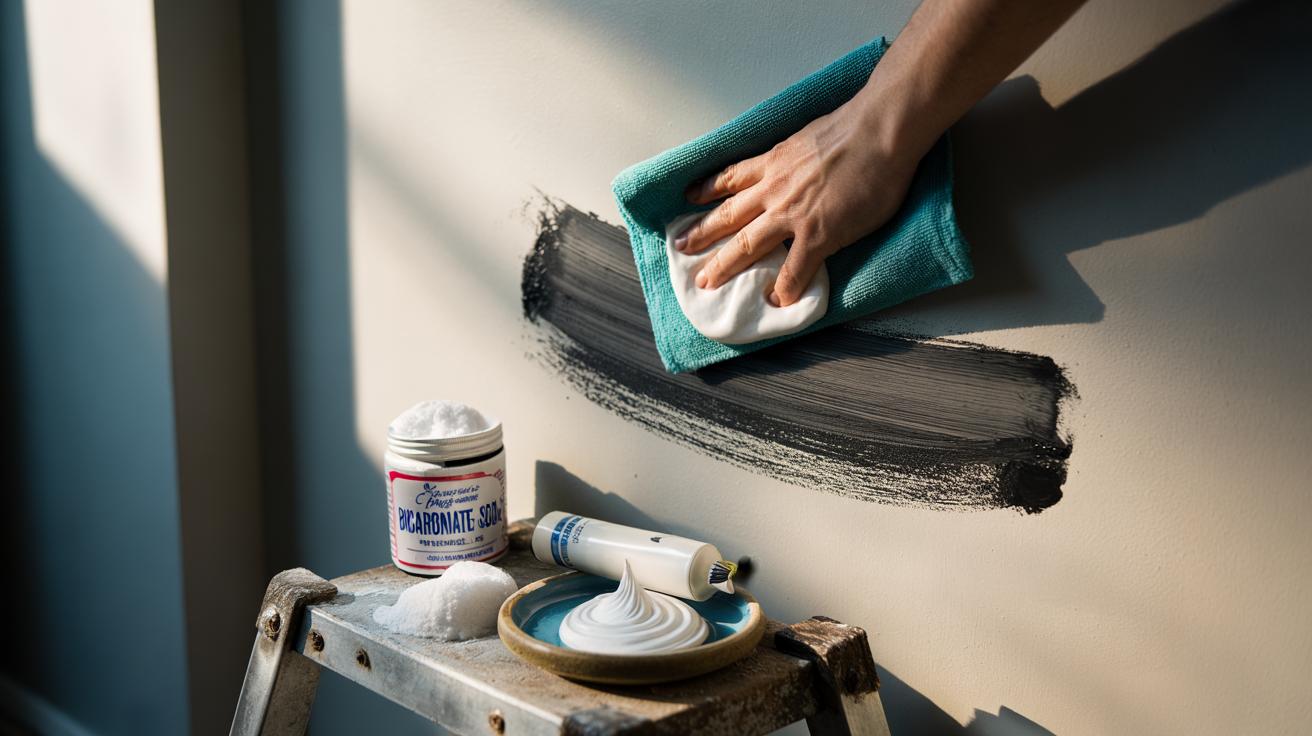
- 🧴 Use a two-ingredient paste of bicarbonate of soda and white, non-gel toothpaste to lift permanent marker with gentle, controlled abrasion.
- ⚖️ Mix in a 1:1 ratio to a thick, clingy consistency; adjust with tiny additions to avoid runny or crumbly paste.
- 🧽 Apply lightly for 10–20 seconds, then wipe and check; repeat brief passes as needed, using a microfibre cloth or soft toothbrush for texture.
- ⚠️ Spot-test first and avoid matte/chalk paints, delicate wallpapers, and uncured paint; rinse thoroughly and never let the paste dry on the wall.
- 🧰 Best on satin, eggshell, and gloss surfaces; for stubborn remnants on hardy gloss, a cautious dab of isopropyl alcohol can finish the job.
Few domestic mishaps are as dispiriting as a bold line of permanent marker on a freshly painted wall. Yet there’s a fast, low-cost remedy hiding in most bathrooms and baking cupboards. This article reveals the two-ingredient paste that lifts ink in seconds, why it works, and how to use it without harming your paint. The best part? It’s gentle, quick to rinse, and needs no specialist kit. Always spot-test on an inconspicuous patch first, then follow the simple method below. With a light touch and the right ratio, you’ll restore walls to their former glory—and avoid the smudging and dull patches that harsher solvents often leave behind.
Why This Two-Ingredient Paste Works
The magic lies in pairing bicarbonate of soda (baking soda) with white, non-gel toothpaste. Together they form a controllable, mildly abrasive paste that gently shaves down the marker’s pigment layer while surfactants in the toothpaste loosen the ink’s oily binders. Bicarbonate crystals provide micro-scrub power without the gouging risk of scouring powders, and toothpaste brings humectants that keep the paste workable long enough to act. Used correctly, the action is mechanical rather than harshly chemical, which explains why the method is kinder to typical UK wall paints than aggressive solvents.
Permanent marker inks rely on fast-drying solvents and resilient dyes to bond with paint films. This paste targets that bond on the surface: the paste grips pigment, the gentle abrasion disrupts it, and a damp wipe then pulls the coloured residue away. The result is quick lift-off with minimal gloss burnishing, especially on satin and eggshell finishes where a slight sheen survives light polishing. Crucially, you control pressure and contact time, keeping the risk of dull spots low.
What You Need and How to Mix It
Gather a tube of white, non-gel toothpaste (standard fluoride paste is fine), a small pot of bicarbonate of soda, a microfibre cloth, cotton swabs for tight corners, and a soft damp cloth for rinsing. Avoid whitening pastes packed with harsh abrasives or microbeads, and skip coloured gels that can stain. Freshly mixed paste works best; don’t pre-make large batches because it dries and loses glide.
Use a 1:1 ratio: one teaspoon of toothpaste to one teaspoon of bicarbonate. Blend on a saucer with a spoon until smooth and thick—think soft putty that clings to the wall without running. If it feels dry or crumbly, add a pea-sized dab more toothpaste; if it’s too loose, dust in a pinch more bicarbonate. Consistency matters: a paste that holds to the ink line concentrates action on the stain rather than spreading across clean paint.
Step-by-Step: From Scribble to Clean Wall
First, spot-test the paste on a hidden area and check for sheen change after drying. If the finish looks unaffected, dab a lentil-sized amount directly onto the marker line. Using a fingertip wrapped in a microfibre cloth, massage in small, light circles for 10–20 seconds. You’re aiming for patient polishing, not pressure. Wipe with a clean, damp cloth to remove the slurry and inspect. Most lines fade dramatically at once; heavier strokes may need a second pass.
For textured paint, apply with a soft toothbrush and feather-light strokes so bristles reach the recesses. On skirting boards or doors with gloss or eggshell, the paste works even faster; reduce contact time to prevent over-polishing. Never let the paste dry on the wall. Rinse thoroughly, then buff with a dry cloth to blend any slight sheen difference. If a ghost shadow remains, repeat briefly, then stop; persistent shadows usually sit within the paint film and are better disguised with touch-up paint.
Safety, Surfaces, and Common Mistakes
Always test before a full application—especially on matte, ultra-flat, or chalk finishes, which show polishing more readily. The paste is generally safe on satin, eggshell, silk emulsions, semi-gloss, gloss woodwork, tiles, and melamine. Avoid delicate wallpapers, raw plaster, and recently painted walls (under 30 days) where the film hasn’t cured. Keep strokes light and brief; heavy scrubbing can create a shiny halo. Do not mix this method with bleach or ammonia-based cleaners, and rinse cloths well between passes to prevent redepositing ink.
Other slip-ups include using dyed gel toothpaste that adds colour, letting paste sit too long, or chasing perfection after the mark has already blended to “good enough.” If a small residue remains on a hardy gloss surface, a dab of isopropyl alcohol on a cotton swab can finish the job—test first and keep it away from matte walls. The guiding rule is minimal force, short contact, thorough rinse.
Quick Reference: Ratios, Timing, and Surfaces
Keep this guide handy so you can work efficiently and safely. The table summarises proportions, dwell time, and where the paste excels or should be avoided. When in doubt, shorten contact time and reduce pressure. A clean rinse and gentle dry buff help blend the finish so the repaired spot is invisible from normal viewing distance.
| Item | Recommendation |
|---|---|
| Ingredients | 1:1 bicarbonate of soda + white, non-gel toothpaste |
| Consistency | Thick, spreadable paste that clings; not runny or crumbly |
| Contact Time | 10–20 seconds per pass; wipe and check between passes |
| Tools | Microfibre cloth, cotton swabs; soft toothbrush for textured paint |
| Best On | Satin/silk emulsion, eggshell, semi-gloss, gloss woodwork, tiles |
| Avoid/Use Caution | Matte/chalk paints, delicate wallpapers, uncured fresh paint |
| Clean-Up | Damp wipe to remove residue; dry buff to blend sheen |
For large marker areas, work in small sections, refreshing the paste as you go. If the wall’s sheen changes, stop immediately and reassess; sometimes a briefer, lighter second pass is all that’s needed. Store neither paste nor mixed cloths; make fresh each time for consistent results.
With a calm hand and the right mix of bicarbonate of soda and white toothpaste, most rogue marker lines vanish in under a minute, leaving your paint intact and your nerves unruffled. This method is frugal, child-safe once rinsed, and relies on control rather than caustic chemistry. The key is to go gently, test first, and stop as soon as the mark is gone. Have you got a tricky surface—or a stubborn colour—that you’re nervous to tackle with the paste, and what’s stopping you from trying a careful test patch today?
Did you like it?4.6/5 (29)