In a nutshell
- 🧊 Use the frozen vinegar cube hack to deliver a slow melt that targets grout lines, lifting soap scum and light limescale without scrubbing.
- 🧪 Science in brief: 5% acetic acid dissolves alkaline residues, while the cold extends dwell time and improves capillary action for cleaner joints with less run-off.
- 🧰 Method: Freeze neat or 1:1 vinegar, glide along grout, leave 5–10 minutes, then rinse and wipe; add lemon peel for scent or a bicarbonate sprinkle post-dwell.
- ⚠️ Safety: Never mix vinegar with bleach; avoid natural stone, patch-test coloured grout, and limit frequency to protect cementitious grout (epoxy is more resistant).
- 🗓️ Maintenance and fixes: Use monthly (fortnightly in hard-water areas), seal grout annually, and troubleshoot soap film, iron staining, efflorescence, or mouldy silicone with targeted steps.
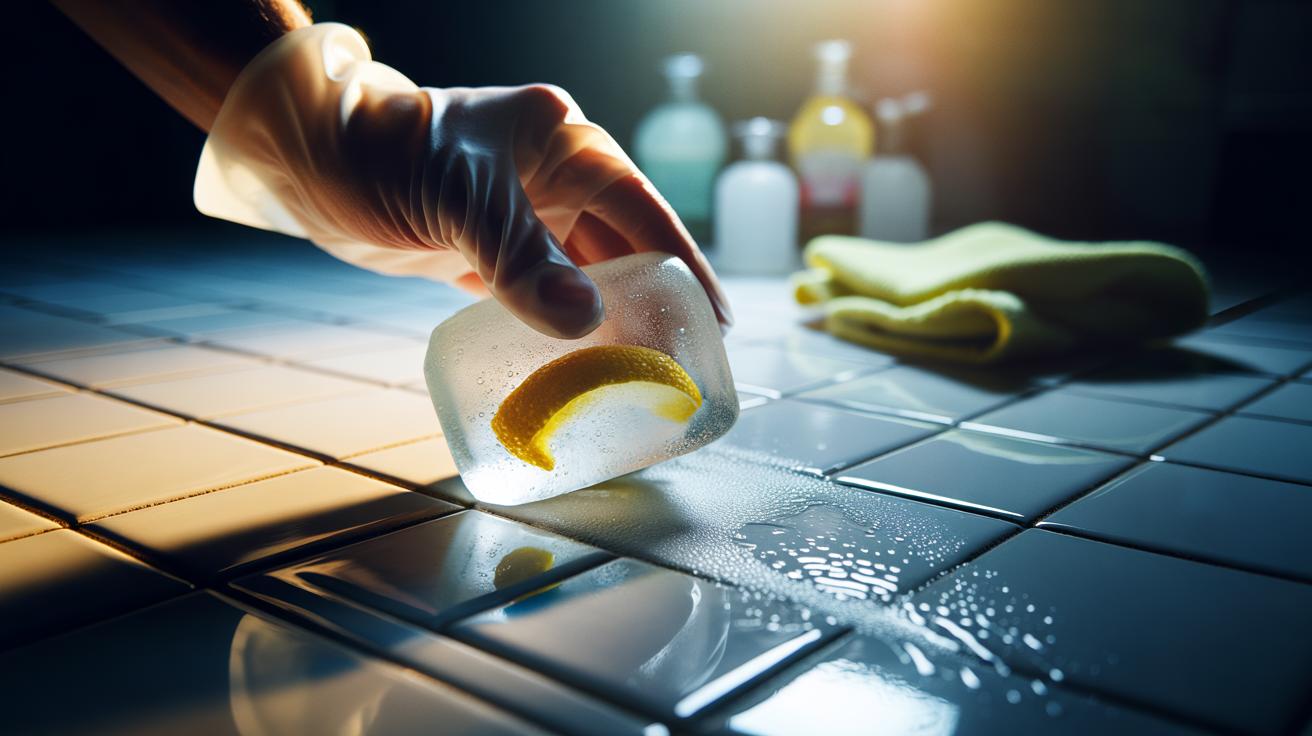
It sounds like a hack, yet the frozen vinegar cube is a quietly brilliant way to refresh tired grout lines without scrubbing. By freezing ordinary white vinegar, you turn a runny liquid into a slow‑melt stick that hugs the narrow channels between tiles. As it glides, it releases just enough acid to lift soap scum, water marks, and light limescale, while the cold tempers any strong odour. The result is controlled cleaning with minimal effort and no abrasive action. Below, I explain the science, a simple method you can copy this evening, and the crucial safety notes that ensure your grout remains intact and your tiles stay pristine.
Why Freezing Vinegar Works on Grout
The secret is chemistry and contact time. White vinegar contains acetic acid, typically around 5%, which dissolves mineral deposits and cuts through alkaline residues that dull grout. When you freeze it, you create a solid applicator that slows the melt, extending the dwell time exactly where you need it—inside porous grout channels. The cube’s edge naturally tracks along straight lines, delivering a targeted film that doesn’t flood the surrounding tiles.
Temperature adds a second advantage. A chilled surface slightly contracts grime and soap residues, encouraging the acid to penetrate. Because the melt is gradual, there’s less run-off and better capillary action. Keep contact time short—five to ten minutes is usually enough for routine soil. After that window, the benefits plateau and the risk to cementitious grout rises. Used sensibly, the approach produces a brightening effect and clearer joints, particularly on light-coloured grout that shows every watermark.
Step-By-Step: The Frozen Vinegar Cube Method
Fill an ice tray with distilled white vinegar—use it neat for heavy soap scum, or dilute 1:1 with water for routine upkeep and sensitive grout. If you want a handle, lay cocktail sticks across the tray before freezing. Once solid, pop out a cube, don gloves, and run the edge along the grout lines, letting the melt trace a glossy ribbon. Re-wet any dry patches with another pass, then leave to dwell for 5–10 minutes. Avoid puddling; thin, even coverage cleans best. Finish by rinsing with warm water and wiping with a microfibre cloth to lift dissolved residues. For lingering odour, a light sprinkle of bicarbonate of soda after the dwell will gently fizz; rinse again. If staining persists, repeat in short sessions rather than extending contact time.
For shower grout, do this after bathing when the room is warm and humid—the moisture aids penetration. To mask the vinegar scent, freeze a strip of lemon peel in one or two cubes; it perfumes without meaningfully altering performance.
| Item | Recommendation |
|---|---|
| Vinegar strength | Neat for heavy buildup; 1:1 with water for maintenance |
| Freeze time | 4–6 hours (standard freezer) |
| Dwell time | 5–10 minutes; up to 15 for stubborn spots |
| Rinse | Warm water + microfibre wipe |
| Extras | Optional lemon peel; bicarbonate sprinkle after dwell |
Safety, Surfaces, and Sensible Frequency
Never mix vinegar with bleach or hydrogen peroxide—that can create hazardous gases or peracetic acid. Ventilate, wear gloves, and protect nearby metal trims that can tarnish in acid. Vinegar is suitable for glazed ceramic and porcelain tiles, but do not use on natural stone—marble, limestone, and travertine will etch. Test an inconspicuous spot first if you’re unsure of the surface. Cement-based grout can be slowly weakened by frequent acid exposure, so keep contact short and rinse thoroughly. Epoxy grout is more resistant, yet the method is still about timing, not intensity.
As a rule, deploy frozen cubes monthly for maintenance, or fortnightly in hard-water areas with noticeable limescale. Seal cementitious grout once or twice a year; sealed grout resists staining and requires fewer acidic treatments. Post-clean, squeegee shower walls and run the extractor fan to curb mould regrowth. For dyed or coloured grout, check colourfastness during your patch test, as prolonged acid contact can lighten some pigments.
Troubleshooting Stains and Boosting Results
Grey film after cleaning usually signals soap residue: repeat with neat vinegar cubes and extend dwell by two minutes, then rinse thoroughly. Orange or brown marks point to iron deposits—focus the cube passes and consider a second short cycle rather than one long soak. Black mould in silicone seams isn’t true grout staining; the vinegar cube can brighten the area, but mould hyphae inside silicone may persist. In that case, replace the bead or use a mould-specific product on the sealant only. Efflorescence (powdery white bloom) responds well to brief acidic contact, but if it returns repeatedly, investigate moisture ingress.
When tiles look clean but grout still appears blotchy, you’re likely seeing uneven sealing or embedded pigment. A professional steam clean followed by colour-sealing can restore uniformity. If you smell strong odour or see fizzing after previous chemical use, stop and rinse—unknown residues may be reacting. Keep a photo log of results to judge frequency and avoid over-treating.
Used judiciously, the frozen vinegar cube technique offers a low-effort route to brighter joints and fresher bathrooms, all while keeping harsh abrasives off delicate surfaces. It’s quick to make, cheap to deploy, and ideal for busy households who want visible results with minimal elbow grease. Pair it with regular ventilation and an occasional grout seal, and maintenance becomes a calm, five-minute ritual rather than a weekend chore. Ready to turn a tray of ice into a cleaning kit—what surfaces in your home would you test first, and how might you tailor the dwell time to match your grout’s condition?
Did you like it?4.5/5 (26)