In a nutshell
- 🌬️ Drive out moisture with warm air and convection; a constant exchange through eyelets and collars pushes humidity from heel to toe box faster than high heat alone.
- 🧰 Channel flow smartly: hold the dryer 15–25 cm away, remove insoles, loosen laces, and use a concentrator or a simple tube to reach deep while keeping vent paths open.
- 🛡️ Protect materials by prioritising airflow over temperature; keep the dryer moving on low or medium heat to avoid damaging leather, knits, or softening adhesives.
- ✅ Verify dryness with a tissue test, weight drop (about 20–60 g), or a pinless moisture meter; finish with cool air to purge humidity and prevent odours.
- ⚙️ Use spacers to create interior air voids, try hands‑free pulsed drying, and remember: airflow first, heat second for quick results without warping or delamination.
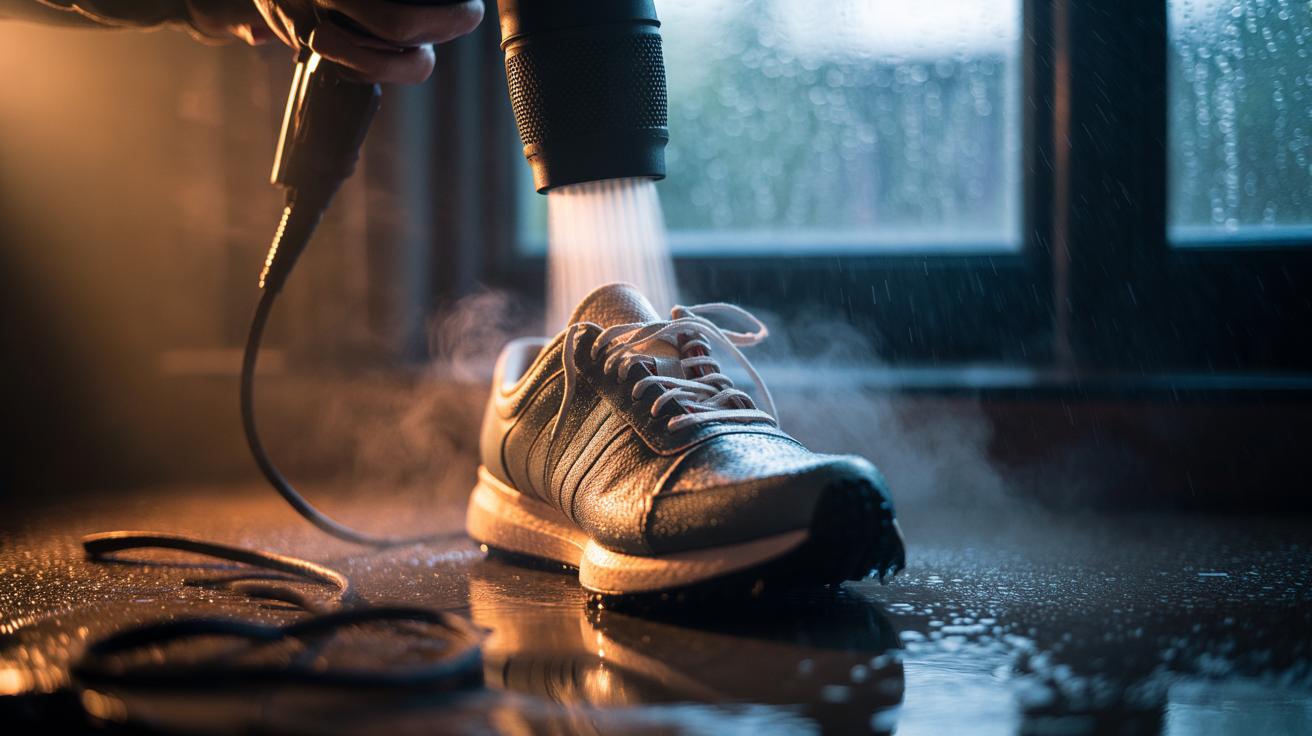
The humble hairdryer is a surprisingly effective tool for reviving rain‑soaked trainers and leather brogues. The trick is not brute heat, but getting warm air to circulate deep into the shoe’s cavities where moisture hides. When done well, you accelerate evaporation, disperse humid air, and avoid that next‑day squelch. Done poorly, you risk warped leather, delaminated soles, or melted adhesives. This guide explains how warm air actually reaches the insides, how to aim it precisely, and how to balance speed with safety. Controlled airflow, not maximum temperature, is the secret to fast, even drying.
How Warm Air Reaches the Toe Box
Inside a wet shoe, damp fabric and padding trap liquid water and saturated air. A hairdryer creates a pressure difference that pushes warm, drier air in and expels humid air out via lace eyelets, ankle collars, and stitching gaps. This is classic convection: heat energises water molecules, raising the vapor pressure gradient so moisture escapes from fibres into the moving airstream. The narrow throat of many shoes also speeds the flow slightly, helping purge moisture pockets. What dries the shoe fastest is a constant exchange of air, not blasting one hot spot.
Because air cools as it travels, the temperature at the toe box is usually much lower than at the dryer nozzle. That drop is useful: it reduces the chance of heat damage while still elevating the dew point enough to keep evaporation humming. Aim to create a steady breeze that enters through the collar and exits through vents or eyelets. Always keep a pathway for moist air to escape.
Positioning and Tools to Channel Air Inside
Hold the dryer 15–25 cm from the opening and angle it so air sweeps along the insole, not directly into one spot. Remove insoles and loosen laces to open channels. A narrow concentrator nozzle increases velocity, helping the stream reach the toe box and bounce off interior surfaces. For deep trainers or boots, a simple duct—like a cardboard tube or rolled magazine—can carry warm air down the throat while leaving gaps for exhaust. Direct the flow in, but leave exits for humidity to escape.
You can rig a hands‑free setup by resting the shoe on its side and placing the dryer on a stable stand, then pulsing heat on low or medium settings. Swap shoes every few minutes to keep heat distribution balanced. To target stubborn zones, insert a breathable spacer (mesh, a perforated plastic ball, or a balled‑up mesh laundry bag) that creates air voids for circulation. Even spacing inside the shoe beats raw heat for speed.
Safety and Material Care When Using a Hairdryer
Different uppers and adhesives tolerate different heat. Leather can darken or stiffen if overheated; mesh and knits can shrink or distort. Keep the dryer moving, default to low or medium heat, and prioritise airflow over temperature. If the surface feels too hot to touch comfortably for more than a second, increase distance or switch to a cooler setting. Heat damage is cumulative—short, cooler passes add up to a safe, quick dry. Deodorise by ensuring complete dryness; lingering moisture feeds bacteria and odour.
| Shoe Material | Dryer Setting | Nozzle Distance | Typical Time per Shoe | Notes |
|---|---|---|---|---|
| Leather | Low heat | 20–30 cm | 20–35 min | Condition after drying; avoid hot spots. |
| Synthetic Mesh/Knits | Low–medium | 15–25 cm | 15–25 min | Use airflow; remove insoles. |
| Suede/Nubuck | Cool–low | 25–35 cm | 25–40 min | Brush nap after drying; avoid glossing. |
| Boots (lined) | Low–medium | 20–30 cm | 30–50 min | Use tube duct; open tongue fully. |
If adhesives are softening or surfaces wrinkle, stop and let shoes cool before continuing. For delicate finishes, interleave short drying cycles with rest periods to protect structure and colour.
Testing Dryness and Avoiding Odours
Don’t trust the outer surface alone. Slip a dry tissue deep into the toe box for 30 seconds; if it emerges damp or cool, keep drying. Weighing shoes before and after gives a precise check: a 20–60 g drop typically signals success for everyday trainers. If available, a cheap pinless moisture meter against the insole area reveals hidden damp. Dry means uniformly warm to the touch and stable in weight.
To prevent odours, finish with two minutes of cool airflow to purge humid air, then let shoes rest in a ventilated spot. Add a sprinkle of baking soda or insert cedar shoe trees to absorb residual moisture and maintain shape. For repeat soakings, alternate pairs so foam midsoles fully dry between uses. Complete drying disrupts bacterial growth and keeps materials resilient, preserving comfort and extending the life of your footwear.
Used thoughtfully, a hairdryer is a fast, targeted drying system that leverages airflow, temperature control, and vent paths to chase moisture from heel to toe. By opening channels, guiding the stream, and keeping heat modest, you can dry shoes quickly without warping leather or loosening glue. Add quick tests to confirm dryness, and your trainers will smell fresher and last longer. The smart move is airflow first, heat second. What simple tweak—nozzle choice, spacing, or testing—will you try next time to get warm air deeper inside your wet shoes?
Did you like it?4.3/5 (21)