In a nutshell
- 🔥 Heat softens pressure-sensitive adhesives (PSA), nudging them toward their glass transition temperature (Tg) so labels peel cleanly instead of shredding.
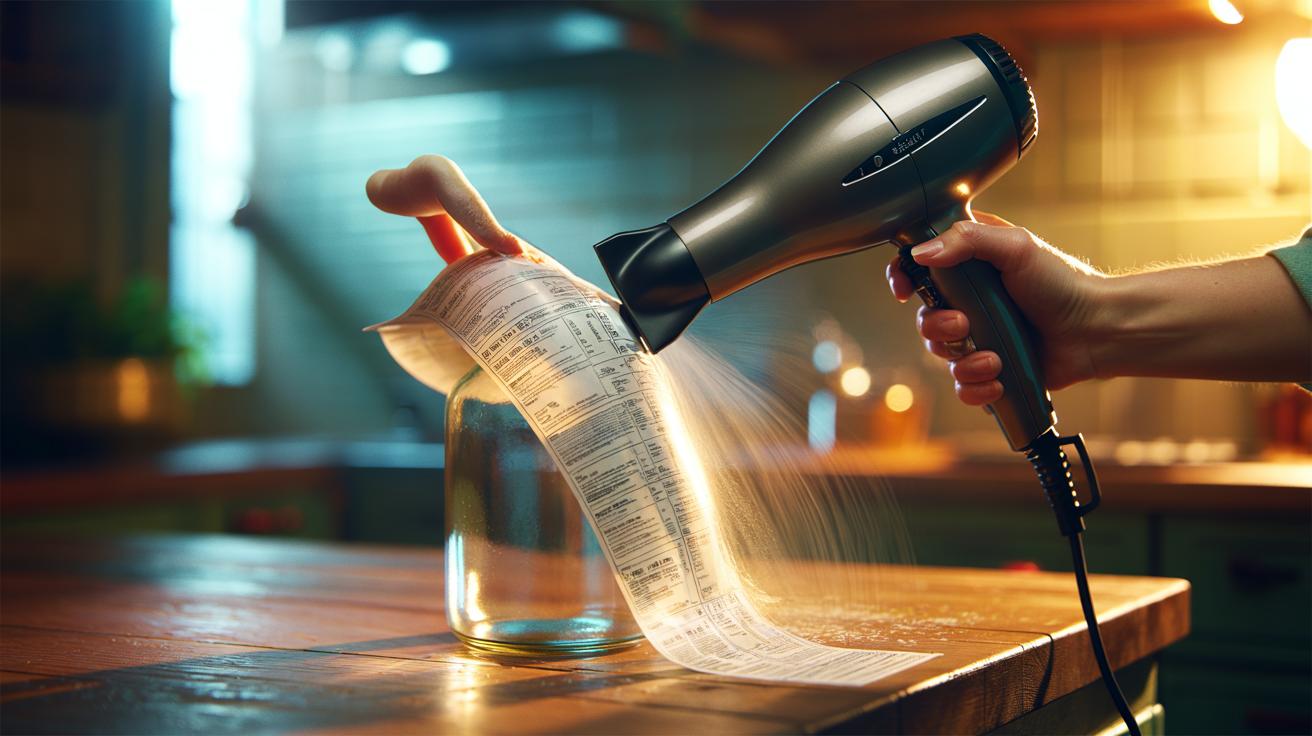
- 🛠️ Safe method: set hairdryer to medium, keep it 8–12 cm away, move continuously, and peel at a 20–30° angle; reheat briefly if resistance returns.
- 🧪 Surface guidance: glass, ceramic, metal handle heat well; use low–medium settings on ABS/PP plastics, and be cautious on painted wood and automotive paint.
- 🧴 Cleanup tips: after lifting, warm any haze and roll it off with a microfiber cloth or plastic scraper; for stubborn spots, apply a dab of isopropyl alcohol or citrus-based remover away from seams.
- 🧰 Troubleshooting: if residue smears, add a touch more heat and use a plastic card at a shallow angle; avoid overheating, hot air into vents, and strong petroleum solvents on delicate finishes.
Sticker residue on glass jars, laptop lids, and new crockery can feel stubbornly permanent, but a household hairdryer turns a tedious scrape into a tidy, two-minute job. Controlled heat softens pressure-sensitive adhesives, loosening their grip so labels peel away in satisfying sheets rather than shredding into fluff. The trick is less brute force and more chemistry: warming the glue so it becomes pliable, then lifting it cleanly. Apply gentle, even heat and keep the dryer moving to protect finishes on plastic, paint and wood veneers. With a touch of patience—and the right angle of pull—you’ll preserve surfaces, save time, and avoid the smell of solvent taking over your kitchen.
How Heat Loosens Sticky Bonds
Most modern labels use a pressure-sensitive adhesive (PSA) built from polymer chains and tackifying resins. When cold, those chains are semi-rigid, gripping surface pores and microscopic texture. Add warmth and you nudge the glue towards its glass transition temperature (Tg), softening the bond. The adhesive becomes rubbery, flowable, and less tenacious, allowing the label to detach without tearing fibres or leaving a grey smear. The goal is to soften the adhesive, not scorch the surface, so steady, moderate heat is the sweet spot. Think pliable chewing gum, not bubbling caramel.
Plasticisers within the adhesive respond quickly to a hairdryer’s airflow, loosening internal friction and lowering viscosity. That changes how the label distributes stress: instead of resisting, it stretches and releases. Heat also defeats “cold flow,” the creep that makes residue smear under a fingernail. By warming first and peeling at a shallow angle—about 20–30 degrees—you reduce shearing force. Finish by rolling remaining sticker residue into little beads with a thumb or a soft cloth while it’s still warm.
Step-by-Step: Using a Hairdryer Safely
Start by cleaning dust from the area; grit can scratch when you rub. Set the hairdryer to medium and hold it 8–12 cm from the label. Sweep in slow arcs for 30–45 seconds, warming both the sticker and the surface beneath. Test a hidden spot first on painted or lacquered finishes. Try a corner lift: if it rises smoothly, keep gentle tension and peel low and slow. If it snags or tears, pause, reheat for 20–30 seconds, and resume. Avoid concentrating heat on one point for too long.
Once the main label is off, reapply brief heat to any haze. Roll residue away with a microfiber cloth or a plastic scraper—never metal on delicate surfaces. On glass or stainless steel, a little cooking oil can help lubricate the rub-off phase after warming. Stop immediately if you smell scorching, see discolouration, or the surface feels too hot to touch comfortably. Patience beats power: two or three short heating cycles are better than one overheated blast.
Materials and Surfaces: What Works and What to Avoid
Glass, ceramic, and metal handle heat well, making them ideal candidates for the hairdryer technique. Plastics vary: ABS and polypropylene are relatively robust, while thin vinyl and low-grade acrylic can warp or cloud. Painted timber, veneered MDF, and automotive clear coats demand caution. When in doubt, use the lowest effective heat and keep air moving. The table below offers rough guidance; your specific item may behave differently depending on thickness, finish quality, and age.
| Surface | Approx. Heat Setting | Notes |
|---|---|---|
| Glass/Ceramic | Medium–High | Tolerant; safe to warm for 60–90 seconds. |
| Stainless Steel | Medium | Keep dryer moving to avoid heat spots. |
| Hard Plastics (ABS, PP) | Low–Medium | Short bursts; check for softening. |
| Painted Wood/Veneer | Low | Test first; finishes can blister. |
| Automotive Paint | Low–Medium | Best outdoors; lift slowly to protect clear coat. |
If a label straddles seams or textured plastic, warmth helps but may not fully release adhesive trapped in recesses. Reheat and massage the residue with a cloth edge. For electronics, avoid directing hot air into vents; shield with a card while warming the sticker itself. Do not use heat on temperature-sensitive films like shrink-wrap or low-melt vinyl. A careful, staggered approach preserves both the finish and your patience.
Troubleshooting and Alternatives
If residue smears rather than beads, you likely need either a fraction more heat or a better angle. Reheat for 15–20 seconds, then use a plastic card to push at a shallow angle while pulling the label back on itself. Stubborn acrylic adhesives on safety stickers may require a warm-up followed by a dab of isopropyl alcohol on a cloth, keeping liquids away from seams. Always start with the least aggressive method—heat, then mild mechanical action, then a gentle solvent if needed.
Citrus-based removers, white vinegar, and a drop of cooking oil can assist once the glue is softened. On automotive paint or guitars, avoid strong petroleum solvents that can dull lacquer. For large decals, work in sections, reheating each area before lifting. Residue dots left behind by foam-backed labels roll off easily when rewarmed and pinched between fingers. If you’re applying a new label, clean the area with a little alcohol after removal to ensure perfect adhesion.
The humble hairdryer is a quiet hero of household maintenance, turning gummy sticker residue into something you can simply peel and roll away. By understanding how heat softens polymer networks and by controlling distance, time and angle, you protect finishes while reclaiming pristine surfaces. It’s faster than soaking, cleaner than scraping, and kinder than harsh solvents. Next time a price tag overstays its welcome, remember: warm, peel, and roll is the tidy trio. What tricky surface or label have you been putting off, and how will you adapt this method to tackle it with confidence?
Did you like it?4.5/5 (26)