In a nutshell
- 🧊🥄 Use the cold-then-heat method: ice makes wax brittle, then a hot spoon melts residue into paper via capillary action, avoiding rubbing and fibre damage.
- 🛠️ Gather simple tools: sealed ice bag, paper towel or brown paper, heated teaspoon, and a blunt scraper; keep the spoon hot but not scorching and replace paper as it saturates.
- 🧵 Treat dyes and delicates with care: lift dye shadows with isopropyl alcohol, clear oily halos with mild dish soap, reduce heat for silk/acetate, and test on a hidden area first.
- ♻️ Have alternatives ready: warm iron over paper on low (no steam), freeze the whole cloth for thick drips, and stop if fibres gloss or distort—then seek professional cleaning.
- 🛡️ Prevent future drips: choose dripless candles, trim wicks to 6–8 mm, add bobeches or sleeves, stabilise airflow, and inspect table linens promptly after use.
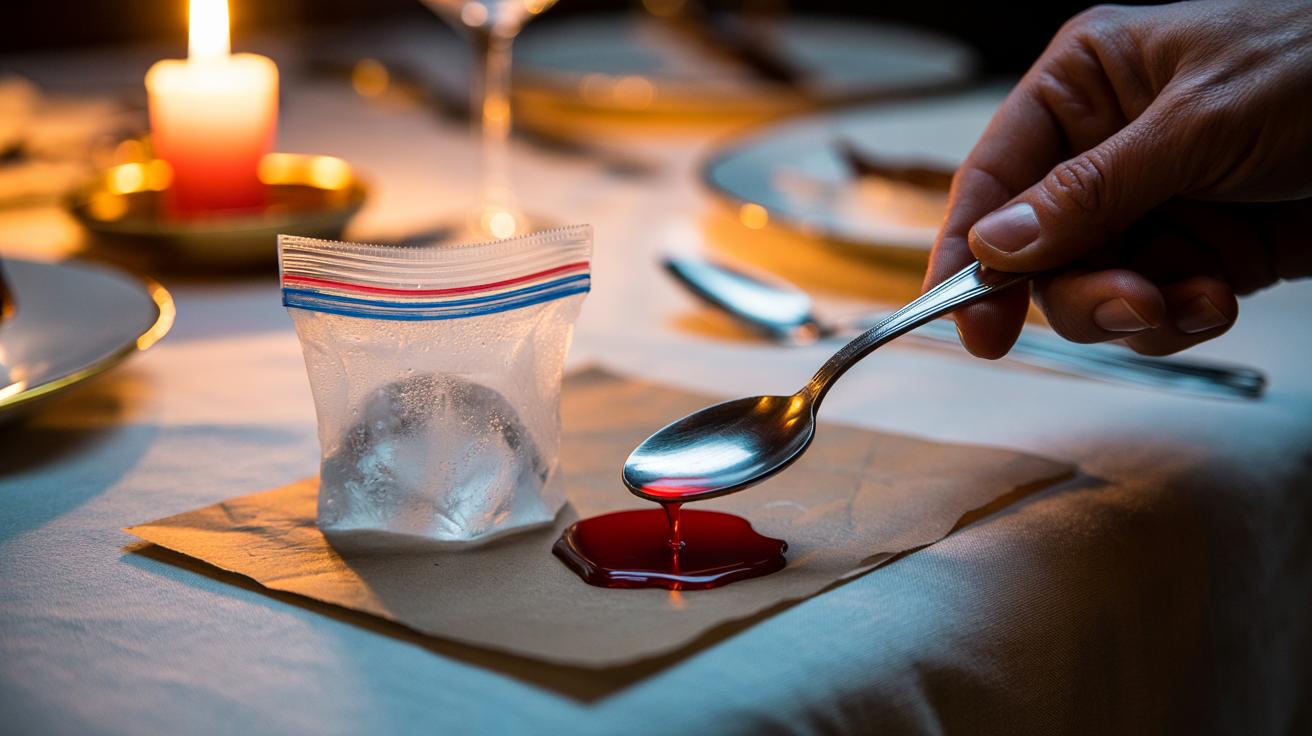
Candlelit suppers are charming until molten wax hardens on your best tablecloth. The neat fix isn’t a harsh solvent or frantic scrubbing; it’s a calm duet of temperature control. Start by making the wax brittle with cold, then coax the residue out using a heated spoon and an absorbent layer. This cold-then-heat sequence lifts wax cleanly without smearing dyes or driving grease deeper into the weave. It works because wax responds predictably to temperature: stiff when chilled, cooperative when gently warmed. With a few household items and steady hands, you can restore linen, cotton, or blends to dinner-party condition—no panic, no stains, no tell-tale shine.
How the Cold-Then-Heat Method Works
Wax is a thermoplastic material: it hardens and contracts as it cools, then softens and flows when warmed. The trick begins with rapid chilling. Pressing an ice pack or bagged ice onto the spill makes the wax brittle, so it fractures away from fibres rather than bending into them. Once the bulk is snapped off with a blunt edge, you’re left with a thin film. That’s where controlled heat earns its keep. A hot spoon supplies focused warmth, melting only the film while an absorbent layer beneath draws liquefied wax out via capillary action. The fabric never needs to get hot—only the wax does.
Because heat travels through metal efficiently, a spoon warmed in hot water offers precise, gentle energy. You glide it over a paper towel placed under or over the spot, and the wax migrates into that paper. This method avoids rubbing that drives wax deeper into fibres. The result is a clean lift, minimal disturbance to the weave, and none of the greasy halos solvents can leave behind.
Step-by-Step: Ice, Padding, and a Heated Spoon
1) Place the cloth flat and slide a couple of paper towels or plain brown paper underneath the stain. 2) Put ice cubes in a sealed bag and press on the wax for several minutes until it turns opaque and rigid. 3) Gently chip away the bulk with a credit card or a butter knife, working from the edge inward. 4) Refresh the absorbent layer. 5) Heat a teaspoon in hot tap water; dry it quickly. 6) With light pressure, stroke the back of the spoon over the spot, letting wax melt and wick into the paper. 7) Replace paper as it saturates. Keep the spoon hot but not scorching—if it sizzles on contact, it’s too hot.
If needed, flip the cloth and repeat from the reverse to chase stubborn residue. A hair dryer on low can pre-warm waxy patches, but the spoon remains the precision tool. For textured linen, work with the grain to protect the surface. Finish by airing the cloth; only launder if a dye tint or fragrance oil lingers.
| Tool/Material | Purpose | How to Use | Typical Duration |
|---|---|---|---|
| Ice in sealed bag | Brittle the wax | Press on spill until opaque and hard | 3–5 minutes |
| Paper towel/brown paper | Absorb melted wax | Place under/over spot; replace as saturated | As needed |
| Heated teaspoon | Apply controlled heat | Warm in hot water, dry, glide over wax | 2–10 minutes |
| Blunt scraper | Lift bulk wax | Chip gently from edges inward | 1–2 minutes |
| Hair dryer (optional) | Pre-soften film | Low heat, short bursts | 30–60 seconds |
Dealing With Stains, Dyes, and Delicates
Coloured candles can leave a faint dye shadow after the wax lifts. Tackle this by dabbing the area with a little isopropyl alcohol on a cotton bud, moving from the outside toward the centre to prevent spreading. Rinse and air dry. For pale linens stained by fragrance oils, a drop of mild dish soap worked into the fibres before a cool wash often clears the mark. Always test on an inconspicuous seam first. If your cloth is silk, acetate, or a heat-sensitive synthetic, reduce spoon temperature and shorten contact time.
Wool blends and textured damask benefit from extra padding beneath to preserve loft. Avoid chlorine bleach on coloured textiles; it can set dye transfer. Oxygen-based stain remover, diluted, is kinder to fibres. If in doubt, photograph the label and consult a professional cleaner, noting “candle wax removal attempted with cold/heat.” Transparency helps prevent aggressive treatments that might fix a stain permanently. Patience is your ally; rushing risks shine marks or puckering.
When the Trick Fails: Alternatives and Preventive Tips
If residue persists, try the classic warm iron over paper on low, no steam, lifting and replacing the paper as it absorbs wax. For stubborn tinted oils, a tiny amount of mineral spirits on a cloth can help on cotton or linen; ventilate well and test first. Freezing the entire cloth in a bag can also help snap off thick deposits before returning to the spoon technique. If fibres gloss or distort, stop immediately. At that point, specialist cleaning may be the safest route, especially for heirloom pieces or embroidered panels.
Prevention is cheaper than stain removal. Use dripless candles or trim wicks to 6–8 mm to reduce flare. Add candle bobeches or glass sleeves to catch drips. Place runners or placemats beneath centrepieces, and keep candles away from vents that make flames dance. Consider unscented, hard-wax blends for steadier burns. After meals, inspect the cloth under bright light so small spills don’t cure unnoticed. A minute of maintenance saves an hour of remedial work.
The charm of candlelight should never come at the cost of your favourite table linen. With ice to firm the spill and a hot spoon to coax wax into paper, you harness physics rather than force, protecting both colour and texture. These steps are quick, quiet, and repeatable, and they avoid the collateral damage harsh solvents can cause. Keep a spoon, paper towels, and a zip-top bag in your entertaining kit, and you’ll be ready for the next drip. What other household challenges would you like demystified using simple, science-led techniques?
Did you like it?4.5/5 (20)