In a nutshell
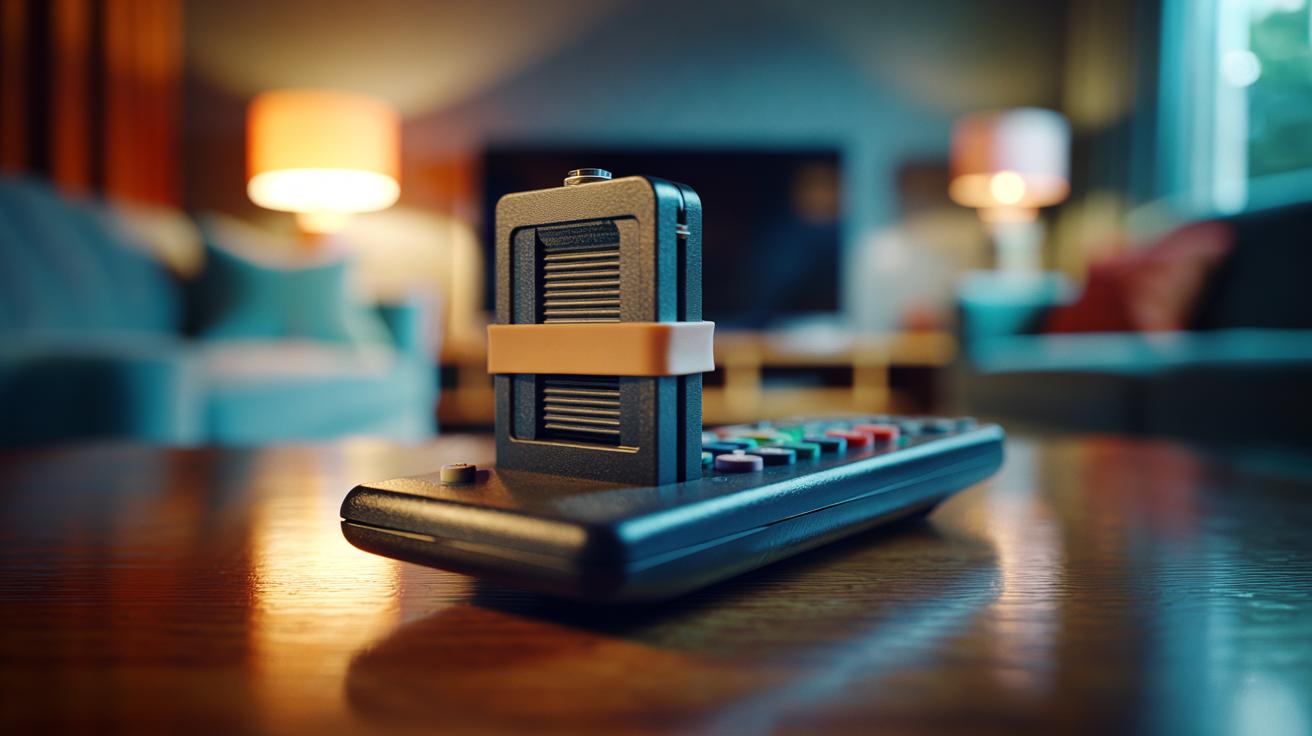
- 🪢 A simple rubber band adds gentle preload around the battery door, boosting contact pressure so AA/AAA cells stay seated and don’t pop loose.
- ⚙️ The band’s viscoelasticity increases friction and provides vibration damping, keeping power delivery stable during drops and one‑handed use.
- 🧰 Choose a medium-width band; EPDM and silicone last longer than natural rubber. Fit it lengthways across the door, avoiding the IR window and buttons.
- 🔒 Prioritise safety: clean oxidation, don’t overcompress thin plastics, keep clear of mics/vents, and recycle cells under UK WEEE guidance.
- ✅ Expect fewer glitches and less spring fatigue; this reversible, low-cost fix extends remote life without tools or messy tape.
Every home has a remote that loses its temper—and its batteries. A quick hack using a rubber band tight around the battery cover restores harmony by adding steady, forgiving tension. It takes seconds, costs pennies, and protects fragile AA/AAA cells from wobble that breaks contact mid-film. Because the band compresses the door and tray, it delivers a constant squeeze that keeps batteries seated through drops, sofa dives, and daily handling. It’s a small intervention with big effects: stronger contact pressure, fewer resets, and less wear on tired springs inside ageing remotes.
Why Loose Batteries Plague TV Remotes
Remotes rely on thin coil springs and stamped tabs to grip cells, a design that works when new but drifts with time. Plastic battery doors flex, springs creep, and the slightest tolerance gap invites micro-movements. Those vibrations interrupt the low-voltage circuit, so a channel change becomes a ritual of shaking and swearing. The result is intermittent power that feels random but is really low, unstable contact force at the terminals. Drop a remote onto carpet and the batteries recoil; toss it onto a coffee table and tiny rebounds nudge them off-axis again.
In British homes with stacks of controllers—TVs, streamers, soundbars—this failure mode is rampant because many housings are thin and doors are loose. Contact plating oxidises, increasing resistance, which demands higher normal force to maintain a clean link. The factory spring can’t always deliver it after years of use. A cheap fix must add controlled compression without surgery or tape residue. That is the genius of a simple rubber band.
How a Simple Rubber Band Creates Perfect Tension
Wrap a band around the battery compartment and you introduce deliberate preload. That squeeze translates into higher contact pressure at both battery ends, raising friction that locks cells in place. This extra force minimises micro-slip, the enemy of continuity, and dampens vibration so the circuit remains stable during knocks and one-handed channel surfing. The elasticity also spreads pressure evenly, unlike hard clips that create point loads. By sitting over the door, the band reinforces the latch, reducing flex and stopping cells from popping the cover during impact.
There’s physics at work. Increased normal force boosts the frictional hold (think “grip”) between batteries and their rails. The band’s own viscoelasticity adds vibration damping, converting tiny shocks into heat rather than motion. Because rubber maintains tension over small dimensional changes, it tolerates worn plastic, slightly bent tabs, or mixed-brand cells. You get a reliable, reversible increase in holding force without opening the remote or modifying its internals. That’s why the hack feels “perfect”—it finds the sweet spot between firm and forgiving.
Choosing the Right Band and Fitting It Safely
The best results come from a medium-width, moderately tight rubber band that spans the battery door’s longest dimension. Too thin and it bites; too thick and it lifts buttons. Place it so it crosses the centre of the compartment, not the infrared window. Aim for snug compression that you can still slide a fingernail under—firm, but never bowing the plastic. Materials matter: EPDM and silicone resist UV and heat better than natural rubber, ideal for sunlit lounges or near warm set‑top boxes.
| Band Width | Material | Typical Lifespan | Notes |
|---|---|---|---|
| 3–5 mm | Natural rubber | 6–12 months | Good grip, may perish faster |
| 6–10 mm | EPDM | 12–24 months | UV stable, steady tension |
| 8–12 mm | Silicone | 18–36 months | Heat tolerant, softer feel |
Fitting is simple: close the battery door, loop the band lengthways around the housing, and check that buttons and microphones aren’t covered. Avoid twisting the band; a flat lay spreads load. If the door bows or clicks open, the band is too tight—size up or reduce turns. Replace any cracked band promptly to prevent snap‑back. Keep spares in a cool drawer to slow oxidation and maintain elastic performance.
Safety, Performance, and Environmental Notes
While the band adds helpful tension, it should never mask deeper faults. Corroded terminals, bent tabs, or leaking alkaline cells need attention first. Clean light oxidation with a cotton bud and isopropyl alcohol; retire swollen or crusted batteries safely. Do not overcompress: excessive force can deform the door, stress hinges, or crack thin ABS plastics. Avoid covering battery vents in rechargeable packs and keep clear of any microphone holes on smart remotes to preserve voice quality.
Performance gains are tangible—fewer dropouts, longer intervals between fiddly resets, and less spring fatigue. Yet the fix is reversible and recyclable, aligning with a waste‑aware mindset. Retire worn bands to appropriate bins and recycle spent batteries at UK collection points under WEEE guidance. If a remote still glitches after banding and cleaning, the fault likely lies in the keypad membrane or PCB solder joints, not the battery seat. At that stage, consider a repair shop or a manufacturer’s replacement programme.
This penny‑wise trick works because it respects the mechanics: increase contact pressure, stabilise alignment, and absorb shocks without marring the device. A small loop of rubber restores confidence to remotes that once needed ritual slaps, extending their useful life and sparing needless replacements. It’s a tidy example of low-tech ingenuity serving high‑tech convenience. As living rooms fill with more controllers, simple fixes keep them civil. What other quiet household tweaks could deliver such outsized reliability for the devices you reach for every day?
Did you like it?4.5/5 (23)