In a nutshell
- 🔬 The fizzing reaction between vinegar (acetic acid) and baking soda (sodium bicarbonate) releases CO2 micro-bubbles that dislodge embedded grime from porous grout.
- 🧪 Mix a clingy paste at about 3:1 (bicarb:vinegar) for routine cleans; adjust thicker to 4:1 for stubborn stains, and let it dwell 5–15 minutes before scrubbing.
- 🧹 Apply to dry lines, allow initial fizz to work, then scrub with a grout brush, wipe, rinse, and dry to prevent haze; add a drop of washing-up liquid for greasy areas.
- ⚠️ Keep acids off natural stone (marble, limestone, travertine); consider a baking soda + 3% hydrogen peroxide alternative, and never mix with bleach.
- 🛡️ For lasting results, patch-test coloured grout and finish with a penetrating grout sealer; repeat quick refreshes monthly in high-traffic areas.
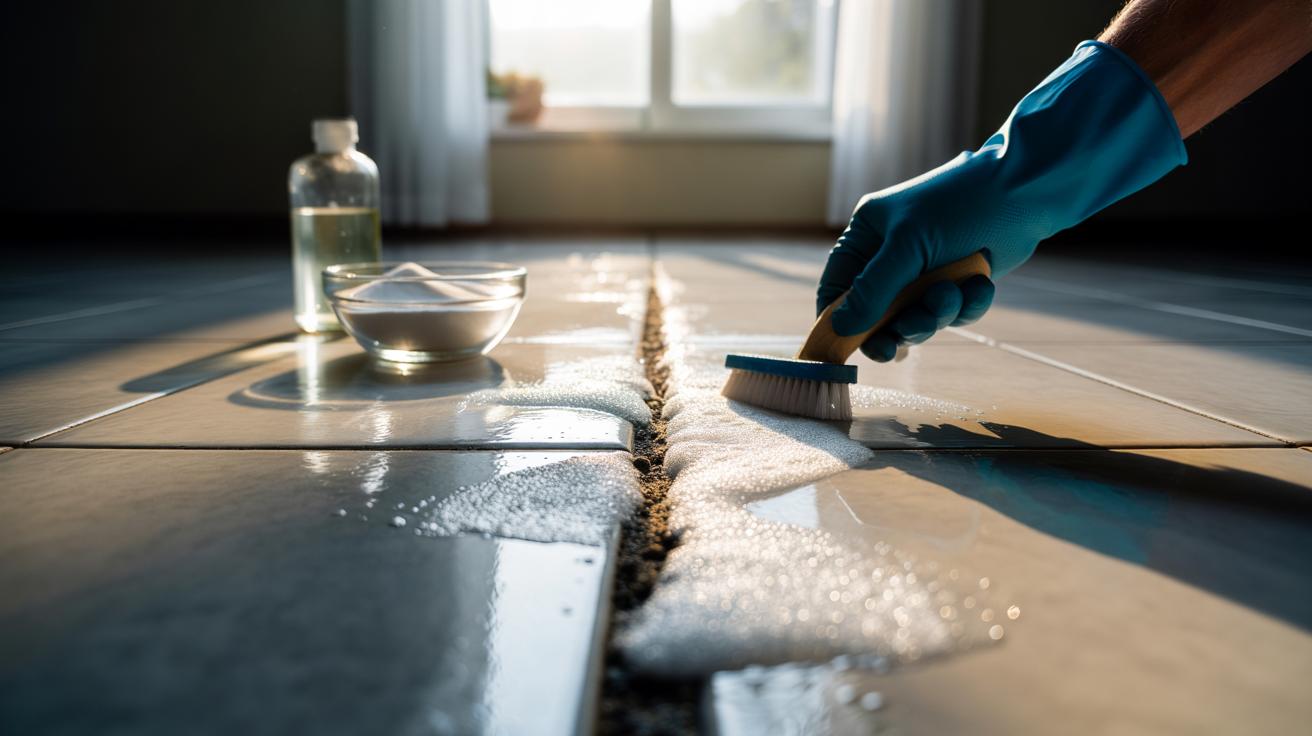
Tile grout, once pristine, can dull to a grey film that defies ordinary mopping. A simple home chemistry trick restores its brightness with surprising speed: a paste of baking soda and white vinegar. When the two meet, they release a storm of micro-bubbles that penetrate pores and unsettle packed grime. The solution is budget-friendly, low on harsh fumes, and satisfying to watch. Within seconds, fizzing action loosens the gunk that brushes often miss. Add a patient scrub and a thorough rinse, and you have a method that rivals shop-bought cleaners. Here’s how the reaction works, the exact recipe to mix, and the safest way to apply it for a dazzling grout revival.
Why the Fizz Matters: The Chemistry Behind the Clean
The magic lies in the meeting of acetic acid (vinegar) and sodium bicarbonate (baking soda). When combined, they form water, sodium acetate, and CO2 bubbles that push through the grout’s micro-crevices. This agitation breaks the bond between dirt, biofilm, and the grout’s rough surface. The fizz is not just theatre; it is mechanical energy doing work where bristles cannot. As the bubbles rise, they lift embedded particles, making the following scrub dramatically easier. The effect is swift, especially on soap scum and everyday kitchen films.
Beyond the bubbles, each component plays a role. Baking soda’s fine crystals provide a gentle abrasive that polishes without gouging. Vinegar softens mineral residues and cuts through light limescale that discolours grout lines. Used as a paste, it clings exactly where you place it, extending contact time. The result is a double action: chemical loosening followed by mild mechanical lift. For most ceramic and porcelain tiles, it’s an efficient, repeatable clean that restores grout’s original contrast.
Mixing the Perfect Paste: Ratios, Tools, and Timing
For a clingy, effective paste, start with 3 parts baking soda to 1 part white vinegar, adding the vinegar gradually until it forms a spreadable cream. Work over the sink to manage the initial fizz. A teaspoon of warm water can smooth the texture; a single drop of washing-up liquid boosts wetting on greasy lines, especially in kitchens. Apply only what you will use within minutes—this reaction is single-use, and the power is in the fresh bubbles. Equip yourself with a grout brush or old toothbrush, a plastic scraper for tight corners, and two microfibre cloths for wipe-down and polish.
Let the paste sit for 5–10 minutes to finish fizzing and penetrate residue. On heavy staining, reapply a thin layer and extend dwell time to 15 minutes, stopping if the area dries out. Ventilate small rooms and keep the mix away from natural stone. Below is a quick-reference guide to help you get the proportions and timing right.
| Purpose | Ratio (Bicarb:Vinegar) | Dwell Time | Notes |
|---|---|---|---|
| Routine clean | 3:1 | 5–8 minutes | Optional 1 drop washing-up liquid |
| Stubborn grime | 4:1 (thicker paste) | 10–15 minutes | Reapply thin layer if drying |
| Greasy splashback | 3:1 + warm water | 8–10 minutes | Use soft brush to avoid scratching |
| Quick refresh | 2:1 | 3–5 minutes | Good before guests arrive |
Step-By-Step Method: From Application to Rinse
Begin with dry grout lines. Vacuum or sweep to clear loose grit that could scratch tiles. Lightly mist the grout with warm water; a slightly damp surface helps the paste spread. Using a small spatula or gloved fingers, press the baking soda–vinegar paste into the lines, building a narrow ridge so the reaction occurs inside the grout rather than on top. Let the fizz run its course before scrubbing—those first seconds do vital lifting work. Hold off on large sections; work in one- to two-square-metre patches for consistency.
Once the bubbling eases, scrub along each line with steady, short strokes. Wipe the slurry with a damp cloth, rinse with clean water, then buff dry. Drying matters: it prevents haze and the reappearance of mineral rings. For persistent patches, repeat with a thicker paste and slightly longer dwell. Always perform a patch test on coloured or dyed grout to ensure the treatment preserves tone. Finish by wiping the tiles themselves to leave a uniform, crisp finish.
Safety, Surfaces, and Smart Substitutions
While excellent on ceramic and porcelain, vinegar should not touch calcium carbonate-based stones such as marble, limestone, or travertine; acids can etch and dull them. For natural stone, swap vinegar for hydrogen peroxide (3%) mixed with baking soda to form a paste, or use a stone-safe alkaline cleaner. Never combine vinegar or peroxide with bleach—dangerous gases can form. Keep rooms ventilated and wear gloves if you have sensitive skin. Avoid metal scouring pads that can scratch glaze and shed rust.
Do not store this mixture; the fizzing indicates it has already reacted. Fresh paste performs better and is easier to rinse. If your grout is chalky or crumbling, postpone aggressive scrubbing and repair or reseal first. After cleaning, applying a penetrating grout sealer helps repel stains and makes future maintenance lighter. For households with heavy traffic, a monthly quick refresh maintains brightness without resorting to harsher chemicals.
The humble reaction between baking soda and vinegar proves that simple chemistry can outclass pricey sprays. By harnessing CO2 agitation, gentle abrasion, and smart dwell times, you can return grout to a bright, hygienic look without harsh odours. The method rewards patience and fresh paste, and pairs well with periodic sealing to lock in results. Ready to let the bubbles do the heavy lifting and reclaim those grout lines? Which room in your home would benefit first—bathroom floor, kitchen splashback, or a high-traffic hallway—and what tweaks will you try to suit your tiles?
Did you like it?4.4/5 (23)