In a nutshell
- ❄️ A salt-ice slush exploits freezing point depression to drive temperatures to well below 0°C, turning cubes into a cold, flowing brine that maximises contact and pulls heat fast via latent heat absorption.
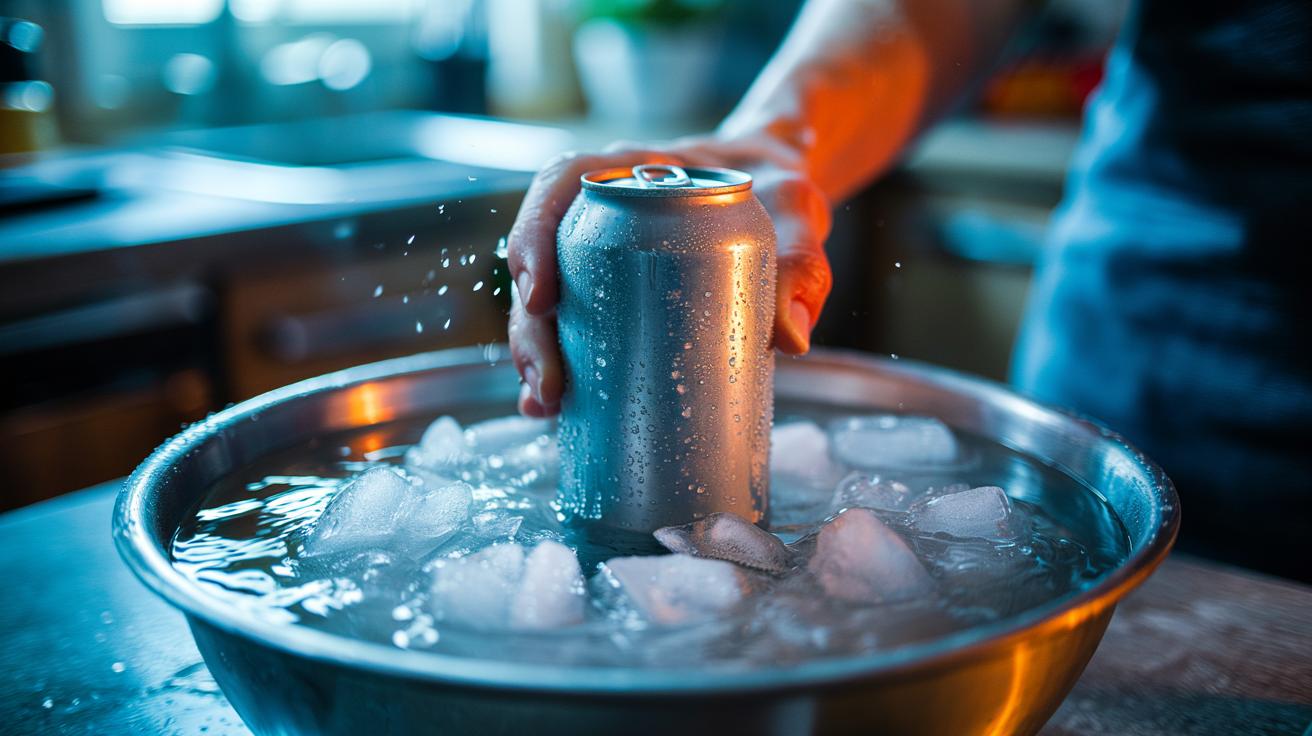
- 🛠️ Build it in minutes: combine ice, a splash of water, and table salt (~10% brine) in a zip bag or bowl; mould around the can and keep it rotating for 60–120 seconds, then rinse off the salt.
- 🧪 The physics: cooling a 330 ml can from 22°C to ~6°C needs ~22 kJ, achievable by melting ~66 g of ice; continuous rotation strips warm boundary layers and maintains superior conduction and convection.
- ⏱️ Versus other methods: fridge 60–90 min, freezer 20–30 min, ice only 10–20 min, wet towel 10–15 min; the salt-ice slush wins at 1.5–3 minutes, delivering near-90-second chills with full surface contact.
- ⚠️ Pro tips and safety: use crushed ice, pre-chill salt, and a metal bowl; avoid thermal shock for glass, don’t ingest the brine, and dispose of salty meltwater safely as surfaces can be slippery.
Warm cans at a picnic are a British summer cliché, but there’s a quick fix that outpaces any fridge: a salt-and-ice rapid-chill pack. By turning solid cubes into a super-cold slush and gripping your can or bottle with it, you can drop the drink’s temperature in as little as 90 seconds. It’s simple kit you already own—ice, table salt, a zip bag, maybe a bowl—and the science is as elegant as it is effective. The secret is not just colder temperatures, but faster heat transfer, delivering a crisp, refreshing drink before the barbecue coals are ready. Here’s how the method works, why it’s so fast, and the safest, cleanest way to deploy it.
Why Salt Supercharges Ice
Salt triggers freezing point depression, forcing ice to melt at lower temperatures. When you add salt to ice, water molecules struggle to re-form a crystal, so the mixture tips into a semi-liquid state that can drop well below 0°C—often -10°C to -15°C in a typical kitchen brine. That melting consumes energy as latent heat, sucking thermal energy from the nearest warm object—your can. Every gram of ice that melts absorbs a surprisingly large amount of heat, making the process intensely efficient.
Equally critical is contact. A jagged cube touches only a few points on a curved can, but a salty slush flows around every millimetre of surface. That improves conduction and boosts convective mixing as you rotate the can. Think of it as upgrading from a chilly handshake to a full, icy bear hug. The result is a rapid pull-down curve that outpaces a fridge’s gentle, dry chill by minutes, not seconds.
How to Build a Rapid-Chill Pack in Minutes
Fill a sturdy zip bag or small bowl with a generous layer of ice (crushed if possible), add enough cold water to make a slush, then stir in table salt—about 6–8 tablespoons per litre of slush. You’re aiming for a roughly 10% brine by weight. Slip your can or bottle into the slush, ensuring full contact. If you’re using a bag, mould it around the drink like a flexible sleeve; if you’re using a bowl, roll the can constantly to expose fresh surface to the brine.
Keep the can moving for 60–120 seconds. A gentle, continuous spin is ideal; vigorous rotation accelerates convection further. Remove the drink, rinse or wipe the exterior to remove salt, and you’re done. For glass bottles, avoid thermal shock: use a well-mixed slush (not hard-frozen spots) and keep the rotation smooth. Do not ingest the brine, and keep salt away from lawns or flowerbeds—dispose of it down a sink with plenty of water.
The Physics of a 90-Second Chill
A 330 ml can starting at 22°C contains roughly 0.33 kg of liquid. With a specific heat of ~4.18 kJ/kg·K, cooling it to 6°C (a 16 K drop) requires about 22 kJ of heat removal. Melting ice absorbs around 334 kJ/kg, so in principle, only ~66 g of ice needs to melt to do the job. Because brine pushes the system to sub-zero temperatures and the slush embraces the whole can, the heat flux can be very high—especially if you keep the can spinning.
Rotation isn’t a gimmick: it constantly sweeps away the thin layer of warmer liquid clinging to the can, preventing insulating boundary layers. Meanwhile, the salt keeps the slush from re-freezing onto the can, maintaining mobile contact. In practice, the limiting factors are surface area and agitation, not the amount of ice. That’s why a compact, grippy salt-ice pack can outperform a pile of dry cubes—and why it beats the patient but slow airflow of a fridge.
How It Compares with Other Methods
Curious how the salt-ice pack stacks up against classic hacks? Here’s a quick snapshot. Keep in mind that ambient conditions, drink size, and agitation all nudge the timing. The consistent winner for speed is a briny slush with rotation, because it combines low temperature with superb contact and mixing.
| Method | Typical Time to 6–8°C | Pros | Cons |
|---|---|---|---|
| Fridge (4°C) | 60–90 minutes | Hands-off, no mess | Slow; dry air; poor contact |
| Freezer (-18°C) | 20–30 minutes | Faster than fridge | Risk of forgotten explosions; uneven cooling |
| Ice Only | 10–20 minutes | Simple, widely available | Limited contact; 0°C ceiling |
| Wet Towel + Freezer | 10–15 minutes | Better surface contact | Still slower than brine |
| Salt-Ice Slush + Rotation | 1.5–3 minutes | Fastest; excellent contact | Requires salt; needs rinsing |
Want to push performance further? Use crushed ice for more surface area, pre-chill the salt, and choose thinner-walled cans over chunky bottles. A metal mixing bowl also helps by shedding heat quickly. Keep safety in mind: salty meltwater can be slippery, so work over a sink or tray.
What makes the salt-and-ice pack so satisfying is its elegant mix of everyday materials and sound thermodynamics. You’re not waiting for air to do the work; you’re engineering a cold, fluid interface that strips heat at speed. With a handful of ice, a scoop of salt, and a steady roll of the wrist, the 90-second chill turns from party trick to reliable tactic. Will you reach for the brine next time the doorbell rings and the drinks are warm, or do you have a home-grown method that beats it on speed and simplicity?
Did you like it?4.6/5 (21)