In a nutshell
- ♻️ Build a zero-waste compost bin for small spaces using repurposed, lidded containers with distributed ventilation and a compact footprint.
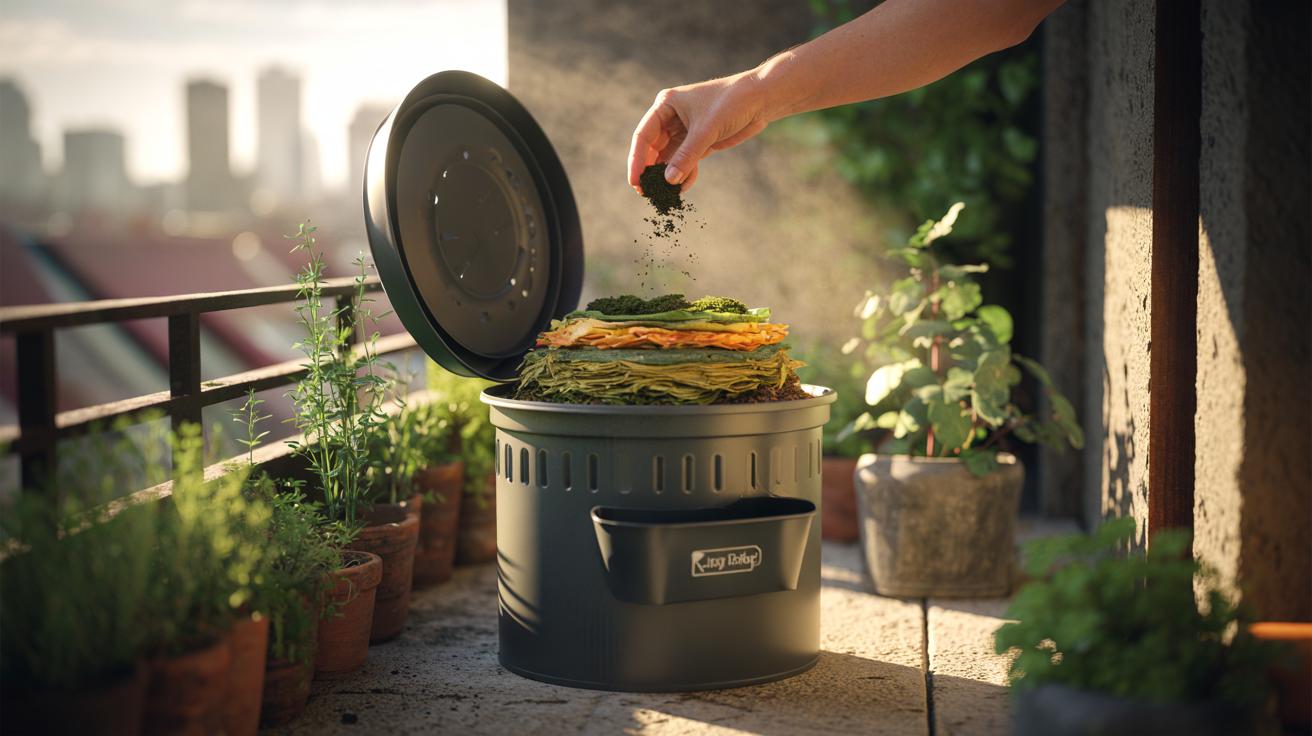
- 🧰 Create aerobic layers: a base for airflow, then alternate browns and greens at roughly 2–3:1, keeping moisture like a wrung-out sponge.
- 🛡️ Prevent odours and pests by burying fresh scraps, capping with browns, maintaining airflow, and optionally adding vermicomposting worms.
- 💧 Manage moisture and leachate: elevate the bin, use a catch tray, reabsorb with paper or dilute before use, and tweak inputs with seasonal temperatures.
- 🌿 Harvest and use after 8–12 weeks via light or migration methods; apply finished compost as a top-dress or mulch to close the loop.
Composting in a small flat, a balcony nook, or even under the sink is not only possible; it can be quietly transformative. A zero-waste compost bin lets you turn peels, coffee grounds, and cardboard into living soil, cutting bin collections and costs at once. Done right, it’s tidy and odour-free. Done cleverly, it’s beautiful. The trick is matching method to space and using simple, salvaged materials. Think lidded buckets, stackable crates, and breathable liners you already own. Think routine, not effort. Every gram diverted from the rubbish bin is a win for your home and the planet. Here’s how to build one that works in tight quarters.
Choosing the Right Container
Start by picking a container that fits your life, not the other way around. A food-grade 10–20 litre bucket with a tight lid hides neatly under a sink. A shallow crate with a cloth cover slips onto a balcony shelf. For a vermicomposting setup, stack two or three nesting boxes so liquid drains down and worms can migrate up. If you prefer a no-worm approach, a single ventilated tub works. Drill many 4–6 mm holes around the sides and lid for even, gentle airflow. Avoid one big vent; distributed micro-vents prevent soggy pockets and keep flies out.
Lean into zero-waste thinking by repurposing what you have: takeaway tubs for caddies, old screens for aeration layers, and scrap wood blocks to lift the bin off cold floors. A tray beneath catches leachate. Keep the footprint compact and the path short—from chopping board to bin. That convenience, more than any gadget, makes the habit stick. If you’re in rented accommodation, line the floor with a boot mat and choose a dark, subtle container that reads as storage, not “bin.”
Setting up Aerobic Layers and Carbon-Nitrogen Balance
A great small-space bin breathes. Build from the bottom: a few centimetres of coarse material—twiggy stems, ripped egg cartons, or a mesh offcut—to create aeration. Then alternate thin layers of browns (paper, dry leaves, shredded cardboard) with greens (veg scraps, coffee grounds, tea leaves). Aim for a loose 2–3 parts browns to 1 part greens by volume. Keep it as damp as a wrung-out sponge. Too wet? Add more browns. Too dry? Mist lightly or add fresh scraps. A handful of finished compost or garden soil inoculates microbes. Crushed eggshells buffer acidity and add calcium. Skip meat and dairy unless you’re using bokashi to pre-ferment indoors, then bury that into your bin under a thick brown cap.
| Material | Type | Role |
|---|---|---|
| Shredded cardboard | Brown | Carbon, structure, odour cover |
| Coffee grounds | Green | Nitrogen, moisture, grit for worms |
| Dry leaves | Brown | Fluff, airflow, fungal diversity |
| Veg peelings | Green | Fuel for microbes |
Chop scraps small. Thin layers speed everything up in tight volumes. If you’re short of browns, stock a bag of torn post, loo-roll tubes, and paper bags. A quick sprinkle of browns after every feed is your no-smell insurance policy.
Odour Control, Pests, and Moisture Management
Smell is feedback. A sweet, earthy aroma means balance; sour notes signal excess greens or trapped moisture. Fix it fast with a generous cap of browns and a gentle fluff to restore airflow. No stink is normal. For fruit flies, keep a ready bowl of shredded paper by the bin and bury every addition. Add a breathable cover: cotton cloth, jute, or an old T-shirt. On balconies, a bungee-secured lid stops wind scatter. Under sinks, lift the bin on tiles or a trivet to avoid cold, which slows microbes and creates condensation.
Worms help but aren’t mandatory. If you keep them, avoid citrus blitzes and spicy leftovers. Provide a corner of dry cardboard as a retreat during rainy weeks. Leachate in the lower tray? Dilute before watering ornamentals, or better, reabsorb with paper so nutrients stay in the system. Moisture should move, not pool. For winter, feed smaller amounts and emphasise browns; for heatwaves, shade the bin and add moisture with melon rinds or cooled tea leaves.
Harvesting, Using, and Closing the Loop
Small bins mature quickly when fed little and often. After 8–12 weeks of steady layering, pause new inputs for a fortnight. Worms and microbes consolidate the middle. Use the “light method”: pull the bin into daylight, skim finished, dark compost from the top, and let worms dive. Or try the “migration method”: start a fresh feeding zone on one side and harvest from the other later. If it smells earthy and crumbles, it’s ready. Strain through a kitchen colander; return chunky bits for another round like a sourdough starter.
Use your compost thinly: as a top-dressing for houseplants, a gentle mulch for balcony herbs, or mixed 1:4 with peat-free potting mix. Store surplus in a lidded tub with air holes to keep it alive. No garden? Gift jars to neighbours, trade in community groups, or feed a local tree pit after rain. That’s the loop closed: scraps to soil, soil to flavour, and barely a bin bag in sight.
Set up once, tweak often, and your small-space system will quietly eat the week’s waste while you sip your morning coffee. The habit becomes second nature, and the rewards are visible in every revived plant and lighter rubbish bag. The secret is consistency: tiny, regular additions and a pinch of browns. Ready to claim a corner of your home for living soil, and what will you compost first to start your zero-waste bin today?
Did you like it?4.4/5 (20)