In a nutshell
- 🌿 Cardboard mulch stops weeds instantly by excluding light and sealing soil gaps, creating a moist, stable microclimate while soil life breaks the cellulose into nutrients.
- 🧰 Step-by-step method: use plain corrugated card, soak it, overlap by ≥10 cm, anchor, add 5–7 cm mulch, water in, and cut minimal planting slits; avoid glossy or plastic-coated pieces.
- 📦 Right materials and quantities: choose corrugated for general beds, kraft/newspaper for short-term, wood chips as top mulch; for 10 m², plan 8–10 large boxes and remove all tape and staples.
- 🌱 Soil and climate gains: supports no-dig structure, boosts fungi and worms, improves water infiltration, reduces irrigation and plastic use, and temporarily stores biogenic carbon.
- 🛠️ Common problems solved: prevent wind lift by wetting and weighting, double-layer against bindweed/couch, keep a 5 cm collar around stems, and remember the barrier remains permeable to rain.
Gardeners often imagine weed control as a never‑ending skirmish with hoes and sprays. Yet a single sheet of humble cardboard can stop most weeds in their tracks, turning hours of maintenance into minutes of set‑up. By excluding light and forming a tight seal over the soil, this no‑dig tactic halts growth almost immediately while conserving moisture and feeding soil life as it breaks down. Lay it once, and an unruly bed becomes plant‑ready with a fraction of the effort. Below, we unpack the science, show you the exact method, and flag the pitfalls to avoid so your weed‑free plot also becomes richer, softer and easier to manage.
Why Cardboard Mulch Works So Quickly
Most weeds depend on light for energy and air gaps for regrowth. A continuous layer of cardboard mulch removes both. Corrugated fibres collapse into the soil’s micro‑contours, sealing out light and limiting oxygen at the surface, so top growth wilts and the weed seed bank can’t germinate. A single, unbroken sheet denies weeds the sunlight they need and stops new seeds from waking up. At the same time, cardboard slows evaporation, creating a gentle microclimate that stabilises temperature and moisture—conditions that favour your crops, not opportunistic weeds.
As the sheet softens, soil organisms get to work. Fungi thread through the cellulose; earthworms pull fibres down, improving soil structure without any digging. This living breakdown is key: your “barrier” becomes a gradual feed, releasing carbon that powers microbial activity. Supplemented with a surface mulch of compost or wood chips, the system shifts the balance from constant disturbance to recovery and resilience. The result is fewer weeds now and fewer again in the months that follow.
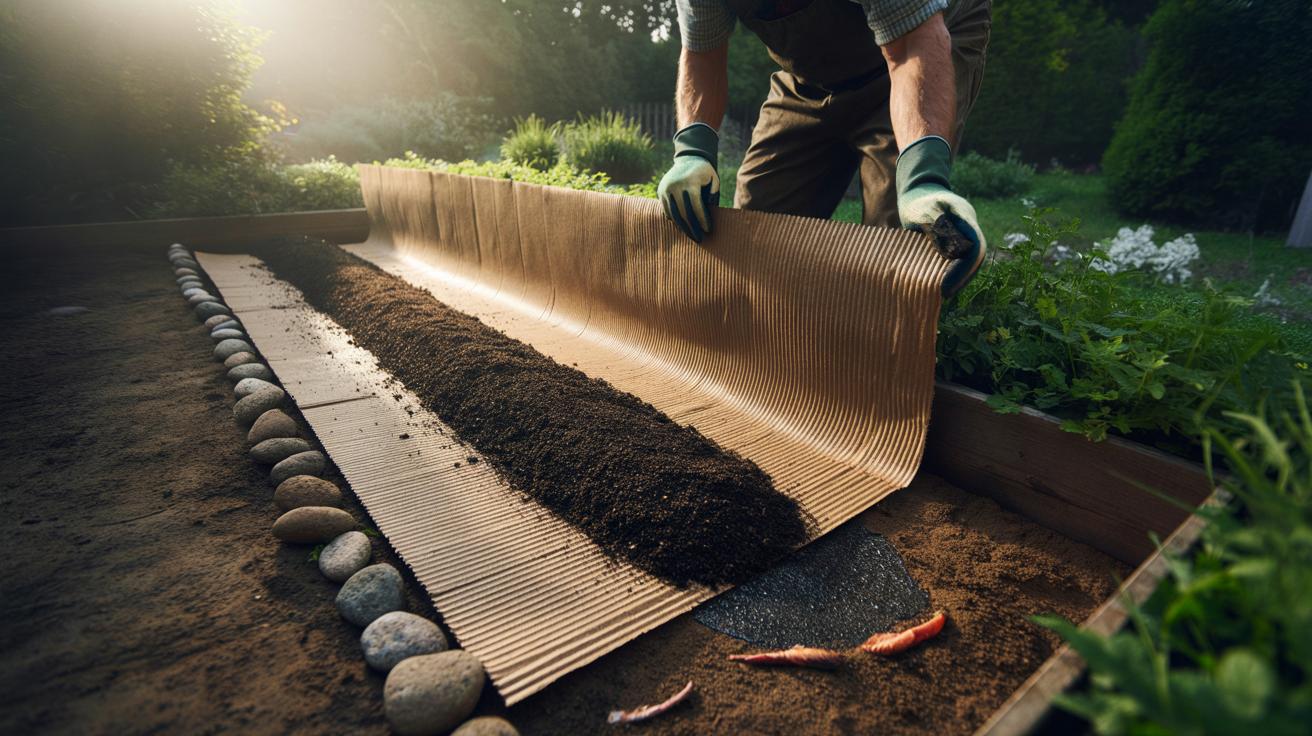
Step-by-Step: Laying a Weed-Stopping Layer
Gather plain, brown corrugated cardboard, a hose or watering can, scissors, biodegradable pegs or stones, and a top mulch (compost, leafmould, or wood chips). Strip off all tape, staples and labels. Never use glossy, coloured, or plastic‑coated cardboard. Pre‑soak each sheet until pliable; damp fibres drape neatly and resist wind. Wet soil also helps the seal, so water the bed first if conditions are dry.
Lay sheets so they run under edges and around perennials, then overlap by at least 10 cm in all directions. Overlap is non‑negotiable: tiny gaps quickly become green seams of weeds. Where vigorous perennials such as couch grass or bindweed are present, use a double layer with generous overlap. Press sheets flat by treading them in, then anchor with pegs, bricks, or logs along the edges and joins.
Finish with 5–7 cm of mulch over the top to hide the cardboard, protect from UV, and add nutrients. Water through to settle everything, then cut planting slits with a knife when ready. Keep the layer a small distance from woody stems. Leave a 5 cm collar of clear soil around trunks and crowns to prevent rot. Top up the surface mulch seasonally as the cardboard returns to soil.
What to Use, What to Avoid, and How Much You Need
Selecting the right material and quantity makes the difference between a flawless barrier and a weedy patchwork. For most beds, standard corrugated boxes provide the ideal thickness and fibre structure. Heavier card suits perennial weeds; lighter paper products break down too quickly unless layered. Aim for coverage that extends beyond the bed’s edges to block creeping invaders.
| Material | Recommended Layers | Breaks Down In | Best Use | Avoid Because |
|---|---|---|---|---|
| Corrugated cardboard | 1–2 sheets | 3–12 months | General beds; paths; new plots | Coated or taped pieces |
| Kraft paper | 2–4 layers | 1–3 months | Short‑term crops; quick smothering | Too thin for perennials |
| Newspaper | 8–12 sheets | 1–2 months | Around seedlings; spot control | Shifts in wind; ink rub‑off |
| Wood chips (top mulch) | 5–7 cm on top | 6–18 months | Protects and feeds surface | N/A — use above card |
A rough guide: one large moving box covers about 1.2–1.5 m² when overlapped. For a 10 m² bed, plan 8–10 big boxes plus a barrow of compost or chips. Use plain brown card only; remove every trace of plastic and tape. If slugs are abundant, favour a coarser wood‑chip top layer and raise young plants until established. This combination balances weed suppression with airflow and predator habitat.
Beyond Weeds: Soil Health and Climate Benefits
Cardboard sheet mulch is a gateway to no‑dig gardening, where minimal disturbance allows aggregates and fungal networks to form. That translates to better water infiltration, less compaction and improved nutrient cycling. As fibres decompose, they feed fungi that trade nutrients with roots. Cardboard mulch is a low‑cost route to no‑dig beds that stay soft underfoot and fertile through the season. The surface mulch above acts like a sponge, reducing irrigation needs during dry spells and protecting the soil from pounding rain.
There is also a quiet climate win. Reusing packaging locks a portion of biogenic carbon back into the soil for a spell, avoids microplastics from woven fabrics, and cuts the fuel spent on repeated tilling or chemical trips. With fewer bare‑soil intervals, you shelter beneficial insects and microbes, and you stop the constant flush of light‑driven weed seedlings. Less weeding, less watering, more life in the soil—a rare trade where convenience and ecology align.
Common Problems Solved
Wind lift occurs when sheets are laid dry or with minimal overlap. Soak thoroughly, press the card into the soil, and weight the perimeter. If edges fray, add a fresh strip and extend the top mulch. Persistent perennials like bindweed and couch grass may pierce gaps; double up the layer, extend beyond the infestation, and resist disturbing the area for a full season. Cut planting holes only as wide as necessary to protect the barrier effect. Where rodents or slugs shelter, tidy refuges and introduce coarse mulch to encourage beetle predators.
Watering worries are common, but misplaced. Punched by roots and worms, the sheet remains permeable; rainfall and irrigation pass through. If nutrients seem slow, dress the surface with a thin layer of compost or diluted liquid feed. Keep the barrier clear of woody stems and crowns. Maintain at least a 5 cm gap around trunks to prevent moisture build‑up and rot. For paths, refresh chips yearly; for beds, let the cardboard vanish into humus, then repeat only if weeds reappear.
One sheet of cardboard, laid with care, can buy back your weekend and set your soil on a healthier path. The method is simple, the materials are free or cheap, and the results arrive almost immediately as green clutter turns into clean, plantable ground. Think of it as a reset button for tired, weedy beds. Whether you’re starting a new plot or reclaiming an old one, this quiet revolution trades noise and sweat for biology and time. What corner of your garden could a single, well‑placed sheet transform this season—and when will you try it?
Did you like it?4.4/5 (23)