In a nutshell
- 🌱 Light exclusion halts photosynthesis, forcing weeds to burn through carbohydrate reserves; annuals fade in weeks while rhizomatous perennials weaken over months.
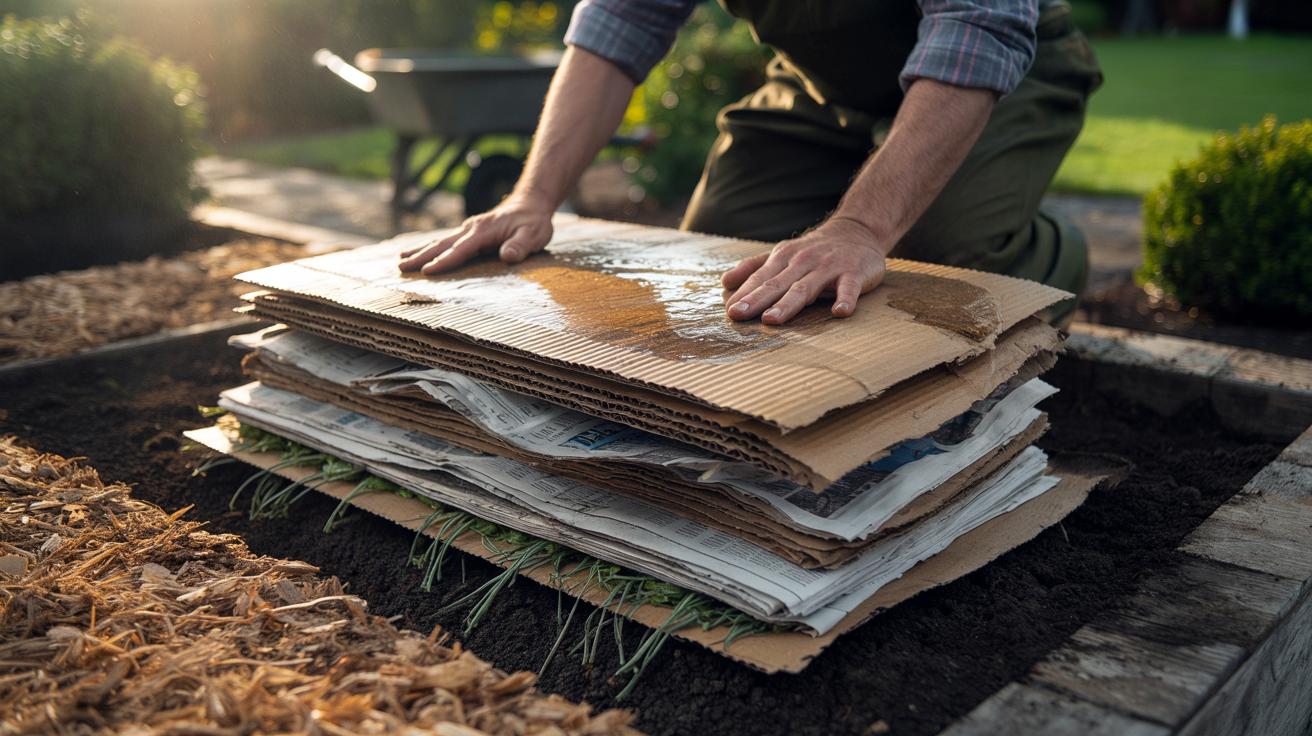
- 🧱 Materials and layering: plain brown corrugated cardboard plus soy-ink newspaper, no coatings; overlap 10–20 cm, soak thoroughly, and cap with 5–10 cm of mulch for a tight seal.
- 🪱 Soil benefits: the breathable barrier admits rain, boosts soil life (fungi and earthworms), retains moisture, and turns dead roots into organic matter for a darker, friable profile.
- 🛠️ Setup and care: mow low, wet soil and sheets, stagger seams, weight edges; inspect monthly, patch gaps, plant via X-slits in the barrier, and direct-sow only into a compost cap while managing slugs naturally with habitat support.
- 🗓️ Timelines and targets: annuals suppressed in 4–8 weeks, perennial grasses 8–16, tough rhizomatous weeds 12–24+; ideal for UK plots seeking chemical-free, season-long reclamation.
Gardeners across the UK are rediscovering a simple, low-cost tactic for reclaiming weedy plots without chemicals: a layered blanket of cardboard and newspaper. By shutting out light, this biodegradable barrier denies unwanted plants the energy they need to regrow. The approach is gentle on soil life, avoids disturbing seed banks, and doubles as moisture-retaining mulch. No light means no photosynthesis, and without fresh sugars, roots burn through reserves until they fail. With careful preparation and patience, even stubborn patches can be subdued for months. Here’s how the light block works, what to use, and the basic steps for turning a problem bed into a thriving, weed-light foundation for planting.
Why Blocking Light Starves Weeds
Weeds survive by converting sunlight into sugars via photosynthesis. When you exclude light with overlapping layers of opaque cardboard and newspaper, shoots can no longer fuel growth. Forced to live off their carbohydrate reserves, roots attempt repeated, weak resprouts. Each failed attempt drains stored energy. For shallow-rooted annuals, this process is swift; many expire within weeks. Perennial invaders with rhizomes or bulbs—couch grass, bindweed, ground elder—hold out longer, but persistence pays off. By maintaining light exclusion long enough, you tip the energy balance toward exhaustion and dieback.
This method isn’t just suppression; it’s soil repair. Cardboard breathes and allows rainfall to pass, so it doesn’t create the suffocating, waterlogged conditions associated with plastic sheeting. Beneath the cover, warmth and humidity build. Fungi colonise the cellulose, and earthworms pull fibres down, aerating and enriching the profile. As weeds fade, roots decompose into organic matter. The result is a darker, friable soil that’s easier to work and richer in biological activity.
Materials and Layering: What to Use and How Thick
Choose plain, brown corrugated cardboard without plastic coatings, glitter, or heavy wax. Remove all tape and staples. Newspapers are ideal if printed with modern soy-based inks (most UK titles are). Avoid glossy magazines. Aim for two to three layers of cardboard with 6–10 sheets of newspaper underneath, all thoroughly soaked so sheets knit together and hug the ground. Overlap edges by 10–20 cm to stop light leaks and tuck around existing shrubs to prevent flares of growth at the margins. A tight seal at the edges is the difference between a clean kill and a creeping comeback.
| Target Weed Type | Recommended Layer | Top Mulch | Typical Duration |
|---|---|---|---|
| Annual weeds | 1–2 layers cardboard + 6 sheets newspaper | 5–8 cm compost or wood chip | 4–8 weeks |
| Perennial grasses | 2 layers cardboard + 8–10 sheets newspaper | 8–10 cm wood chip | 8–16 weeks |
| Rhizomatous perennials (e.g., couch, bindweed) | 2–3 layers cardboard + 10 sheets newspaper | 10 cm wood chip | 12–24+ weeks |
Finish with a generous mulch—compost for beds you’ll plant soon, or wood chip for longer suppression. Mulch stabilises the sheets, blocks leaks, and feeds soil life as the barrier breaks down. Where you plan to sow seeds immediately, add a 5–8 cm layer of compost on top and keep the barrier intact everywhere else.
Step-by-Step Setup and Aftercare for UK Beds
Begin by knocking back tall growth. Scythe or strim to ground level and remove woody stems so the cover sits flat. Water the area if it’s dry; moist soil accelerates decay. Lay wetted newspaper first, then cardboard, staggering seams like roof tiles. Press out air pockets and weight corners with stones. Immediately apply your chosen mulch. Moisture is your ally: damp layers bond, exclude light better, and attract the decomposers that do the real work. Mark any perennials you want to keep and cut neat X-slits around their stems.
Aftercare hinges on vigilance. Re-wet during dry spells to prevent curling. Inspect seams and edges monthly; plug gaps quickly. If stout perennials probe through, add a fresh patch and more mulch. For transplanting, slice a cross, peel back flaps, add compost, and tuck flaps back to shade the soil. For direct sowing, restrict to areas with a compost cap on top of the barrier. Watch for slugs under the cool, damp cover; encourage predators and avoid creating stagnant piles near crops. Keep the cover intact until regrowth stops, then let time and worms finish the clean-up.
Used well, the cardboard-and-newspaper method turns weedy chaos into a soil-building pause button. It harnesses light exclusion to starve roots while feeding the web of life below, avoiding herbicides and heavy digging that wake dormant seeds. With careful overlaps, adequate mulch, and steady moisture, the barrier suppresses annuals in weeks and wears down even tenacious perennials across a season. The reward is a darker, looser, biologically richer bed ready for planting with fewer weed flare-ups. How might you adapt this light-block strategy to your own plot—targeting stubborn corners first, or staging a bed-by-bed transformation over the coming year?
Did you like it?4.8/5 (20)