In a nutshell
- 🔥 Explains how warm air and convection travel through insole and seam channels to the toe box, drying shoes from the inside in minutes.
- 🧭 Step-by-step method: blot moisture, remove insoles, set to low to medium heat, use a narrow nozzle, pulse in short bursts, and rotate shoes for even airflow.
- 🛡️ Safety and materials: avoid high heat to protect adhesives, mind leather, suede, and waterproof membranes, keep electrics away from puddles, and never leave the dryer unattended.
- ⏱️ Timing guide: mesh 3–6 min, leather 6–10, suede 8–12, waterproof 8–15; prioritize airflow over temperature and reinsert insoles only when fully dry.
- 🧰 Smart extras: use a cardboard tube or sock diffuser to direct flow, add silica gel or dry paper after drying, and condition leather or brush suede to restore finish.
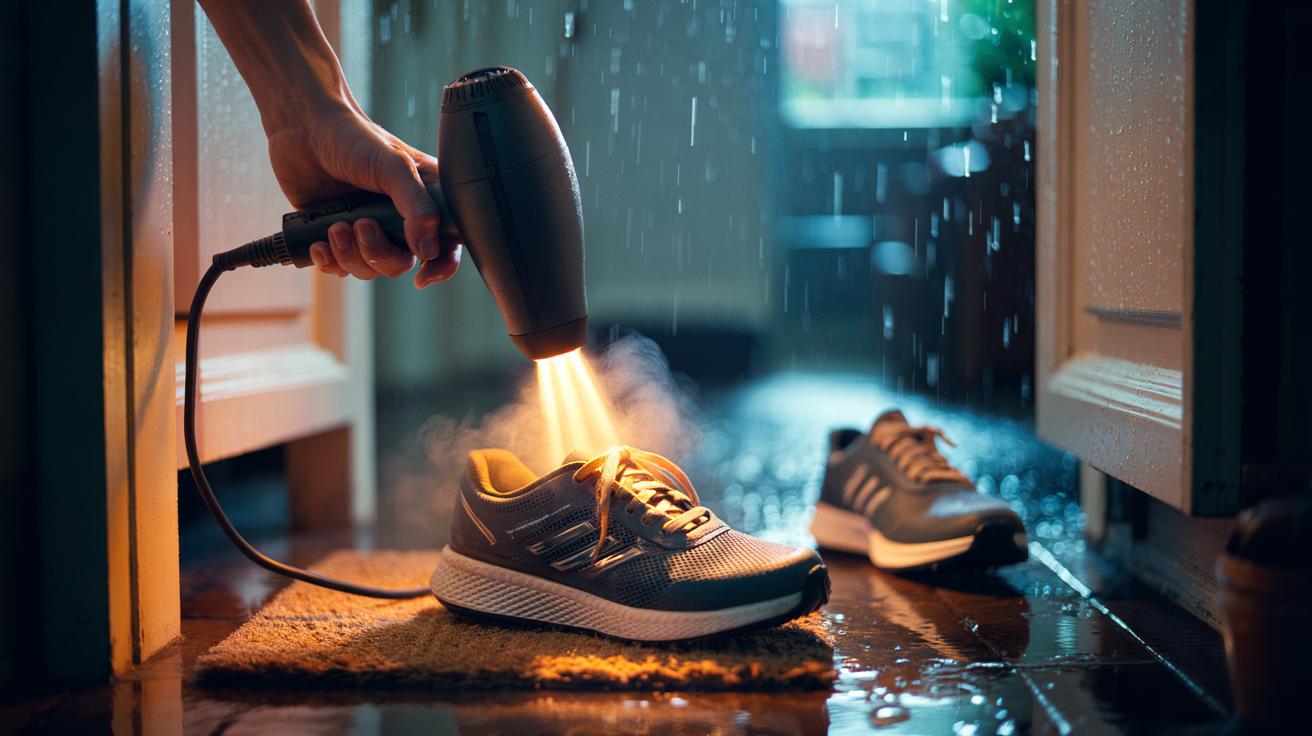
British rain has a habit of sneaking into our trainers, boots, and school shoes. When you need to be out the door, waiting for them to air-dry is a non-starter. Enter the humble hairdryer. Targeted correctly, a stream of warm air pushes through the shoe’s tunnels and stitching, evaporating moisture and carrying it away so toes feel cosy within minutes. This fast, controlled method works from the inside out, keeping the exterior tidy and preventing that tell-tale damp squelch. Used with care, it’s quicker than stuffing with newspaper and far gentler than a radiator blast, making it the go-to hack for commuters, parents, and weekend hikers alike.
Why Warm Air Reaches Your Toes so Quickly
Inside a shoe, channels formed by the insole, lining, and seams act like little ducts. A hairdryer creates a pressure difference that drives convection, pushing dry air in and hauling humid air out. As the air brushes past damp fibres, it takes up moisture; every centimetre of toe box fabric becomes a tiny heat exchanger. This is why the trick seems almost magical: you’re not just warming the surface, you’re moving an airstream right to the farthest corners where water lingers and feet feel coldest.
There’s a second advantage: evaporation is dramatically faster when you combine moderate heat with steady airflow. High heat risks softening glues and warping leather, but a measured warm setting keeps temperatures below the threshold where adhesives fail while still lowering the material’s surface humidity. The golden rule is simple: use low to medium warmth and constant flow, not scorching blasts. Done properly, the inside dries first, so the whole shoe regains shape and comfort swiftly.
Step-by-Step: The Hairdryer Hack
First, blot excess water with a towel and, if removable, take out the insoles. Set your dryer to warm (not hot) and attach a narrow nozzle for focus. Angle the stream into the heel opening and pulse in 20–30 second bursts while gently flexing the shoe to open creases. Rotate the pair so each one gets equal attention. After a minute or two, switch to the toe box and aim along the sidewalls; that’s where soaked stitching hides moisture that chills your toes.
For even faster results, create a mini duct. A cardboard kitchen-roll tube, or a clean sock pulled over the nozzle as a diffuser, directs and softens the flow deep inside without blasting one spot. Keep the nozzle a few centimetres from the material and keep the air moving. Never leave the dryer unattended, and avoid high heat that can bake leather or unseat glue. Most mesh trainers feel warm at the toes in three to five minutes; chunkier boots may need a little longer with brief rests between bursts.
Safety, Materials, and Timing
Different uppers respond differently to heat and airflow. Mesh and knit fabrics dry quickest because they let vapour escape freely, while dense leather and suede require patience. Always start gently and test with the back of your hand: if the surface feels hot rather than warm, pull back. Moisture plus electricity demands caution—keep the dryer and plug away from puddles and wring-out points. Remove batteries or electronics from heated insoles, and avoid direct, continuous heat on glued seams. The right combination of low warmth and airflow preserves shape, stitching, and finish.
| Material | Typical Time to Warm Toes | Key Caution |
|---|---|---|
| Mesh/knit trainers | 3–6 minutes | Don’t overheat foam midsoles; keep air moving |
| Leather shoes | 6–10 minutes | Use low heat to avoid cracking; condition after drying |
| Suede boots | 8–12 minutes | Keep distance; brush nap once dry to restore texture |
| Waterproof/Gore‑Tex hikers | 8–15 minutes | Warm, not hot; protect seam tapes and membranes |
Speed comes from airflow, not temperature. If time allows, cycle one minute on, 30 seconds off to let humidity dissipate. Reinsert insoles only when they’re dry to the touch; if they’re spongey, give them their own short burst. A silica-gel sachet or a handful of dry kitchen roll left inside after drying helps prevent overnight re-dampening. The aim is crisp warmth without stress on materials—a routine you can repeat through winter without degrading your shoes.
Used with a light touch, the hairdryer trick turns sodden footwear into walkable comfort in the time it takes to brew a cuppa. Focused warm air travels through the shoe’s hidden channels, scooping up moisture and delivering relief where it matters—at the toes. Respect the limits of leather, suede, and adhesives, and you’ll avoid warping or shine loss. Add simple aids like a nozzle, a cardboard tube, or a sock diffuser, and the process becomes both faster and safer. Which pair in your hallway will you rescue first, and how will you tailor the technique to your materials and daily routine?
Did you like it?4.6/5 (23)