In a nutshell
- 🧊 Freezing exploits thermal contraction and mismatched CTE to disrupt adhesion, driving micro-cracks and a glass transition that makes residue brittle and easy to flake.
- 🍯 Works best on caramelised sugar, cheese/fat crusts, starch films, and baked egg; ideal for stainless steel and silicone, with caution for thin glass and cheap plastics.
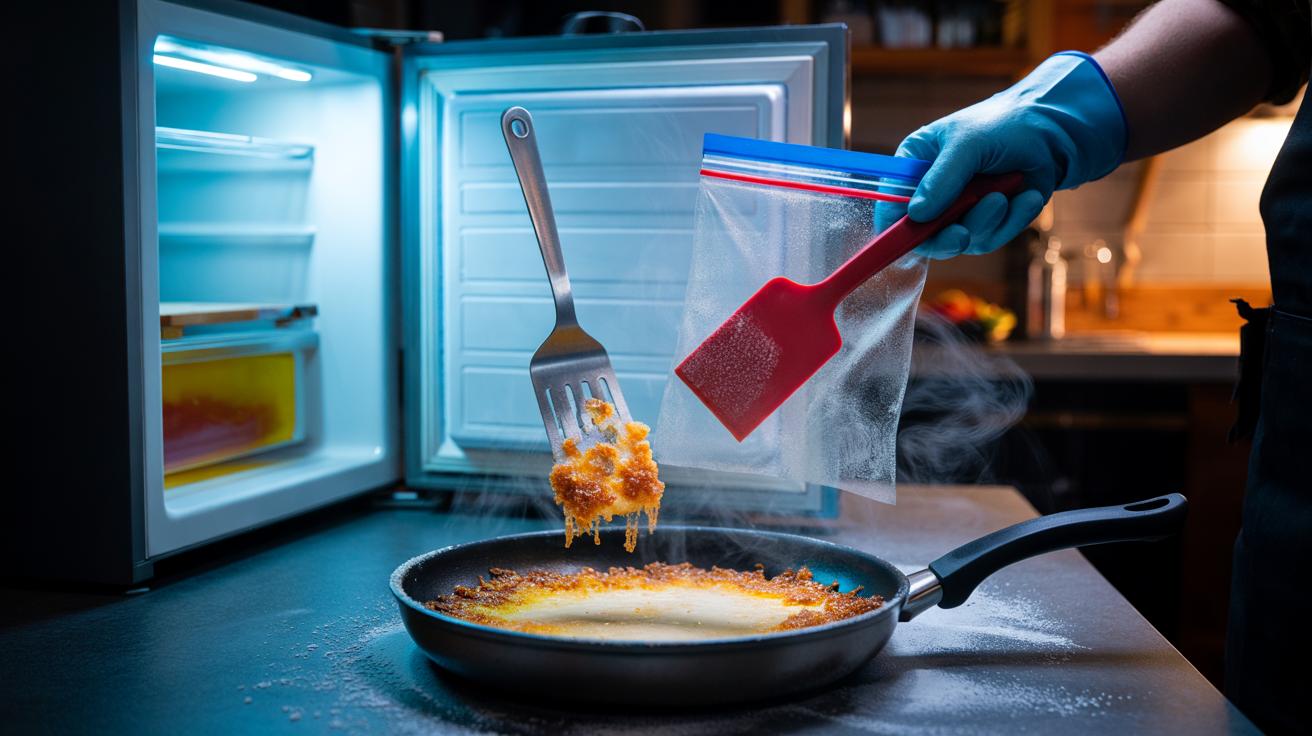
- 🛠️ Method: bag the utensil, chill 30–90 minutes, then use a plastic scraper or silicone edge to lift brittle flakes; work quickly to limit condensation and finish with warm soapy water.
- ⚠️ Avoid thermal shock, metal-on-metal scraping, and unsafe knife leverage; manage odour and cross-contamination by sealing items, and consider an ice-pack sandwich if freezer space is tight.
- ✅ Benefits: preserves non-stick coatings, reduces water use and mess, and often beats soaking—turning physics into a fast, gentle cleanup strategy.
Every kitchen has that pan with caramel welded to its rim or the spatula cloaked in baked-on cheese. Many of us reach for scouring pads or long soaks, but there is a cleaner, quieter trick: the freezer. By exposing utensils to low temperatures, you exploit the laws of physics to loosen the grip of hardened residue. The technique relies on thermal contraction, brittleness changes, and a gentle breakdown of adhesion at the interface. Instead of scrubbing away a finish, you encourage the residue to let go of its own accord. It’s quick, low-mess, and surprisingly kind to cookware and countertops.
The Science: Thermal Contraction and Adhesion
When materials cool, they shrink. Residues like sugar glass, congealed fat, and starchy films often have a different coefficient of thermal expansion (CTE) than stainless steel, silicone, or wood. That mismatch generates tiny shear stresses at the boundary as temperatures fall, interrupting the van der Waals and polar interactions that help food stick. Cold creates a subtle tug-of-war at the interface, prising residue away without brute force. At the same time, micro-voids form as trapped moisture contracts, giving tools an edge to slip under the crust.
The chemistry shifts too. Many residues pass through a lower-temperature glass transition, becoming more brittle and less tacky. Brittle layers fracture into flakes that lift with a tap or a light scrape; fats crystallise and lose plasticity, reducing smear. The net effect is a drop in adhesion energy and a rise in micro-cracking, both friendly to removal. Cold can reduce adhesion more effectively than heat for certain residues because it hardens the mess while leaving the utensil largely unchanged.
When Freezing Works Best for Kitchen Utensils
Freezing excels on sturdy items—stainless-steel spoons, spatulas, whisks, tongs—where the utensil tolerates contraction without risk. It shines on caramelised sugars, cheese crusts, hardened sauces, and starch films that turn brittle. Non-stick coatings benefit, because you avoid abrasive scouring. For silicone, the tool remains flexible while residues stiffen, improving peel-off. Be cautious with thin glass or cheap, rigid plastics, which can suffer stress if temperature swings are extreme. For wooden spoons, freezing is fine; just bag them to prevent odour absorption.
| Residue | Why Cold Helps | Notes |
|---|---|---|
| Caramelised sugar | Brittle glassy phase; fractures cleanly | Tap gently to flake; avoid hot shock after |
| Cheese/fatty crust | Fat crystallises; tack drops | Scrape with plastic edge to protect coatings |
| Starch film (rice/pasta) | Contracts and cracks; less gluey | Rinse with warm water after flaking |
| Baked egg | Protein network stiffens; adhesion weakens | Lift from edges to avoid gouging |
Always bag or wrap utensils before freezing to avoid freezer odours and moisture frosting. Aluminium and stainless steel respond predictably; enamel and seasoned cast iron are fine if cooled gradually. With knives, the technique is effective for sticky resin or sugar, but protect the edge and handle. The rule of thumb: the more the residue changes texture when cold while the utensil does not, the better the results.
Step-by-Step Method: From Freezer to Flake-Off
Start by wiping away loose crumbs; dry the utensil to minimise surface frost. Seal it in a reusable bag to block odours. Place it flat in the freezer for 30–90 minutes; thick caramel may need longer. The goal is uniform cooling. Avoid plunging a hot utensil straight into the freezer; let it come towards room temperature first. When ready, remove the bag and work quickly so condensation doesn’t rehydrate the residue.
Grip the utensil over a bin and use a plastic scraper, old loyalty card, or a silicone spatula edge to nudge from multiple points. A light twist of the tool (not of a knife blade) amplifies interfacial cracks. For whisks and sieves, tap gently on a tea towel to shed flakes. Stubborn spots respond to a brief second chill. Finish with warm, soapy water to remove traces. Do not lever aggressively on non-stick or enamel—coatings are tough, not invincible.
Common Mistakes and Safety Considerations
Thermal shock is the chief pitfall. Never move a just-frozen glass or ceramic piece into hot water; let it temper for a few minutes, then use lukewarm rinses. Avoid metal-on-metal scraping that can scar finishes. Cheap, rigid plastics can embrittle at freezer temperatures; test a small area first. For knives, keep the edge away from hard surfaces and your fingers; use a board and light taps, not prying. Wear thin gloves if working with multiple chilled items to prevent cold burns.
Cross-contamination and odour are easy to avoid: seal tools well, keep raw meat separate, and rinse the bag afterwards. If freezer space is tight, improvise with an ice pack sandwich or a metal tray pre-chilled outdoors on a winter’s day. Energy-wise, consolidate batches rather than opening the door repeatedly. After removal, wash, dry, and lightly oil wooden handles. The safest approach combines patience, gentle force, and the right scraper—you’ll protect both the utensil and your sanity.
Freezing to unstick stubborn residue turns physics into a household ally. It reduces water use, preserves coatings, and often succeeds where soaking fails. Better still, it’s a method you can deploy while the kettle boils, returning to find brittle flakes ready to fall away. Treat the residue, not the utensil, and you’ll keep your kit looking new for longer. Which utensil in your kitchen would benefit most from a cold reset, and how might you adapt this method to your own cooking habits?
Did you like it?4.4/5 (30)