In a nutshell
- ❄️ The freezer method uses cold to sap tack, turning glue brittle so labels lift cleanly without scraping or fumes.
- 🧪 Adhesive science: pressure-sensitive adhesives (PSAs) stiffen near their glass transition (Tg), losing grip on smooth, non-porous surfaces.
- 🧰 Step-by-step: bag the item, freeze at about −18°C for 30–90 minutes, peel immediately while cold with a plastic card, and avoid metal blades and condensation.
- 📦 Materials matter: glass and steel release best; plastics vary (PP/PE good, brittle ABS/acrylic need care); wood/cardboard gain limited benefit.
- ♻️ Safety and cleanup: minimise solvents; spot-treat residue with isopropyl alcohol or citrus oil, supporting eco-friendly upcycling and better recycling.
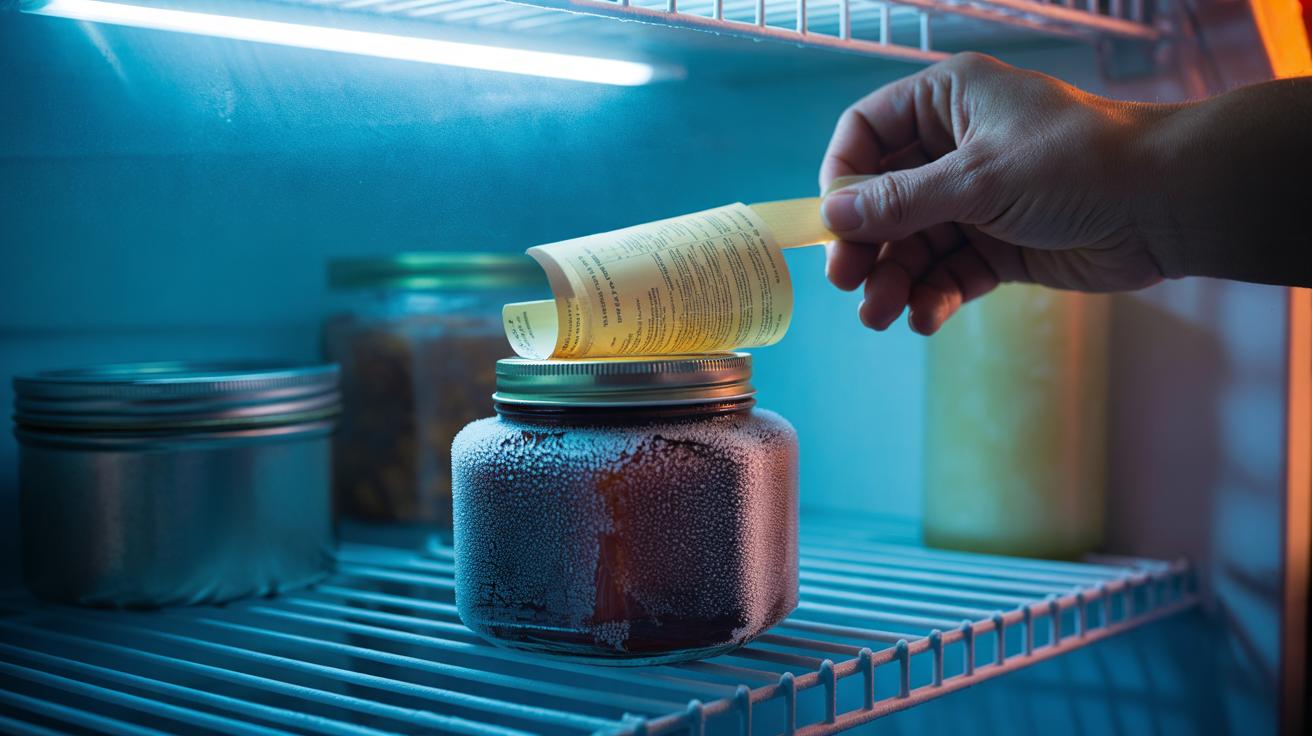
Stickers cling with stubborn glue, but a household shortcut can break their grip without fumes or scratches. The freezer method relies on physics, not force: chilling turns flexible adhesive into a brittle film that lifts cleanly from jars, gadgets, toys, and even metal tins. Cold reduces tack and lets you peel instead of scrape. By lowering temperature, you slow the motion of polymer chains that make glue “sticky,” so the bond weakens and the label releases in large pieces. It’s a tidy, low-cost tactic for upcycling containers and removing price tags, especially when you want to avoid harsh chemicals that could damage finishes or leave a lingering smell.
How Cold Affects Adhesive Chemistry
Most sticker glues are pressure-sensitive adhesives (PSAs), blends of elastomers and tackifiers designed to flow slightly at room temperature. That flow is what creates grip. Drop the temperature and the adhesive’s glass transition temperature (Tg) becomes critical. As you approach or pass Tg, polymer chains lose mobility, tackifiers harden, and the glue’s viscoelastic balance shifts from rubbery to glassy. In this stiffer state, the bond’s strength plunges while cohesive brittleness rises. That is why cold enables labels to shear off in broad curls rather than shredding into frustrating confetti.
The effect is especially pronounced on smooth, non-porous surfaces—glass, glazed ceramics, polished steel—where the adhesive cannot anchor into pores. Rubber-based PSAs tend to embrittle faster than acrylic systems, though both lose tack with sufficient chill. Watch for condensation: moisture on glass can briefly re-lubricate residue as it warms. A swift peel straight from the freezer keeps the glue cold long enough to separate cleanly, limiting smears and fingerprints.
Step-By-Step: The Freezer Method Done Right
Start with a clean, dry item. Place it in a sealed bag to prevent frost and odours, then chill in a domestic freezer at about −18°C. For thin paper labels on glass, 30–45 minutes often suffices; thicker vinyl stickers or gummy price tags may need up to 90 minutes. Peel while the item is still cold. Use a fingernail or a plastic card to lift one corner and roll the label back on itself at a shallow angle, keeping tension smooth rather than jerky.
If residue remains, pinch and “thumb-roll” it into pills while the glue is chilled. Stubborn smears respond to a second short freeze. Afterwards, let the surface return to room temperature and wash with warm water and mild detergent. On electronics, avoid condensation by bagging tightly and limiting time out of the freezer before peeling. Do not yank or gouge with metal blades; cold does the heavy lifting, and gentle tools preserve finishes. Finish with a soft cloth to restore shine.
What Works (and What Doesn’t) Across Common Materials
Glass jars and bottles are ideal candidates: smooth, rigid, and tolerant of deep chilling, they release paper labels in satisfying sheets. Steel tins and enamelled mugs behave similarly, though any micro-texture may hold onto thin glue films. Plastics vary. Polypropylene and polyethylene containers often respond well, but brittle plastics—especially older ABS or low-grade acrylic—can develop hairline stress marks if flexed while frozen. Wood and cardboard pose problems because adhesives seep into pores; cold helps, yet fibres may tear, leaving a fuzzy patch that needs light sanding or a dab of solvent.
Sticker chemistry matters. Rubber-based and hot-melt adhesives embrittle quickly. Acrylic PSAs used on premium decals resist better but still lose tack at low temperatures. Laminated vinyl decals may crack in the cold, so peel slowly to keep graphics intact. For antiques with delicate varnish, test discreetly. When in doubt, chill briefly, peel gently, and escalate only if needed. The method’s strength is its minimal risk profile compared with scraping or soaking in aggressive chemicals.
| Material | Recommended Freeze Time | Notes |
|---|---|---|
| Glass | 30–45 minutes | Peel immediately; watch condensation. |
| Stainless steel | 45–60 minutes | Smooth finishes release cleanly. |
| Rigid plastics (PP/PE) | 45–75 minutes | Limit flex; avoid metal scrapers. |
| Brittle plastics (ABS/acrylic) | 30–45 minutes | Test first; risk of stress whitening. |
| Wood/cardboard | 60–90 minutes | Partial help only; fibres may lift. |
Safety, Sustainability, and Post-Freeze Cleanup
Cold removal is kinder to surfaces and lungs than solvent baths. Skipping harsh chemicals reduces emissions and preserves finishes, making the method a savvy choice for upcycling kitchens and craft benches. Still, be mindful of condensation, particularly around electronics and unsealed wood. Keep items in sealed bags, peel promptly, and dry with a soft cloth afterwards. If labels cover food-contact areas, wash thoroughly with warm water and detergent once the adhesive is off.
When residue lingers, reserve solvents for spot work. A drop of isopropyl alcohol clears glass and metal without streaks; a touch of citrus oil or plain cooking oil softens rubbery smears on many plastics. Always test an inconspicuous area. Avoid blades and scourers that leave micro-scratches, which can harbour grime. For recycling, the freezer method speeds label removal from jars, improving sorting quality at kerbside. Less force, less waste, and a cleaner finish: that’s the cold advantage.
Chilling a sticker sounds quaint, yet the science is solid: lower the temperature, sap the tack, and the bond lets go without drama. The freezer method is quick, quiet, and effective across everyday materials, and it pairs well with light, targeted cleanup for a spotless result. By choosing cold over chemicals, you protect surfaces and air quality while saving time at the sink. Ready to reclaim that handsome jar or de-badge a gadget without a scratch—what item in your home will you try the cold-peel trick on first?
Did you like it?4.6/5 (25)