In a nutshell
- 🔬 Hydrogen peroxide decomposes into water and oxygen bubbles that mechanically lift grime while reactive oxygen breaks stain chromophores, brightening tiles and grout without abrasion.
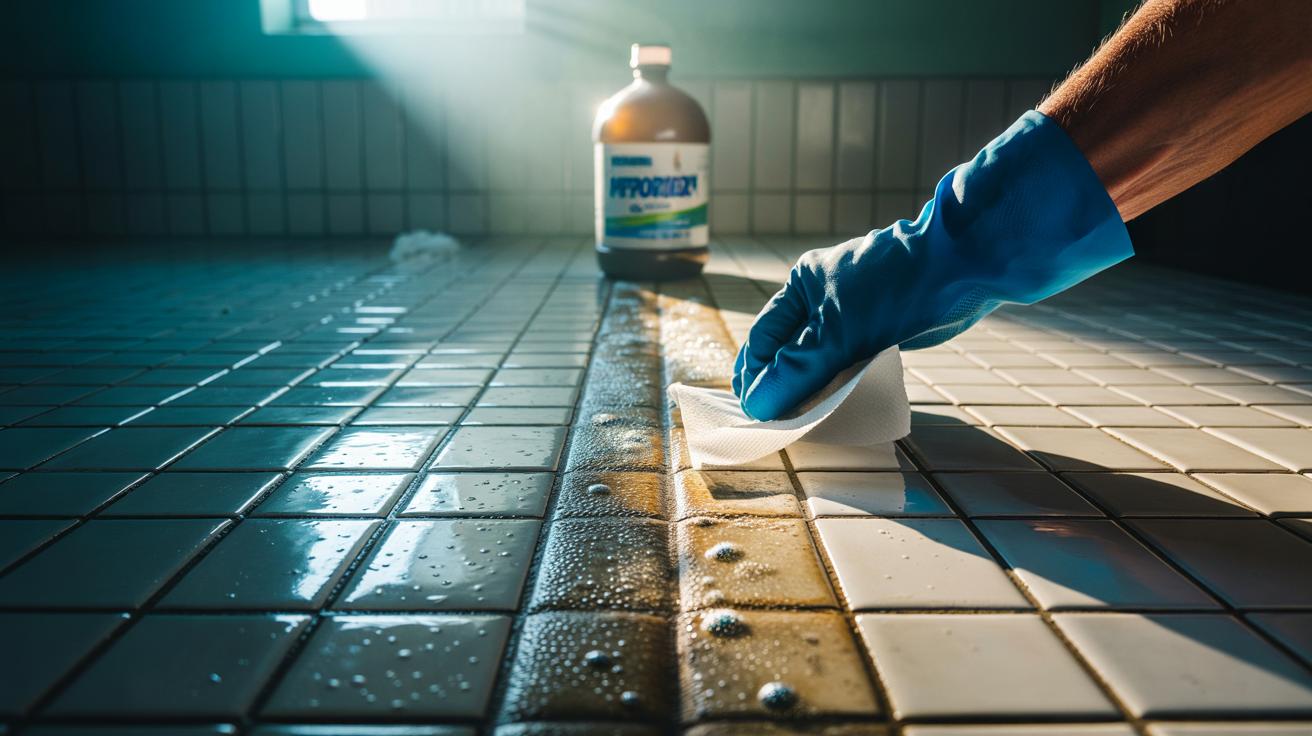
- 🧼 Soak method: apply 3%–9% peroxide (or developer cream) using saturated paper towels for 10–45 minutes, keep surfaces wet for effective dwell time, then rinse and dry to prevent re-soiling.
- ⚠️ Safety first: wear gloves and eye protection, ventilate, store in an opaque bottle, and Never mix with bleach or acids; patch-test coloured grout to avoid unwanted fading.
- 🧱 Best surfaces: ideal on glazed ceramic, porcelain, and most grout; be cautious with unsealed natural stone and metal trims where rapid bubbling or tarnish can occur.
- 🔄 Versus other cleaners: gentler than chlorine bleach, targeted compared with floor-wide oxygen bleach solutions, and cleaner than steam or abrasives which can scratch or re-deposit minerals.
The grout lines that once framed your kitchen tiles in crisp white can quietly darken to beige and brown, the result of soap scum, tannins, mildew, and tracked-in soil. A simple, science-backed fix is the hydrogen-peroxide soak. By flooding the surface with a mild solution and allowing time for oxygen bubbles to form, stains are lifted without harsh fumes or scratching. The method is gentle on most glazed ceramics yet tough on the organic films that make floors look dingy. Because hydrogen peroxide breaks down into water and oxygen, it leaves no residue, a meaningful advantage in busy homes trying to cut chemical odours without compromising hygiene.
How Oxygen Bubbles Lift Stains
Hydrogen peroxide (H₂O₂) decomposes into water and oxygen: 2H₂O₂ → 2H₂O + O₂. That released oxygen appears as streams of microbubbles, and those bubbles do more than fizz. They pry at the microscopic edges of grime, loosening biofilms and lifting pigmented soils from pores and grout voids. At the same time, reactive oxygen species created during the breakdown attack the chemical bonds in stain-causing chromophores, bleaching them so they no longer absorb visible light. This dual action—mechanical lift plus oxidative fade—explains why dull grout brightens without abrasive scrubbing.
Tiles and grout are riddled with capillaries. A soak saturates these pathways, letting peroxide travel deep where mould threads and tea or wine compounds lodge. When catalytic surfaces—like traces of iron in grout—touch H₂O₂, decomposition accelerates, generating more oxygen at the very spot that needs it. The bubbles expand and collapse, dislodging particles the way a tiny jack lifts a stuck floorboard. Because the by-products are just oxygen and water, the process is effective yet clean, particularly on glazed ceramic and porcelain.
Best Practice: The Soak Method Step by Step
Start with a quick dry sweep and a light wash to remove loose soil. For the soak, pour 3% hydrogen peroxide into a tray, saturate strips of paper towel or cotton pads, and lay them along stained grout or tiles. Keep them wet for 10–30 minutes; mist with more peroxide if they dry. For stubborn marks, a 6–9% “developer” cream sold for hair colouring clings well and extends contact safely on glazed surfaces. Never mix peroxide with bleach or acids; apply it on its own, then rinse and wipe. Finish by drying the area so new grime cannot wick into damp grout.
| Strength | Typical Use | Dwell Time | Notes |
|---|---|---|---|
| 3% | Routine whitening, light mould | 10–30 mins | Safe on most glazed tiles |
| 6% | Set tea, coffee, or shoe marks | 20–45 mins | Patch test coloured grout |
| 9–12% | Heavy staining on durable surfaces | 15–30 mins, monitor | Use sparingly; ventilate well |
Keep the surface wet—bubbles need liquid contact to work. Rinse thoroughly, then neutralise odours with plain water. If residue remains, repeat rather than scrubbing hard; the second pass often releases what the first loosened.
Safety, Materials, and Surface Suitability
Peroxide is relatively low-odour and breaks down cleanly, but it is still an oxidiser. Wear gloves and eye protection, and ventilate the room. Store in its original opaque bottle; light and heat shorten shelf life, reducing fizz and effectiveness. On surfaces, the soak is ideal for glazed ceramic, porcelain, and epoxy or cementitious grout. Exercise caution on unsealed natural stone such as marble or limestone, where porosity and mineral content vary; test in an inconspicuous corner. If you see vigorous bubbling on metal trims, wipe off quickly to prevent tarnish.
Coloured grout can fade if the pigment is not fast; a short trial is prudent. Avoid combining peroxide with chlorine bleach or acidic descalers, which risks hazardous reactions and unpredictable surface changes. For households seeking greener cleaning, peroxide’s end products—water and oxygen—are a welcome endnote, making it an effective, low-residue option for regular hygiene in kitchens, bathrooms, and utility rooms.
Comparing Peroxide to Other Whiteners
Traditional chlorine bleach acts rapidly but carries pungent fumes, can corrode metals, and may yellow ageing grout. Hydrogen peroxide whitens more gently, excels on organic stains, and leaves no chlorine smell. Powdered oxygen bleach (sodium percarbonate) releases peroxide when dissolved; it’s excellent for floor-wide mopping, yet a liquid peroxide soak gives better control for targeted grout lines. Steam cleaning dislodges grime with heat and moisture, but without oxidation some stains persist, and condensed minerals can re-deposit.
Abrasive powders scour quickly but risk scratching gloss tiles and polishing grout lower than the tile edge. For sensitive finishes, a peroxide soak paired with a soft brush balances safety and bite. Cost-wise, supermarket 3% bottles and salon “developer” creams are inexpensive and widely available. The deciding factors are odour tolerance, surface delicacy, and time: if you can spare a half-hour dwell, peroxide offers a strong clean with minimal downside.
The humble hydrogen-peroxide soak harnesses physics and chemistry to restore brightness: microbubbles lift, oxidation fades, and water carries debris away. On everyday stains—from tea rings to bathroom mildew—the technique is tidy, affordable, and kinder to indoor air than heavy-duty bleaches. With a little patience and good contact time, tiles regain their sheen and grout looks newly laid. Because the method relies on dwell time, gentle repetition beats aggressive scrubbing. Will you try a controlled peroxide soak on a test patch this week and see how far oxygen bubbles can take your tiles back towards showroom-white?
Did you like it?4.5/5 (27)