In a nutshell
- 🧪 Hydrogen peroxide’s bubbling oxidation attacks microbes by generating free radicals that disrupt cell membranes and proteins, leaving only water and oxygen behind.
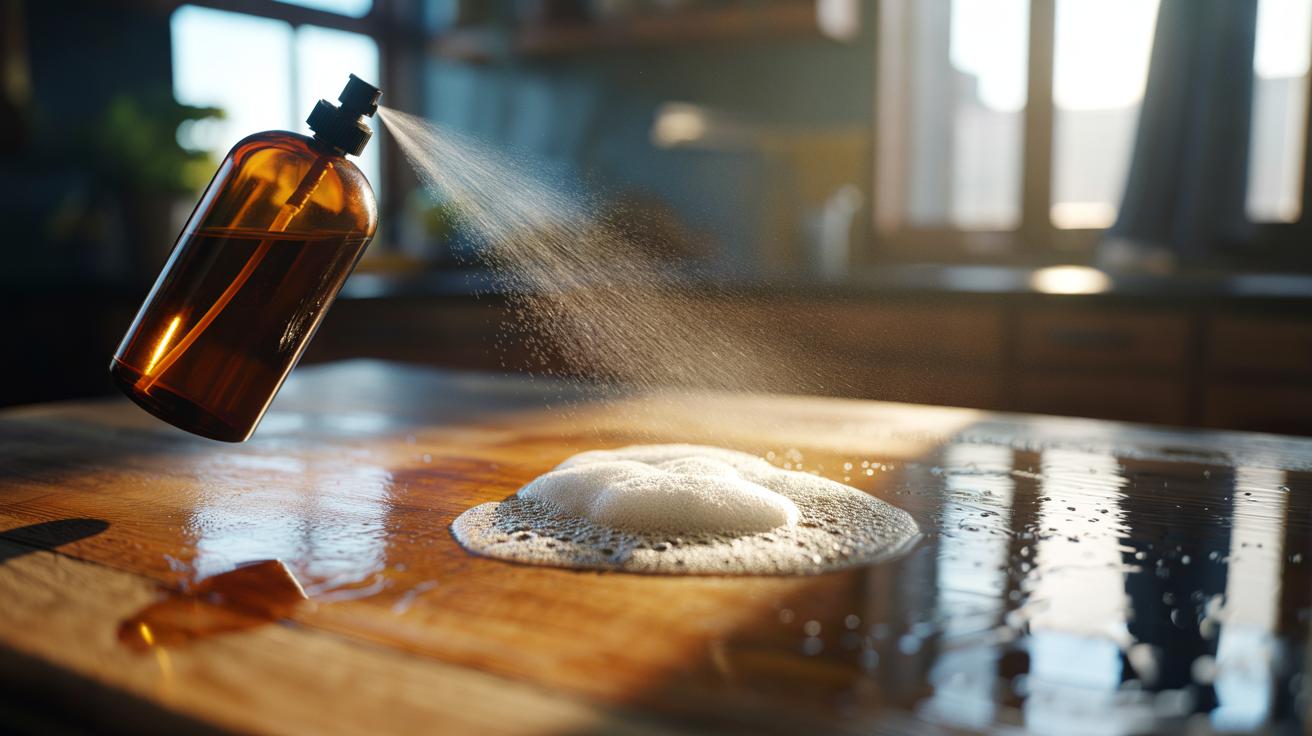
- ✨ Visible fizz signals an active reaction, but efficacy depends on full wet coverage and keeping the surface wet for the correct contact time.
- ⏱️ Recommended protocol: clean first, then spray 3% H2O2; hold wet contact for 3–5 minutes on plastic and 5–10 minutes on hardwood, rinse, and air-dry upright.
- 🪵 Material matters: plastic is easy to saturate but deep gouges warrant replacement; wood needs longer contact and re-oiling to maintain moisture resistance and hygiene.
- ⚠️ Safety essentials: store in an opaque or amber bottle, don’t mix with bleach or vinegar (risk of chlorine or peracetic acid), and avoid metal sprayers to prevent degradation.
Few household tricks feel as satisfyingly visible as a hydrogen peroxide spray fizzing on a well-used chopping board. The tiny bubbles look theatrical, but they’re doing serious work: breaking down grime and knocking out microbes that hitch a ride from raw meat, unwashed veg, and sticky sauces. Because hydrogen peroxide (H2O2) breaks back into water and oxygen, the idea of a residue-free disinfectant appeals to cooks who crave both cleanliness and simplicity. Used correctly, this bubbling oxidation offers fast, effective protection against common foodborne bacteria. Here’s how the chemistry works, the steps that deliver reliable results, and the safety notes every home cook should know before they spray.
What Makes Hydrogen Peroxide Bubble and Disinfect Cutting Boards
Hydrogen peroxide is a reactive oxidiser. When it meets organic material—food juices, microscopic biofilms, or microbial enzymes like catalase—it breaks apart into water and oxygen. Those signature bubbles are the oxygen escaping. Bubbles are a sign the reaction is active, not a guarantee that every pathogen has been eliminated. The real punch comes from oxidation: peroxide-generated free radicals attack cell membranes, denature proteins, and disrupt the metabolic machinery of bacteria such as E. coli and Salmonella.
This process does double duty on a board’s surface. The fizz helps lift residues from knife scores, while the oxidative hit challenges microbes clinging within fine grooves. On porous timber, the reaction can wick a little deeper than ordinary soap, nudging hidden grime out. Because peroxide decomposes to benign by-products, it suits food-contact surfaces where chemical taint and lingering odour are unwelcome.
Practical Protocol: From Cleaning to Contact Time
For consistent results, treat peroxide as a disinfecting step after cleaning. First, scrape away scraps, wash the board with hot, soapy water, and rinse. Pat dry, then spray generously with 3% hydrogen peroxide until the surface glistens. The key to efficacy is keeping the board visibly wet for the full contact time. Aim for 3–5 minutes on plastic and 5–10 minutes on hardwoods to account for porosity. Rinse with potable water and stand the board on its edge to air-dry. Finish wooden boards with a light coat of food-safe mineral oil once fully dry to maintain moisture resistance.
| Hydrogen Peroxide Concentration | Board Type | Contact Time | Likely Targets | Notes |
|---|---|---|---|---|
| 3% (household) | Plastic | 3–5 minutes | E. coli, Salmonella, Listeria | Rinse and air-dry upright |
| 3% (household) | Hardwood | 5–10 minutes | Vegetative bacteria, some viruses | Do not soak; re-oil after drying |
| >3% | Any | Shorter | Broader spectrum | Not advised for routine kitchen use |
If odours persist or the board is heavily stained, repeat once. Consistency, not brute force, delivers the safest surface for slicing.
Wood vs Plastic: Getting the Method Right
Plastic boards are non-porous, easy to wet thoroughly, and simple to rinse, making them ideal for raw meats. Peroxide’s fizz loosens film within knife marks, and its lack of lingering scent beats bleach for everyday use. For badly scarred plastic, peroxide helps, but deep gouges still harbour microbes—retire the board when cuts can’t be properly cleaned. Test on coloured plastics, as hydrogen peroxide may lighten dyes over time.
Hardwood boards are prized for their gentle treatment of knives and natural capillarity, which pulls moisture away from the surface. That same porosity demands longer wet contact. Spray until wet, wait the full time, then rinse and dry on edge in a well-ventilated spot. Avoid soaking—swelling and warping follow. Recondition with food-grade mineral oil once dry to maintain a tight, water-shedding surface that resists infiltration. End-grain boards, with open pores, benefit noticeably from the meticulous spray-wait-rinse routine.
Safety, Storage, and What Not to Mix
Household 3% hydrogen peroxide is widely available and, used sensibly, kitchen-friendly. Wear gloves if you have sensitive skin and keep it away from eyes. Never decant into an unlabelled container. Light and heat speed decomposition, so store in its original opaque bottle or an amber spray bottle with a tight, chemical-resistant nozzle. Do not keep in metal sprayers; corrosion deactivates the solution. A faint hiss when opening and mild fizz on contact indicate freshness.
Never mix hydrogen peroxide with bleach or vinegar in the same bottle. Combined with bleach, it risks releasing chlorine; with vinegar, it can form peracetic acid, a strong irritant. If you like pairing vinegar and peroxide, use them separately with a rinse in between. After disinfecting, rinse boards with clean water to remove loosened residues and allow odour-free drying. Keep out of reach of children and away from fabrics you care about—peroxide can lighten dyes.
For home cooks seeking a fast, low-odour route to safer prep, a 3% hydrogen peroxide spray is a savvy ally. The fizzing shows chemistry in motion; the oxidation does the heavy lifting against everyday kitchen microbes while leaving only water and oxygen behind. Its success hinges on clean-first discipline, full wet coverage, and patient contact times, especially on wood. Used with sensible storage and zero mixing mishaps, it’s a formidable, eco-minded disinfectant for boards. Where might a bubbling peroxide spray fit into your own kitchen routine—daily quick clean, post-meat safeguard, or part of a weekly deep sanitise?
Did you like it?4.5/5 (23)