In a nutshell
- 🫒 Soft oils like olive oil reduce scratch visibility by wicking into micro-abrasions and matching wood’s refractive index, improving optics without structural repair.
- 🧽 Follow a simple olive-oil buff: clean with diluted white vinegar, apply a 2:1 oil-to-vinegar mix sparingly along the grain, then buff dry; finish with beeswax on waxed pieces.
- 🛠️ Choose the right product: olive (non-drying), walnut (semi-drying), mineral (inert), or boiled linseed (fast-drying); identify the existing finish (shellac, lacquer, polyurethane) before treatment.
- 🧯 Know the limits: oils won’t fix deep gouges or film damage—use filler sticks or compatible repair kits first, then oil to unify sheen; less is more to avoid residue or rancidity.
- 🛡️ Prevent future scuffs with felt pads, coasters, weekly dusting, humidity at 40–55%, UV control, and by avoiding silicone polishes; plan periodic light maintenance.
Britain’s love affair with well-made timber furniture has a new ally: the kitchen cupboard. A humble dab of olive oil can coax tired tabletops and scuffed skirting boards back to life, softening the look of scratches and restoring a mellow gleam. The trick is less about miracle cures and more about understanding how soft oils move through wood pores, refract light, and replenish faded finishes. Used sparingly and buffed thoroughly, a light oil can disguise minor abrasions without leaving a sticky residue. Here is a practical guide—rooted in material science and workshop habit—that shows how household oils revive wooden surfaces while respecting the character that age brings.
Why Soft Oils Soothe Scratches in Wood
On finished timber, a scratch often looks worse than it is because tiny torn fibres and exposed pores scatter light. Soft oils such as olive oil have a refractive index closer to wood resins than air; they wick into micro-abrasions and reduce that scatter, so the eye reads a smoother, deeper tone. It’s an optical lift, not a structural repair—perfect for superficial scuffs on cabinets, chairs, and oiled worktops. The oil also adds a whisper of sheen that makes surfaces look freshly tended, not artificially glossy.
Different oils behave differently. Olive oil is a non-drying oil: it conditions and enriches colour but does not harden into a film. Walnut oil is semi-drying and can gently polymerise, adding a touch more resilience over time. Mineral oil is inert and food-safe, ideal for butcher blocks but quick to wash out. On sealed finishes—shellac, lacquer, or modern polyurethane—oils sit on top, softening the look of fine scratches without penetrating the wood beneath. Always match the oil to the finish and the job.
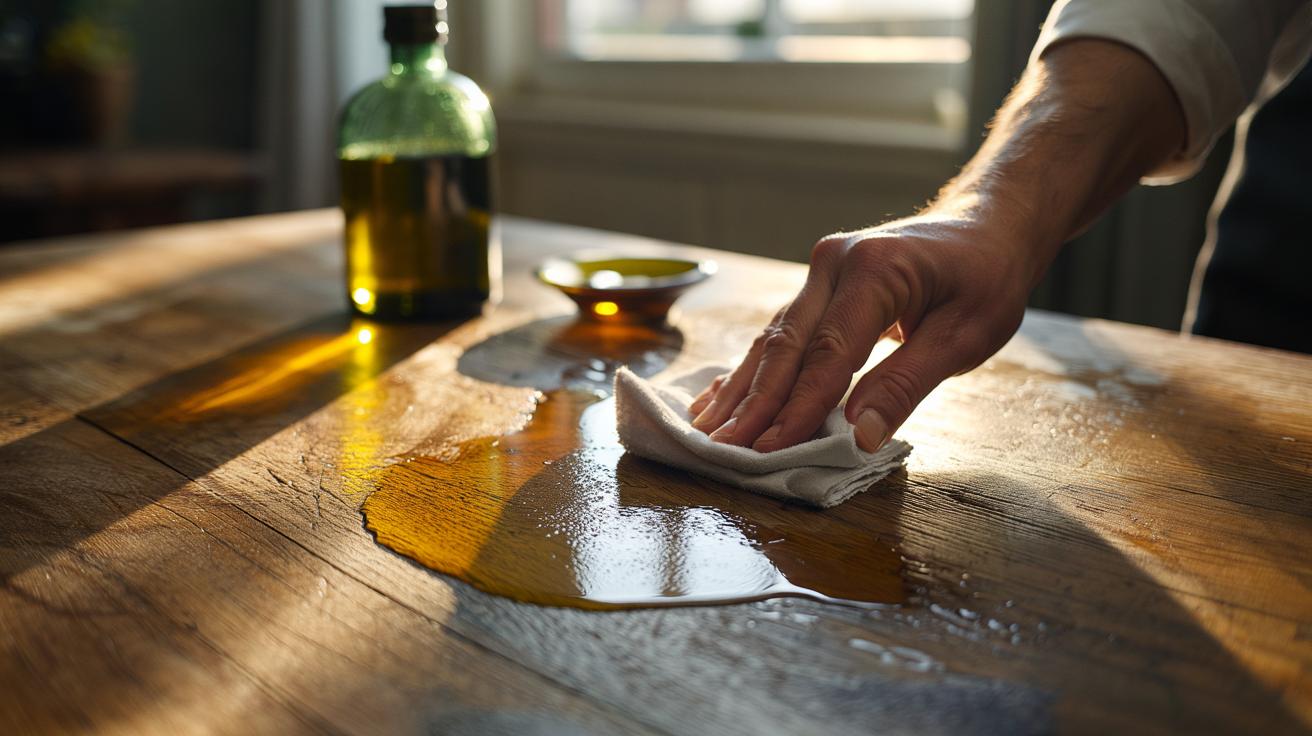
Step-By-Step: The Olive-Oil Buff
Begin with cleanliness. Dust with a dry microfibre cloth, then lightly wipe with a cloth dampened in diluted white vinegar (about 1:10 with water) to cut grease; dry immediately. Always test in an inconspicuous corner first. For the polish, mix 2 parts olive oil with 1 part vinegar or lemon juice in a small jar and shake. The acid brightens the surface while the oil provides slip and warmth of tone.
Apply a few drops to a lint-free cloth—never directly to the wood. Work in small sections, massaging gently along the grain. For hairline scratches, use light circular passes to wet the edges, then finish with long strokes with the grain. Wait two minutes, then buff firmly with a clean, dry cloth until the surface feels dry and satiny. Less is more: the goal is a whisper-thin conditioning layer.
For waxed furniture, you can amplify the result by finishing with a thin layer of beeswax polish after the oil buff; allow to haze, then buff again. Avoid oil on heavy silica-filled timbers or floors, which can become slippery. On deep gouges, use a wax filler stick or a colour-matched hardwax before the oil buff—oil alone will not level a trench, only soften its contrast.
Choosing the Right Oil for the Job
Not every surface wants olive oil. Kitchen worktops, heirloom oak, and mid-century veneers each benefit from oils with different drying characteristics, aroma, and maintenance profiles. The right choice balances appearance, durability, and compatibility with the existing finish. Use the quick reference below to steer your selection and avoid common pitfalls like residue, rancidity, or unwanted shine.
| Oil | Polymerises? | Best For | Cautions |
|---|---|---|---|
| Olive oil | No (non-drying) | Quick buffs, colour enrichment, decorative furniture | Can go rancid if overapplied; always buff dry |
| Walnut oil | Slow semi-drying | Cutting boards, oiled finishes needing subtle build | Nut allergy context; allow full cure |
| Mineral oil | No (inert) | Food-contact surfaces, butcher blocks | Washes out quickly; frequent reapplication |
| Boiled linseed oil | Yes (fast with dryers) | Reviving old oil finishes, workshop pieces | Use ventilated area; can yellow slightly |
| Beeswax blend | Wax topcoat | Sheen and fingerprint resistance after oiling | May mute open-pore textures; thin coats only |
On tough modern polyurethane, a light oil will mostly improve optics, not mend the film. Where film damage is obvious, use a compatible touch-up—shellac-based sticks for shellac or lacquer, or a polyurethane repair kit—then finish with a gentle oil buff to unify sheen. When in doubt, identify the finish first: a drop of alcohol will mark shellac, lacquer softens with lacquer thinner, polyurethane resists both.
Long-Term Care: Preventing New Scuffs and Shine Loss
Prevention begins underfoot and undercup. Fit felt pads to chair legs, rotate rugs, and insist on coasters to block heat and ring marks. Dust weekly with a dry microfibre cloth; abrasive dust is the sandpaper of daily life. For display pieces, a monthly light olive-oil buff maintains colour; for worktops, use mineral or wallet oil as appropriate, then seal occasionally with beeswax for added slip and resistance. Never pile on thick layers—thin, well-buffed coats give the truest glow.
Wood likes stability. Keep indoor humidity around 40–55% to minimise expansion that can crack films and expose edges to scuffing. Shield prized timber from direct sun with blinds; UV saps finishes and fades dyes, making scratches stand out. Avoid silicone-loaded polishes that promise instant shine; they can contaminate surfaces and complicate future refinishing. For unavoidable high-wear areas, accept patina and plan periodic maintenance: a light degloss, targeted touch-ups, then a careful oil-and-wax refresh to unify the whole.
The olive-oil buff is not a miracle, but it is a satisfying, reversible way to coax back warmth and depth without a weekend of sanding. Used judiciously, soft oils reduce the glare of minor scratches and restore a natural lustre that celebrates the wood beneath the finish. The secret is restraint: clean first, use a few drops, and buff until the surface feels dry and alive. As our homes tilt toward repair over replacement, which piece in your rooms is quietly asking for ten minutes with a cloth, a bottle of oil, and a little patient attention?
Did you like it?4.6/5 (24)