In a nutshell
- 🧪 The chemistry: white vinegar (≈5% acetic acid) dissolves soap scum and limescale by converting minerals into soluble salts; works brilliantly on glass, glazed tile, and chrome.
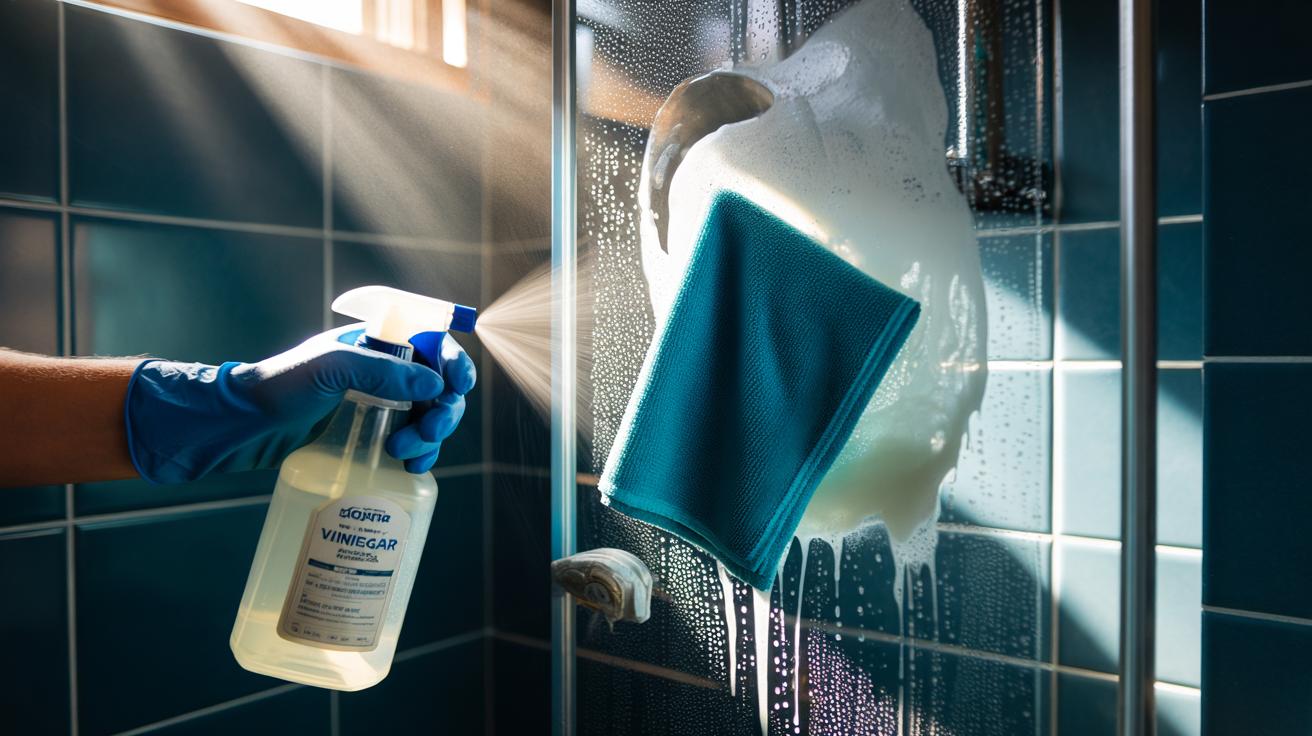
- 🚿 Method that works: Use 1:1 vinegar-water or full-strength for heavy scale, apply warm, allow 5–10 minutes of dwell time, wipe with microfiber, rinse, then squeegee and dry for a streak-free finish.
- ⚠️ Surface and safety rules: Never mix vinegar with bleach or hydrogen peroxide; avoid natural stone (use pH‑neutral cleaners), limit contact on unsealed cement grout, and test discreetly; gloves and ventilation advised.
- 🧼 Stubborn build-up tips: Keep areas wet with vinegar‑soaked towels, add a drop of dish soap to improve wetting, and use a non-scratch pad if needed—skip baking soda in the same step as it neutralises the acid.
- ♻️ Practical benefits: A low-cost, low-odour, eco-friendly routine that cuts product clutter; in hard-water homes, pair with a quick daily dry-down to prevent new deposits.
Cloudy glass, chalky tiles, and a dull sheen on chrome are the signatures of stubborn soap scum and mineral deposits. The simplest fix often sits in the pantry: white vinegar, powered by its mild acetic acid content. A quick wipe and short soak dissolve the crust that hard water leaves behind, freeing surfaces to shine without harsh fumes or scratching abrasives. Used correctly, vinegar breaks down scale fast while staying gentle on most shower materials. This guide explains the chemistry that makes it work, the exact steps for a streak-free finish, and the surfaces where caution matters most.
Why White Vinegar Works on Soap Scum
The cloudy film in showers forms when fatty acids in soap react with hard-water ions, creating insoluble salts that cling to surfaces. Add in limescale from calcium carbonate and you get that stubborn haze. White vinegar, typically 5% acetic acid, dissolves these mineral deposits by converting them into water-soluble acetates and carbon dioxide, effectively ungluing the film. With a pH near 2.4, vinegar is acidic enough to react with scale yet mild compared with stronger acids, making it a practical household choice for bathrooms.
It’s important to distinguish residues: vinegar excels on mineral-based scum and light soap film, but heavy body oils or silicone-based grime may need a touch of detergent. On glass, glazed ceramic tile, and many chrome finishes, a vinegar wipe restores clarity without abrasion. Exercise caution on natural stone. Because vinegar is mildly acidic, it targets scale without scratching glass, making it ideal for routine shower maintenance.
Step-by-Step: The White Vinegar Wipe Method
Assemble a spray bottle, microfiber cloth, squeegee, and white vinegar. For general cleaning, use a 1:1 mix of vinegar and warm water; for heavy scale, use full-strength vinegar. Lightly warm the vinegar (do not boil) to boost reaction speed, then spray the shower walls, door, and fixtures until evenly damp. Allow a dwell time of 5–10 minutes so the acid can dissolve mineral bonds. For vertical surfaces or stubborn patches, press on a vinegar-soaked paper towel to keep the area wet. Heat and time do the heavy lifting—rushing the step reduces results.
Wipe with a microfiber cloth using small, overlapping strokes, focusing on corners, door edges, and around tap bases where deposits collect. Rinse thoroughly with warm water to flush dissolved scale and any loosened residue, then use a squeegee to pull away water before it dries. Dry taps and glass with a clean towel to prevent new spots. For etched limescale halos, repeat once more or pair the wipe with gentle mechanical help, such as a non-scratch pad, to lift remaining mineral rings.
Surfaces, Safety, and What to Avoid
Vinegar is safe for many shower materials, but respect its acidity. Wear gloves if you have sensitive skin and ventilate small bathrooms. Never combine vinegar with bleach or hydrogen peroxide; the mixtures can release hazardous gases or create peracetic acid. Avoid prolonged contact on natural stone, cement-based grout that is unsealed, and delicate plated finishes. Always test a discreet spot first. After cleaning, rinse thoroughly to remove acid residues and prevent prolonged contact that could dull susceptible surfaces.
| Surface/Material | Vinegar Strength | Dwell Time | Notes |
|---|---|---|---|
| Glass shower doors | Full-strength or 1:1 | 5–10 min | Excellent on haze; squeegee after rinsing. |
| Glazed ceramic/porcelain tile | 1:1 | 5–10 min | Safe for glaze; avoid unsealed cement grout contact. |
| Chrome/stainless fixtures | 1:1 | 3–5 min | Wipe promptly; dry to protect shine. |
| Acrylic or fibreglass | 1:1 | 3–5 min | Test first; use soft cloth only. |
| Natural stone (marble, travertine) | Do not use | — | Acid etches stone; use pH-neutral cleaner. |
| Rubber/silicone seals | 1:1 | 2–3 min | Short contact; rinse to protect elastomers. |
If you need extra cutting power, add a drop of mild dish soap to the spray to reduce surface tension and improve wetting, then rinse well. Skip baking-soda-and-vinegar mixes in the same step; they neutralise each other and blunt the acid’s action. When in doubt, lower strength, shorter contact, and thorough rinsing protect finishes without sacrificing cleaning power.
In a world of expensive bathroom cleaners, the humble bottle of white vinegar remains a standout: low-cost, low-odour, and potent against mineral scale and soap scum. With smart use—warm solution, proper dwell time, and a final squeegee—you can keep showers clear, reduce product clutter, and cut plastic waste. If your home has very hard water, consider pairing this routine with a quick daily dry-down to prevent build-up at the source. What tweak will you try first to make the vinegar wipe even faster in your bathroom: warming the spray, timed soaks, or a new microfiber routine?
Did you like it?4.5/5 (22)